
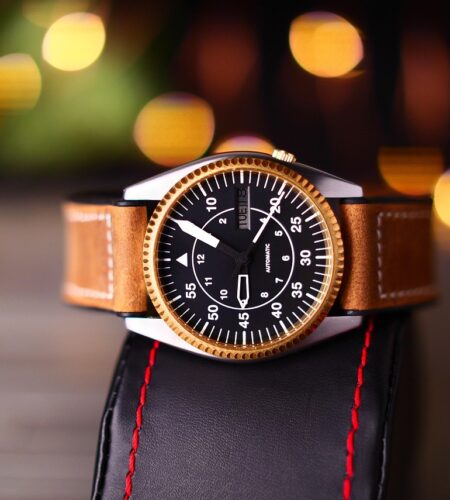
A once-bright dial that now barely glows—panic or plan?
At purchase the lume glowed strongly after a brief charge; a year later it offers only a faint smear in darkness. That feels like a defect—loss of night legibility, diminished resale value and possibly a warranty claim. A short, ordered diagnostic routine—document charging conditions, test in total darkness, photograph results and note timelines—separates normal early fading from material or application faults. Following this sequence preserves repair options and supports maker claims.
- Bright peak typically 30–120 seconds after charge.
- At 12 months, glow should remain visibly for several minutes.
- Near-total darkness after a full charge indicates likely defect; document and report.
Symptom catalog
Match the visible symptom to the likely cause and an immediate action. If the simple charge-and-test sequence from earlier has already been run, compare findings with the uneven lume vs fading issues.
Symptom → Likely diagnosis → What to try first
- Evenly dim across entire dial → General photobleaching or age → Charge under bright light 10–30 minutes, then check in a dark room.
- Bright spots with dark areas → Poorly applied lume or partial degradation → Charge briefly, inspect under magnification for missing fill; document for relume.
- Very bright immediately, then fades fast → Thin application or low-intensity compound → Repeat a longer charge (30+ minutes); if repeatable, consider relume.
- Hands dim but markers OK → Different compound/thickness or worn hands → Charge both; compare glow duration; likely hand refinishing.
- No glow after light exposure → Missing or defective lume batch → Charge under strong light; if still dark, contact seller or service for inspection.
- Color shift (green → blue) or odd tint → Chemical change or contamination → Note color and test again; photograph for service reference.
- Tiny bright islands or cracking → Moisture ingress or separation → Dry and watch; if condensation seen, seek immediate service for resealing.
- Inconsistent after recent service → Improper application during repair → Return to technician with test notes and photos.
When to escalate: if moisture, physical damage, total blackout after charging, or no improvement after the tests above, arrange professional inspection and possible relume.
How modern lume charges and what to expect in year one
How they charge and fade
Modern watch lume generally falls into two camps. Photoluminescent pigments (for example Super‑LumiNova) store light energy when exposed to a bright source and then re‑emit it; the visible brightness drops quickly after charging, then more slowly over hours. Tritium tubes are sealed glass vials with a radioactive gas that glows continuously; brightness decays very slowly over years because of radioactive decay, not by charging.
Why thickness and pigment grade matter
- Thickness: a thicker paint layer contains more pigment particles and therefore holds more charge; thicker applications noticeably extend visible duration after a charge. Thin, finely traced lume will look bright initially but fall off faster.
- Pigment grade: higher‑grade pigments have larger, purer crystals and hold charge longer; cheaper mixes dim sooner even if applied thickly.
Realistic first‑year behavior
Expect a strong out‑of‑box glow that becomes less punchy after months if the application is thin or low grade. Tritium will remain steady with only marginal first‑year loss. If lume patches flake, are missing, or remain almost dark after a full bright‑light charge, that suggests a defect or poor application and merits repair or relume.

Simple diagnostic checklist
-
Controlled charging
Use the same bright, diffuse light (LED or daylight) and charge for a fixed time (e.g., 2 minutes), keeping distance and orientation constant.
-
Timed photos
Photograph the dial at 0, 10, 30, 60, and 300 seconds with identical camera settings and framing; a tripod helps.
-
Visual inspection
Inspect with a loupe for cracks, flaking, loose particles, bubbles, or condensation; note locations.
-
Uniformity checks
Compare hands, numerals, and markers for consistent brightness and color; rotate the watch to check angles.
-
Repeat and record
Repeat the identical test after 24–48 hours and save timestamps and filenames for technician review.
If moisture, loose particles, or very rapid fade appears, stop and seek professional service; do not open the case.
Avoid high‑power UV lamps or lasers; they can harm seals and movement.
If condensation is seen, stop testing and get service.
Keep records: photos, times. Do not attempt relume or open case.Match symptoms to likely causes and fixes
Symptom → cause → practical fix
- Poor application (thin, patchy, flaking) — Symptoms: uneven glow, visible brush strokes or clumps under loupe. Fix: relume by a competent watchmaker or relumer. Cost: roughly $40–$200 depending on complexity. Tradeoff: original pigment is lost; colour/texture may not match exactly.
- Water ingress — Symptoms: splotches, stains on dial, rust near hands, accelerated fading. Fix: full service (cleaning, new gaskets), possible dial restoration. Cost: $300–$800+. Tradeoff: aggressive dial restoration can remove original paint; conservative service preferred for value.
- UV or chemical damage — Symptoms: yellowing, chalky surface, uneven bleaching. Fix: relume or gentle dial cleaning if early. Cost: low–moderate. Tradeoff: cleaning can change patina; relume sacrifices originality but restores function.
- Tritium tube failure — Symptoms: single marker or hand that goes dark while others still dimly glow; older watches (pre-1998) affected. Fix: tube replacement by a specialist. Cost: variable, often $100+ per tube. Tradeoff: replacing tritium alters original components and provenance.
- Polishing/crystal work removed lume — Symptoms: visible bare metal or flattened markers after recent polishing. Fix: relume or dial rework. Cost: $50–$300. Tradeoff: polishing already changed appearance; relume restores legibility but not original finish.
For all scenarios, document condition with photos, get a written quote, and weigh legibility versus conserving original material.
Photograph the watch before any work.
Seek a watchmaker experienced in conservation.
Prefer reversible, minimally invasive treatments when collector value matters.
Be prepared to pay more to keep original parts and patina.
Accept, claim, or repair
- Accept aging After a 30s strong‑LED charge, if 5‑minute brightness ≥50% of peak and 30‑minute ≥30%, uniform and no flakes — normal aging.
- File warranty claim If 5‑minute <30% of peak, 30‑minute <10%, or any delamination/patchiness — document and contact maker for a warranty claim.
- Take to a pro If consistently dim but uniform and out of warranty, or restoration to original brightness is desired — arrange professional relume.
- Document evidence Photograph peak and timed fades (0, 5, 30 min) using the same light source; include serial, purchase proof, and a white card for exposure reference.
Lock exposure on phone; note LED source and charge time.
Take stills at 0, 5, 30 minutes and a short continuous video.
Include serial/purchase receipt and a white card in frame for consistent exposure.
Safety and service paths for different luminous materials
Radium is hazardous; tritium and modern pigments are much lower risk.
Radium emits stronger radiation; tritium’s beta emissions have limited penetration.
Documented conservation can preserve value; crude relumes often reduce it.
Collectors prioritize originality and provenance.
Radium, tritium and modern pigments require different service paths.
Disposal, licensing and techniques vary by material.
If a dial is radium‑era, powdering, or high‑value, consult a specialist. Refer to handling vintage radium lume safely. Use licensed or radioactive‑experienced shops for radium; regulated technicians for tritium; conservation restorers for modern pigments.
Quick, ordered steps to follow
-
Repeat the test and photograph
Charge the watch under the same light for 10 minutes, then take time‑stamped photos in low light at 0, 5 and 30 minutes using identical camera settings. Record room, light source and camera details.
-
Record and compare
Compare the new photos to earlier images or the acceptance threshold, and log exposure times and observed brightness differences.
-
Inspect for physical issues
Check for moisture, flaking, uneven application, or crystal/bezel faults; take close‑up shots of any anomalies.
-
Contact seller or watchmaker
Send a concise service inquiry with model, serial, purchase date, symptom summary, tests performed and attached photos; request diagnosis and an estimate.
-
Decide repair versus replacement
Ask about lume grade, color match and cost for repair; if considering a new watch, review watches with long‑lasting glow recommendations.
Subject: Service inquiry — [Brand Model, serial]
Brief: One‑sentence symptom summary (when noticed, how it fails).
Details
Purchase date: Model / serial: Tests performed (charge method, timings, camera used): Photos attached (filenames, timestamps): Desired outcome: repair / estimate / replacementAttach time‑stamped photos and mention warranty or prior correspondence. Keep the message factual and concise.
Final guidance
- Keep dated photos and charge-curve records to support any warranty claim.
- Use documented underperformance (numeric thresholds) before requesting repair or replacement.
- Stop use and seek professional service immediately for flaking, visible moisture, staining, or corrosion.
Modest brightness loss in the first year is often normal due to pigment thickness and application variability. Dated photos and repeated charge-curve records are the best evidence when pursuing a warranty claim.
Serious symptoms — flaking, detachment, visible moisture, staining, or corrosion of metal — point to contamination or seal failure and deserve immediate professional attention. Present the stepwise evidence collected earlier to a qualified watchmaker for diagnosis and repair.
My 3-year-old field watch still glows decently after charging, but the triangle marker is almost gone. Article mapped this to ‘partial flaking’ and suggested targeted re-lume — anyone had success with re-luming just one marker?
Worried about mismatch and cost.
Yes, spot re-lumes are possible. Ask the service to use the same pigment family and to artificially age the touch-up slightly if you want a closer match. Costs are usually lower than full-dial jobs, but expect variability depending on how much patina the rest of the markers have.
I had what I thought was early fade and did the photo-fade curve with my phone. Turns out the phone camera exposure messed up my comparisons — learned to use a manual exposure app after reading the article’s photograph tips.
Also, curious if anyone’s had to involve manufacturer warranty for lume — mine argued ‘acceptable variation’ but my photos showed it below the numeric threshold in the guide.
Long story: I bought a vintage chrono, the lume looked patchy. Article convinced me to get a conservator because of potential radium. They tested it and confirmed no active radium but discovered the hands were relumed poorly in the past, causing uneven charging.
Lesson: when you see flaking, moisture, or odd corrosion patterns, don’t DIY. The safety and service paths section is worth repeating — consult specialists for anything suspect.
Good article — the photo-evidence thresholds section really helped me decide whether to claim a warranty on my vintage diver. I did the charge-photograph-fade curve method and my lume dropped to ~30% after 6 hours, which the guide says is borderline.
One question: for pigment thickness issues, does a partial re-lume always change the dial patina enough to be obvious? I want to keep originality if possible.
Short answer: it depends on the material and the dial finish. If the original lume is thin and already close to the dial surface, a careful relume by a specialist using matching pigment can be nearly invisible under normal viewing.
If the lume has aged to a distinct creamy or patinated color, any fresh lume — even color-matched — can look ‘new’ next to aged markers. For valuable or collectible pieces we recommend documenting current photos, asking for a conservator-style match, and getting a sample on an inconspicuous area first.
Minor gripe: the ‘what to expect in year one’ section was great, but I wish there were more specifics on pigment grades and real-life numbers. The line “realistic first-year glow expectations” is helpful but a little vague.
That said, the symptom-to-diagnosis quick pairs are super useful when you’re troubleshooting on the bench.
Thanks David — fair point. To expand briefly: Super-LumiNova grades typically show strong initial luminance (100% baseline on charge) but thin applications can fall to ~40–60% in 6–12 hours. Higher-grade pigments (BGW9, X1) have better persistence; thickness and binder quality matter more than nominal grade for first-year fade. We’ll consider adding a small table with numeric examples in a follow-up.