Why a Careful Clean Matters for Vintage Watch Cases
A vintage watch case can hold decades of dirt, oils, and tiny corrosion—and a careless clean can erase value. Proper cleaning reveals detail while protecting fragile finishes. This guide focuses on the case exterior and removable bracelets, not the movement.
Expect risks: lost water resistance, worn plating, and movement exposure if you skip precautions. Learn when to do it yourself or when to seek a professional watchmaker. Balance is restoration versus preservation—choose methods that respect the watch’s age and value.


Assessing the Case: Condition, Materials, and Conservation Goals
Identify materials and finishes
Before a single drop of water touches the case, determine what you’re dealing with: stainless steel (e.g., vintage Rolex Oyster), solid gold (14k/18k), gold-plated or gold-filled (common on dress watches), chrome-plated, brass, or lacquer/painted finishes. Plating can be paper-thin—aggressive polishing removes it; lacquer will lift or crack with solvents. Note hallmark stamps, inside caseback markings, or a magnet test for steel.
Inspect for structural and mechanical issues
Look closely for loose pushers, a brittle crown tube, dents, deep scratches, heavy corrosion, pitted metal, or signs of previous repair (solder marks, mismatched screws). A brittle crown tube or loosened stem risks exposing the movement during cleaning. If corrosion has eaten metal or you see active rust flaking, stop and consult a watchmaker.
Document the case
Take clear photos from at least five angles: front, back, both sides, and a macro close-up of problem areas under good light. Timestamp or label images—this record helps you and any pro assess change or damage later.
Decide your conservation goal
Choose gentle dirt removal to reveal original character, or a more aggressive cosmetic restoration to remove tarnish and light scratches. Real-world example: a 1960s gold-plated dress watch often benefits from preservation (avoid stripping plating), while a worn stainless sports case can tolerate light polishing. Remember: more aggressive cleaning increases risk to finish and water resistance—your choice dictates tools and techniques in the next section.
Gathering Tools and Safe Cleaning Supplies
Workspace basics
Set up a dedicated, well-lit surface (daylight lamp if possible) with soft pads to rest the case on and good magnification at hand. A clutter-free zone reduces the chance of losing tiny screws or introducing contaminants—watchmakers often work over a tray to catch parts.
Essential tools and supplies
Assemble non-abrasive, watch-safe tools so you can work confidently:
Ultrasonic cleaner note
If you own an ultrasonic bath, use it cautiously: reserve a separate solution/bath for metal parts only. Ultrasonics can force water past seals, damage delicate gaskets, and rapidly strip thin plating or fragile lacquers.
What to avoid and why
Avoid abrasive powders, household bleach, strong acids, concentrated ammonia, and steel wool. These attack plating and lacquer—bleach and acids chemically eat finishes, abrasives grind away plating, and ammonia can cloud or lift lacquered surfaces. When in doubt, test in an inconspicuous area or skip aggressive chemicals.
Next, we’ll prep the watch itself: removing straps, protecting the movement, and safety steps before any cleaning begins.
Preparing the Watch: Removing Straps, Protecting the Movement, and Safety Steps
Removing straps and organizing small parts
Use a proper spring-bar tool (Bergeon-style tips if you have them) to depress spring bars gently and free straps or bracelets. Work over a shallow tray or magnetic parts mat so tiny bars and screws won’t roll away. Label removed parts with small masking-tape flags (1, 2, 3) or place them in an ice-cube tray so reassembly is obvious—many hobbyists photograph each step for reference.
Decide whether to open the case
If you’re inexperienced, do NOT open the caseback. Opening risks dust, moisture, and damaged gaskets; instead, protect the crown and crystal and leave the movement sealed. For a deep clean under bezels or heavy grime inside the case, have a watchmaker remove the movement or learn to do so only after training.
Temporary protections that work
Workspace, gloves, and marking for reassembly
Set up a bright, clutter-free table with a soft pad and a 10x loupe. Wear nitrile gloves to keep oils off metal and prevent fingerprints; an anti-static wrist strap is optional for electronic/quartz movements. Mark parts and photograph orientations—those two precautions save hours and avoid costly mistakes.
Step-by-Step Cleaning Methods by Case Material
Quick universal sequence
Follow this order for any metal: dilute a mild soap bath (a few drops of dish soap like Dawn in 250–500 ml distilled water), gentle agitation with a soft-bristled toothbrush or swab, rinse with distilled water, pat dry with lint-free cloth, and finish with a light buff using a jeweler’s cloth if appropriate.
Stainless steel

Solid gold
Use only mild soap and a soft microfiber or cotton cloth. No abrasives or polishing compounds—gold is soft and volume loss is permanent. Wipe, rinse, dry, and air-dry in a warm spot if needed.
Gold-plated / gold-filled
Be conservative: remove grime with a dampened microfiber or very gentle cotton swabs. Never use aggressive polishing or chelating agents—excessive rubbing removes the plating. If corrosion beneath plating appears, consult a pro.
Chrome / nickel plating
Mild soap and careful brushing around edges; avoid acidic cleaners (vinegar, citric) which eat plating. Rinse and dry thoroughly to prevent under-plating corrosion.
Brass and unfinished alloys
Start with mild soap. For tarnish, test in an inconspicuous spot before using a tiny paste of baking soda + water or a mild chelating cleaner (EDTA-based). Rinse completely and neutralize residues.
Tight crevices, hallmarks, pushers, bezels
Use a soft wooden toothpick, pegwood, or a damp cotton-tipped swab to lift grime. For integrated pushers and rotating bezels, work gently—do small motions and protect seals with tape if the movement is still installed. Small ultrasonic cleaners are useful for bracelets only, not for full cases with movements.
Addressing Corrosion, Rust, and Stubborn Grime
Start with gentle mechanical removal
Begin each problem area with non-metallic tools: wooden toothpicks, pegwood, and a soft toothbrush or camel-hair brush. Work slowly, lifting flakes rather than scrubbing; mechanical removal minimizes chemical exposure and avoids surprise finish loss. A quick real-world check: on an old steel case I rescued, a few minutes of pegwood around the crown removed most grit without touching the finish.
Localized steel rust: baking soda poultice
Make a thick paste of baking soda + a few drops of distilled water. Apply with a cotton swab or wooden stick, press gently into the rust spot, wait 20–60 seconds, then wipe away and rinse with distilled water. Always test in an inconspicuous spot first—some vintage finishes can dull with even mild abrasives.

Cautious chemical options
If rust persists, consider stainless-specific removers (Evapo‑Rust, WD‑40 Specialist Rust Remover) in tiny, controlled amounts. Apply with a cotton swab, keep contact time brief, and inspect under a loupe or microscope for finish change. Never soak the whole case; protect crowns, crystal edges, and any remaining seals with tape.
Verdigris and green deposits on brass
For verdigris near crowns, briefly swab with a diluted citric-acid solution (few drops citric in 20 ml water) then neutralize immediately with a baking-soda rinse and copious distilled water. Verdigris can carry salts that continue to corrode—complete neutralization is essential.
When to stop and consult a pro
If corrosion has penetrated seams, screw threads, or you detect pitting that weakens structure, cease DIY work. Structural corrosion often requires re-threading, soldering, or case fabrication best handled by a watchmaker.
Quick safety checklist
Polishing, Scratch Management, and When to Preserve Patina
Decide whether to polish
Polishing changes a case permanently. Many collectors prize original patina or gilt wear; removing it can strip character and thin plated layers. Ask: is the case historically important, desirable as-is, or thinly plated? If yes, stop—light cleaning only.
Gentle-to-strong polishing workflow
Managing deeper scratches (use extreme care)
Blending small touch‑ups
Criteria for preserving patina — when minimal cleaning is best
Safety reminders
Polishing removes metal, can alter geometry, and may compromise water resistance and crown seating—proceed slowly and stop if fit or alignment changes.
Reassembly, Post-Cleaning Care, and Ongoing Maintenance
Drying and final checks
Before touching anything else, ensure every part—case, caseback threads, bracelet links, spring bars—is completely dry and free of cleaning residue. A quick pass with a lint-free cloth and 10–20 minutes in a warm, dry spot (or a low‑heat hairdryer at arm’s length) prevents trapped moisture. A small jeweler’s blower is handy for tight crevices.
Replacing gaskets and water resistance
If you opened the case, replace gaskets with OEM or quality aftermarket parts (sources: CousinsUK, Otto Frei). Lightly lubricate rubber seals with silicone grease (e.g., Dow Corning 111) for proper seating. Remember: home reassembly does not restore factory water resistance—have a watchmaker pressure-test the watch (using common bench testers like Witschi or Bergeon machines) if you plan to expose it to water.
Reassembly and function checks
Reattach straps/bracelets and secure spring bars (Bergeon 6767/6768 tools are reliable). Check crown, pushers, and caseback engagement for smooth operation and proper alignment. Wind and set the watch, then monitor crown sealing and pusher return.
Simple maintenance schedule
Storage tips
Store in a temperature-stable, low-humidity place, use silica gel packets (Dry & Dry) and humidity indicator cards, and keep watches in separate soft pouches or a padded box (e.g., Wolf watch case).
When to call a pro
Seek professional restoration for plated-surface damage, active rust, case deformation, missing provenance, or ANY water-resistance restoration. Routine cleaning and light touch‑ups are fine at home, but serious repairs belong to a qualified watchmaker.
Now move on to finishing touches and long-term conservation in the Conclusion section.
Finish and Keep It Conserved
Cleaning a vintage watch case at home can restore appearance and slow deterioration when done methodically and conservatively. Prioritize gentle methods, protect the movement, and resist over‑polishing; preserving historical character is often more valuable than cosmetic perfection.
If you encounter severe corrosion, water‑resistance concerns, or uncertainty about opening the case, consult a professional watchmaker. Keep records of treatments and perform gentle maintenance periodically to enjoy the piece while safeguarding its value. Enjoy caring for it.
Loved the conservation-first tone. One practical Q: any advice on reassembly order? I always get the spring bars confused and end up with mismatched straps. The article’s ‘Reassembly’ section was good but short on examples.
Also, the 155-piece kit came with a magnifier which made reassembly so much easier — highly recommend for anyone doing this at home.
Good point — reassembly order can vary by model. A photo before disassembly is the simplest safeguard. We’ll look to expand the reassembly examples in a future update.
Labeling is clutch. I also separate spring bars by length on a tray.
If you have a friend with steady hands, bribe them with coffee to help for the tricky bits 😂
Photos saved me multiple times. Also label small baggies with parts — I use sticky notes.
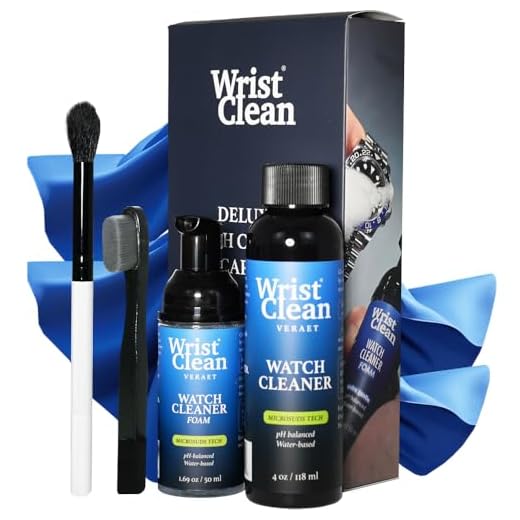
I appreciated the part about using a blower and soft brushes before any liquids. I have a small vintage watch that’s been sitting for decades — resisted the urge to dunk it. Instead I used Blue Rubber Blower + soft brush + Microsuds on a cotton swab. Worked wonders, and the patina stayed.
Also: the SEVENWELL Large Jewelry Polishing Cloths lasted a long time for me — they’re big enough to fold and still get a fresh surface.
Nice practical workflow, Nadia. The blow-first approach is exactly what we wanted readers to take away.
I didn’t open the movement — just cleaned the case externally. For seals, I’d take it to a pro for pressure testing if you plan to wear it.
How do you handle crown seals after sitting so long? I worry about brittle gaskets.
Correct — if seals are a concern, better to have a watchmaker check and replace gaskets as needed.
Not a watch person normally, but I cleaned a cheap vintage alarm watch for a thrift find. Used a cheap polishing cloth and the blower — felt like a tiny restoration project. The article made it approachable.
Also, FYI: Microsuds tech smelled a bit so I did it outside. Better safe than sorry!
Thrift finds are the best practice pieces. You’ll learn a lot without risking a family heirloom 😄
Love that — small restorations are satisfying. Good tip to work outside with strong-smelling cleaners.
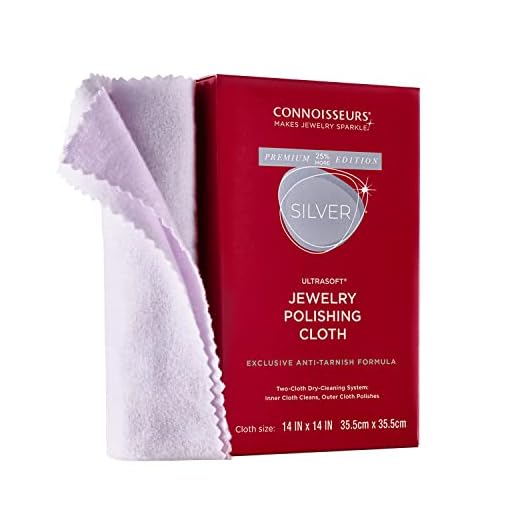
Funny, I tried the Connoisseurs Premium Extra-Large Silver Polishing Cloth on a gold watch (don’t ask) and it didn’t destroy it, but I’m not convinced it did much either. Maybe cloths vary by brand.
Also, lol at ‘protecting the movement’ — I protected nothing and learned my lesson. Now I’m paranoid about dust under the crystal 😬
I ended up taking it to a pro who sucked the dust out with a little vacuum. Magic! 😅
Dust under the crystal is the worst. If it’s just dust, sometimes a blower from the outside can shift it, but open carefully if you have doubts.
Not all cloths are created equal — the Connoisseurs cloth is formulated for silver so it’s not specialized for gold finishes. Good fun anecdote though.
Loved the detailed checklist for preparing the watch (removing straps, protecting the movement). One thing I add: take a photo of the case orientation before disassembly — saved me hours during reassembly. Also, the Deluxe Watch Cleaning Kit with Microsuds Tech is great for shallow grime.
Side note: the Rust-Oleum Trigger Spray Gel Rust Dissolver is surprisingly effective for tiny rust spots but be very careful with plated parts.
Do you dilute the Microsuds? I wasn’t sure how concentrated it is.
Ah yes photos are lifesavers. Also, remember to tape over the dial if you’re cleaning near the case back — learned that the hard way.
I use Microsuds full-strength for case cleaning on stainless but rinse quickly. For gold-plated, I dilute.
Thanks for the tip about photographing orientation — such a simple step but so helpful. And good warning on the rust dissolver; test on a hidden area first.
Thanks for the corrosion section — super useful. I used the Rust-Oleum gel on a steel bracelet link (detached) and it cleaned up pitted areas pretty well. PSA: wear gloves, that stuff is stinky and potent.
Also: the 155-Piece Professional Watch Repair and Link Removal Kit has a tiny hammer that saved me when a stubborn pin wouldn’t budge.
Agree on the kit — it’s surprisingly handy for basic bracelet work. The pin punches are a life-saver.
Which rust gel did you use exactly? There are so many products and I wasn’t sure if they damage brushed finishes.
Appreciate the safety reminder, Lucy — gloves and eye protection are a must with rust dissolvers.
Nice write-up. Had to laugh at the ‘protect the movement’ bit — I once forgot to remove the stem and nearly bent it while cleaning the case. Rookie move.
Also pro tip: use a Pro-Size Jewelry Polishing Cloth for last-pass shine; it doesn’t add abrasive residue like some pastes do.
The polishing cloths are underrated. I keep a few in a Ziploc to avoid contamination.
Ouch! Bending a stem is a costly mistake. Good reminder to always check the crown position and protect the movement.
Appreciate the product list — I ordered the Blue Rubber blower and a few polishing cloths after reading this. One question: are the SEVENWELL cloths any different from the Pro-Size ones? I couldn’t tell from the descriptions.
SEVENWELL tends to be larger and geared toward general jewelry; Pro-Size is optimized for finer watch work with a slightly different weave. Both are fine; choice depends on whether you want a big cloth or a smaller, denser one.
I use SEVENWELL for bracelets and Pro-Size for bezels/cases — both have their place.
Small nitpick: the step about ‘polishing every scratch’ could be misread — maybe emphasize more that deep scratches often need professional tools. I tried a DIY polish on a gold-plated case and lost the plating on the bezel 😭
Otherwise, the guidance on different materials is solid. Love the product links for reference.
For light surface scratches, the cloths (Pro-Size or SEVENWELL) work ok. For anything deeper, it’s best not to risk it.
Toothpaste is mildly abrasive and can remove micro-scratches, but it’s unpredictable on different finishes — good anecdote though 😄
Good point, Daniel — the article does recommend when to stop and seek pro help, but I’ll add a clearer warning about plated cases and aggressive polishing.
Same here — I attempted a scratch removal on a plated watch and made it worse. Now I just keep a polishing cloth handy and leave deep scratches to a pro.
Funny thing—my neighbor fixed a scratch with toothpaste and it… sort of worked? Not recommended lol.
Question: for vintage watches with a nice patina, do you recommend the Pro-Size Jewelry Polishing Cloth or leaving it alone? I’m paranoid about wiping off character.
If the patina is something you want to keep, avoid abrasive polishing. Use a very gentle cloth (like the Connoisseurs Premium Extra-Large or SEVENWELL) only to remove surface grime, not to buff. The article’s ‘When to Preserve Patina’ section covers this.
I preserved the patina on my dad’s old Seamaster by only spot-cleaning with a damp cotton swab and not polishing. Cloths can be dangerous if you overdo it!
Minor constructive criticism: the article could use a quick decision flowchart — “If case is plated -> do X; if stainless -> do Y”. Felt slightly long trying to find the right method quickly.
That said, the content is thorough and I like the product recs. The 155-Piece kit + polishing cloth combo is my go-to for hobby cleaning.
Agreed — maybe add a printable 1-page checklist for folks who like a quick reference.
Thanks, Marcus — a quick flowchart is a great idea for a future edit. Glad the product combo works for you.
We’ll consider a downloadable checklist in the update — appreciate the suggestions.
Totally yes to the flowchart. When you’re mid-clean, flipping through paragraphs is annoying.
Great step-by-step — I liked the emphasis on assessing materials before you start. Saved me from ruining a plated case last weekend.
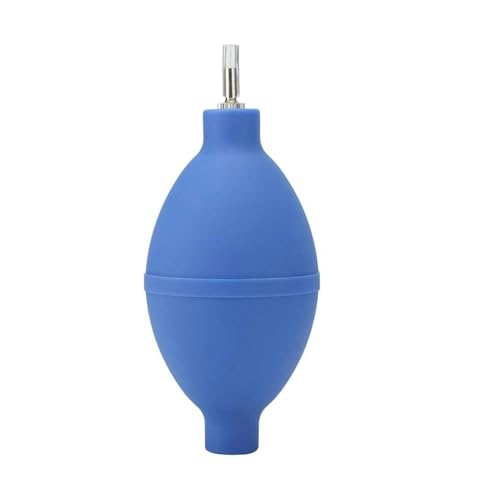
Quick tip I learned: use the Blue Rubber Wristwatch Parts Air Blower Cleaner to dust out crevices before any liquid contact. Way safer than canned air for delicate crowns.
Totally agree! I used the blower then a soft brush from the 155-Piece kit and it made a huge difference.
I tried canned air once and it blew a tiny gasket out of place 😅 now I only use a rubber blower.
Glad that helped, Michael — exactly, the blower is gentler and avoids moisture/pressure issues. Good call removing loose dust first.