
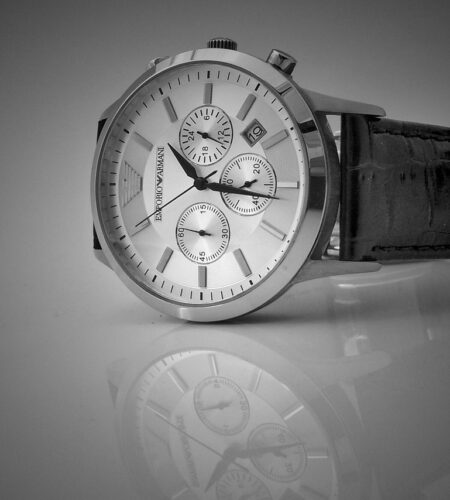
The watch that slides, leaves marks, or pinches — a small annoyance that ruins comfort.
After fastening a watch it often slides toward the hand, leaves a red ring, or pinches at the clasp. That tugging and doubt makes even a favorite timepiece feel wrong — awkward, irritating, and easy to fix.
Rather than guessing, a few simple, measurable rules remove the guesswork and protect comfort, security, and style.
- One-finger rule: one finger fits comfortably between strap and wrist.
- Movement: with arm down, watch should not slide more than 1 cm.
- Comfort test: no red indent or soreness after ten minutes.
Why fit matters beyond looks
A good-looking watch does little good if the fit causes problems. Fit affects more than appearance: it changes how the watch feels all day, how securely it stays on, and how well the movement and components endure everyday use.
Comfort
Too tight straps compress skin and restrict circulation, causing numbness or soreness. Tightness also traps sweat against the caseback or strap, accelerating leather rot, metal corrosion, or allergic reactions. Conversely, a watch that slides exposes the wrist to repeated knocks that create hotspots and chafing.
Security
A loose watch moves laterally and increases the chance of catching on objects. That motion puts extra lateral load on spring bars and end links, hastening wear or sudden failure. A slipping watch is more likely to be jarred off during an impact.
Function
Poor fit can directly harm the watch’s operation:
- repeated knocks may disturb the balance staff or timing, degrading accuracy;
- constant pressure on the crown or pushers can bend stems or open crowns, compromising water resistance;
- for smartwatches, inconsistent skin contact reduces heart-rate and motion sensor reliability.
In short, fit preserves comfort, prevents avoidable damage, and keeps the watch performing as intended. Small adjustments now save repairs later.
Three simple rules for watch tightness
Three short rules make fit easy to remember and apply.
- Rule 1 — One-finger rule: The strap should allow one finger (index finger) to slide between wrist and strap without force. This ensures the watch is not choking circulation while remaining secure.
- Rule 2 — No lasting marks: After removing the watch, the skin should show no persistent indentations or redness. Short, faint impressions are normal; anything that stays visible for minutes indicates the strap is too tight.
- Rule 3 — Gentle stability: The watch head should not flop when the arm moves, but it should rotate a little with the wrist. If the watch slides more than an inch or swings freely, it’s too loose; if it cannot shift at all, it’s overly tight and may stress spring bars.
These rules work together: Rule 1 gives a quick tactile check, Rule 2 protects comfort and skin health, and Rule 3 keeps the watch secure without harming the strap or case.
Quick notes by strap type
- Metal bracelet: Fit slightly tighter than leather to prevent the head from sliding; adjust half-links so the one-finger gap is consistent around the circumference. Bracelets often need micro-adjustments for temperature changes.
- Leather strap: Aim for the one-finger rule; leather stretches over time, so start snug rather than loose. Avoid overtightening to prevent creasing and breathability issues.
- Rubber / silicone: These can be worn a touch snugger during activity for security, but still follow the no-lasting-marks rule to avoid chafing.
- NATO / fabric: Allow a little extra movement for comfort; secure the excess so the head does not slide along the wrist.
- Mesh / Milanese: Micro-adjusts provide fine control—use them to meet the one-finger rule without pinching.
- Deployant clasp: Set so the clasp closes comfortably with the one-finger gap; deployment clasps change perceived tightness, so test both hand positions.
A quick fit check after a short walk or at different temperatures helps find the sweet spot.
Wrists swell with heat, exercise, and sodium intake — recheck fit at the end of the day.
For sports, tighten slightly for security; loosen for long wear to preserve comfort and strap life.
30–60‑Second Fit Checklist
-
One‑finger gap test
Slide an index finger under the strap at the widest point. It should pass with light resistance—too easy means loose, impossible means too tight.
-
Stability flick test
Give the wrist a quick, relaxed flick or bend the wrist back and forth. The case may move a little (5–10 mm) but must not rotate enough to press the crown into the skin or flop over the hand.
-
Two‑minute comfort and marks check
Wear the watch for two minutes, then remove it. No sharp pain, numbness, or deep red lines should remain; faint impressions that fade within a minute are acceptable. For smartwatches, confirm sensors keep gentle contact without pinching.
Quick adjustment methods by strap type
Leather and fabric straps
- Use existing holes first: move the buckle one notch tighter or looser to change fit in ~1–2 mm increments.
- If holes are exhausted, add a new hole with a leather punch set placed through the same plane as existing holes to avoid twisting.
- For long leather straps, tuck excess under a keeper or swap to a shorter strap.
Metal bracelets
- Remove or add links to get within one-finger gap. Work from the clasp side for symmetry.
- For minor tweaks, use micro-adjustments on the clasp if available.
- See “Removing links to adjust fit” in related posts for step-by-step link removal and push-pin techniques.
Rubber and silicone
- Trim only marked areas with a sharp blade; cut conservatively and test fit before removing more.
- Use the keeper or clasp micro-adjust to prevent slipping.
Quick surface fixes (no tools)
- Shift the watch head slightly toward the hand to reduce perceived slack.
- Rotate and reposition the strap in the buckle to distribute pressure and eliminate hot spots.
- For persistent uncertainty, measure wrist circumference (see “Measuring your wrist accurately” in related posts) before committing to permanent changes.
For deployant clasp behavior and avoiding slack, consult the related guide on deployant clasps.

Micro‑adjustments and when to see a pro
Micro‑adjustments are small clasp or half‑link moves that fix mild slipping or tightness without removing full links. For tiny fit tweaks try micro‑adjust bracelets for comfort. Use micro‑adjusts for day‑to‑day swelling or minor play, not major resizing.
When to see a pro
Seek a pro for link removal, pressed pins, riveted or folded bracelets, bent endlinks, or stretched metal—these require tools, replacement parts, or experience to avoid damage. Vintage and fragile pieces especially benefit from professional work.
Quick how‑to summary
- Begin by wearing the watch and identifying the comfortable clasp hole or half‑link position.
- Depress the spring bar with a spring‑bar tool or small pointed tool and move the clasp one notch.
- Test wrist comfort and security; if pins resist, wobble, or tooling feels forced, stop and consult a pro.
Adjusting fit by activity
Baseline rules still apply, but small adjustments improve comfort and function for different situations.
High-movement sports
For running, HIIT, and cycling, a fit slightly tighter than the one-finger baseline reduces bounce and sensor error. Practically: tighten one clasp micro‑step (or move one hole) from the usual setting. Check for circulation after 5–10 minutes.
Strength training and contact sports
Loosen enough to avoid pinching or crush injuries—about one notch looser than baseline. Consider a fabric strap or protective sleeve to prevent impact damage to the case and spring bars.
Diving and wetsuits
Use a dive extension or wear the watch over the wetsuit. The watch should be firm enough to avoid rotation during work at depth, but not so tight that it compresses neoprene.
Sleeping and long rest
Loosen or remove the watch to avoid pressure marks and improve circulation. If sleep tracking is needed, use a lighter, softer strap and a slightly looser fit than daytime.
Swelling and temperature changes
Loosen gradually during hot weather, flights, or when swelling is noticed. Re-check fit often; finger‑press capillary response is a helpful quick check.
Smartwatches and sensors
Position sensors centered on soft skin and snug them a touch tighter than baseline for reliable readings, but stop if numbness or blanching appears.
Myth→Fact Fixes
Excess tightness causes marks, discomfort, and strap stress.
Loosen until a fingertip slips under; flick test should show only tiny movement.
Too loose swings and harms sensors and lugs.
Tighten one notch or use a micro-adjust when active.
Materials and bracelets need different clearances.
Use one finger for leather, a hair’s gap for metal, and switch to softer straps if marks persist.
Quick Q&A: Common Fit Questions
How tight should a watch be for everyday wear?
One-finger gap; the watch should rest close to the wrist without sliding more than about an inch. It must not leave red or deep indent marks after an hour.
How tight during exercise or when using sensors?
For exercise or sensors, tighten slightly so the case and sensor stay flush and the watch doesn’t rotate. It must still allow easy circulation; test in motion and check sensor readings.
When is a watch too tight?
Too tight signs include numbness, tingling, persistent white indent lines or blue fingertips. Loosen immediately and wait for normal sensation before re-tightening.
How to handle swelling or temperature changes?
If wrists swell with heat or activity, use a half-link or micro-adjust, swap to rubber or expandable straps, or reposition to the non-dominant hand. Recheck fit midday and after long activity; carry a quick tool or clasp setting if frequent adjustments are needed.
Final checklist and next steps
- One-finger gap for daily wear; slightly tighter for sport.
- Avoid pressure marks; long-term marks signal incorrect fit.
- Micro-adjust before cutting or removing links; professionals prevent damage.
Quick wrap: Run the 30–60‑second self‑check when fit feels uncertain and use the three fit rules to balance comfort, security, and strap health.
If adjustments don’t stop rubbing, instability, or pressure marks, tighten only as needed or consult a watchmaker for permanent resizing.
- One-finger rule Leaves light room to breathe while keeping the watch stable.
- Activity adjustments Tighten for sensors and movement, loosen for sleep and impact.
- Two-step action Run the self‑check and adjust; if problems persist, visit a pro or follow the how to size a watch.
Love the 30–60‑second fit checklist. The flick test is genius — saved me from over-tightening my vintage bracelet.
Great breakdown — the one-finger gap rule is so simple but I never realized the impact on sensors and water resistance until that section. Quick question: how strict is the one-finger rule for fitness trackers with optical heart rate sensors? Do I need it tighter than for a mechanical watch?