
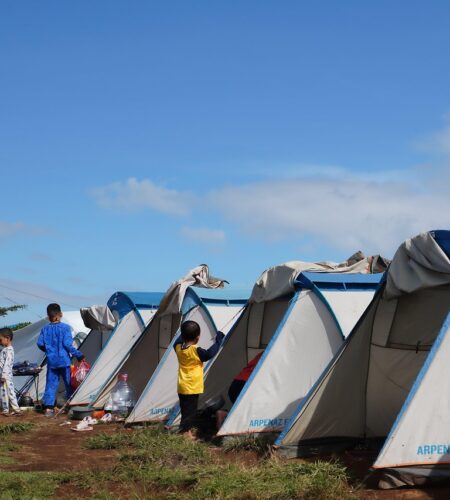
A good night starts before the tent goes up.
At a drive-in campsite, a roomy tent leaves space to change clothes and wait out a shower. Carry that same tent for several miles, and the extra floor space may no longer seem worth its weight. A compact hiking tent makes the walk easier, but a rainy weekend with two people and damp gear can make it feel very small.
The useful question is where the tent will spend most of its nights. If trips usually begin at a parking spot, standing room and space for gear may matter more than packed size. If the campsite takes a long walk to reach, weight becomes harder to ignore. Choose for the trips that are likely, rather than the occasional trip that sounds appealing.
Start with the trip, not the tent
A tent that feels perfect beside a parked car may feel burdensome after several miles on foot. Before comparing models, jot down four details about the trips it will actually be used for:
- Carrying distance: Will the tent go from the trunk to a nearby pitch, or spend hours in a backpack?
- Sleepers: Count people, then consider dogs, bulky sleeping pads, and whether anyone needs extra elbow room. A rated capacity often leaves little space for gear.
- Likely weather: Note expected rain, wind, and temperatures. A fair-weather summer campsite calls for different protection than an exposed site with unsettled forecasts.
- Campsite conditions: Check whether pitches are spacious or tight, and whether the ground is rocky, soft, or likely to collect water.
For a drive-up family weekend, a roomier tent may be worth the extra weight and longer setup. Space to change clothes, keep bags dry, and wait out a shower can matter more than saving a few pounds. At a walk-in or backpacking site, packed size and weight become harder to ignore; a smaller footprint may also make finding a level spot easier.
These notes help narrow the search without pretending one tent must suit every outing. If trips vary widely, decide which kind will happen most often—or whether borrowing or renting for the occasional outlier makes more sense.
Match the tent design to the trip
A tent’s shape affects how much of its floor space feels usable. Dome tents have sloping walls, so there is less room to stand or move near the edges. They are often a practical middle ground for car camping: easier to carry and pitch than a large cabin tent, without being built around minimum pack weight.
Cabin tents trade portability for living space. Their taller, straighter walls make changing clothes and sharing the interior more comfortable, but the packed tent can be bulky and its larger frame may take longer to assemble. Backpacking tents make the opposite trade: lower weight and a smaller packed size, usually with less headroom and little spare floor space. Checking the packed weight matters more than judging one by its pitched appearance.
Instant tents use a preattached frame to shorten setup, though that frame can add bulk. For a drive-in campsite reached after sunset, fewer loose poles may be worth the storage space; the setup trade-offs between instant and dome tents deserve particular attention when pitching in the dark is likely.
Freestanding is not another tent shape. It means the tent body can stand with its poles before being staked out; the difference between freestanding and stake-dependent pitches matters on hard or shallow ground. Even a freestanding tent should be secured against wind, and its rainfly may still need stakes for proper tension.
Look beyond the tent’s person count
A “four-person” tent usually means four sleepers can lie side by side, not that four people can sleep comfortably with their bags and clothing inside. The number is a starting point, not a promise of elbow room.
Check the floor dimensions against the actual sleeping pads. Add the pad widths, then look for space between pads and along the walls. A floor that narrows at the foot may fit the pads near the door but crowd sleepers farther in. Taller sleepers should compare their height plus pillow and foot room with the usable floor length; sloping walls can bring sleeping bags into contact with condensation even when the listed length looks generous.
Headroom matters beyond the peak-height figure. A high point in the center may still leave little room to sit up near the sides or change clothes without brushing the ceiling. If a store has a pitched display, sitting and lying inside often reveals more than the specifications.
Decide where gear will go before choosing a size. Vestibules can shelter boots and packs outside the sleeping area, but their shape and ground coverage vary. Families carrying extra bedding or spending rainy evenings inside may appreciate a tent rated for one or two more people than will sleep in it. For backpacking, that extra space must earn its added weight.
Balance carrying weight and living space
A tent has two sizes to consider: the bundle carried to camp and the space available once it is pitched. Check the packed weight, including whether stakes and guylines are counted. Check packed length as well; a long pole bag can be awkward in a backpack even when the weight seems reasonable.
On a long walk, extra weight goes along for every step, so added floor space should earn its place. For two hikers, the choice between a two-person and three-person backpacking tent may depend on whether wider sleeping pads or indoor gear storage justify the heavier load. Splitting tent parts between packs makes carrying easier, but does not reduce their total weight.
Beside a parked car, a heavier tent is usually less of a concern. Room to change clothes or sit through rain may be worth more than saving a kilogram. Compare floor dimensions with the actual sleeping pads, then choose the lightest tent that fits the sleepers and any gear that needs to stay inside.
Plan for rain and heat
A tent that feels airy on a dry summer night may be uncomfortable in a long shower. For rainy trips, a full-coverage rainfly offers more protection than a small roof cap, especially when wind pushes rain against the walls. A vestibule gives wet boots and packs a place outside the sleeping area, though its usable space depends on how the fly is pitched.
For hot trips, look for mesh panels and vents that allow air to move through the tent. A large mesh roof helps on clear nights, but it provides little shade without the fly; pitching the fly can also reduce airflow. Doors or vents on different sides offer more options when the breeze changes. In mixed weather, vents that can stay open under the fly are particularly useful.
Water inside is not always a leak. Breath and damp gear release moisture that can collect on a cool fly or tent wall overnight. Dampness spread across the inside surface, especially after a still night, suggests condensation; a drip at a seam during rain points more toward a leak. Keeping wet gear in the vestibule and leaving safe vents open can help reduce condensation. A waterproof label matters, but fly coverage, pitching, and airflow determine much of the experience.
Check the ground before choosing a tent
A sheltered, grassy campground and an exposed, rocky ridge ask different things of a tent. Before buying, picture the ground at likely campsites: will stakes go in easily, and will there be room to spread out guylines?
Non-freestanding tents rely on anchored points to hold their shape. They can work well on soil that takes stakes, but rock, hard-packed ground, or loose sand may make a reliable pitch harder to find. Freestanding tents hold their basic shape with poles, giving more flexibility on awkward ground. They still need securing, especially when wind could move the tent or lift the rainfly.
On exposed sites, guylines help keep the fly taut and reduce flapping. A tent with useful guyline points offers more options, but only if there is space and something secure to anchor them to. A complicated pitch may also feel less appealing when camp is reached after dark or in bad weather. For those trips, a design that is easy to set up matters as much as its specifications.
Compare what the price includes
-
Measured space and carrying weight
Compare floor length and width with the sleeping pads that will actually go inside. For a walking trip, check packed weight rather than a lighter figure that excludes stakes or the stuff sack.
Look forPad fit and a weight that suits the walkWatch out forChoosing by person count or minimum weight alone -
Rainfly and seams
A fly that reaches low over the walls offers more shelter than a small roof cover; check whether seams come sealed or need treatment. For wet walks, lower-cost backpacking tents with substantial rainflies can be a sensible choice when their weight and weather protection fit the route.
Look forUseful fly coverage and clear seam detailsWatch out forAssuming every tent sold as waterproof protects equally -
Pole design
Check how many poles must be assembled and whether replacement sections are available. A simple pitch has particular value when camp is reached tired or near dark.
Look forManageable setup and replaceable partsWatch out forPaying for a clever design that is awkward to pitch -
Included components
Confirm whether stakes, guylines, and a repair sleeve are included; a footprint may cost extra. A cheap tent loses some appeal if essential pieces must be bought separately.
Look forA complete kit at a realistic total costWatch out forComparing sticker prices without checking the bag
Choose for the trip that is actually coming
Start with the next likely trip, not the most ambitious one that might happen someday. Note how many people will sleep in the tent and what weather it must handle. Then remove any option that is too heavy or bulky to carry to the site, or too difficult to secure on the ground available. Among the tents left, compare sleeping room, storage space, and price. Extra headroom is worth more on a rainy weekend in camp than on a trip that changes sites each morning.
Before buying or packing, check the stated floor dimensions against the actual sleeping pads; a person-count label is not a fit test. Pitch the tent at home once, including the fly and guylines, so missing parts or awkward steps turn up before departure. The best choice is the one that works for trips it will actually take.
Borrowing a tent for the occasional odd trip is such an obvious idea that I somehow missed it. I was about to shop for one that could handle both family car camping and a solo hike, which seems like a lot of compromise.
Can you explain freestanding a bit more? I thought it meant you didn’t need stakes at all, but the section about rocky ground seems to say otherwise.
The condensation point cleared up something that bothered me on our last trip. The inside felt damp in the morning even though it hadn’t rained. We’ll try opening the vents next time instead of immediately blaming the tent.