
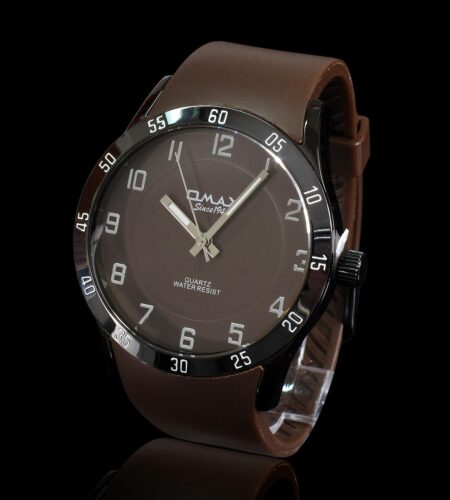
A brief hinge of movement can turn a bracelet from mint to marred.
On arrival, a polished bracelet often shows fine hairlines along links and the clasp — a familiar sight after a flight or bus ride. Those hairlines come from metal-on-metal rubbing: links shifting against lugs, clasps scraping buckles, loose straps tumbling with keys, and zippers abrading surfaces during every jostle. Even soft packing can’t eliminate hours of micro‑movement.
The consequences go beyond aesthetics: hairline scratches dull polished surfaces, wear down plated finishes, and chip away resale value or make vintage pieces harder to restore. Professional refinishing costs time and money; brushing out fine scratches risks altering the original finish. A simple, two‑minute pre‑trip routine — padding, separate compartments, and securing clasps — prevents most transit damage.
Fast triage: which bracelets to bring
Quick triage checklist
Follow a three-step assessment before packing: finish, risk, and activity. Keep answers short and honest — the goal is minimizing avoidable scratches.
- Finish: Polished surfaces show hairlines; brushed or matte finishes hide them. Polished = high risk, brushed = lower risk.
- Sentimental/value risk: If a bracelet is expensive, rare, or has sentimental value, treat it as fragile. High-risk pieces should stay home unless essential.
- Trip activities: Match bracelet toughness to planned activities. Hiking, boating, construction, or crowded travel increase scratch risk.
Decision rules:
- If two of three items are high risk (polished, valuable, active trip), leave the bracelet at home or pack it in a padded case.
- If only the finish is risky but the piece is replaceable, consider swapping to a tougher strap.
When to swap straps:
- Choose rubber or silicone for water and heavy use; NATO straps for breathability and minor protection; avoid leather for wet or abrasive trips.
Final tip: pack one protective case and one hardy strap to reduce regret without overpacking valuable metal bracelets.
Mechanical & cleaning checklist
-
Set up a controlled workspace
Work on a clean, flat surface over a soft cloth or tray to catch small parts. Arrange a bright light, loupe or magnifier, a small parts container, and the necessary small tools before starting.
-
Inspect links, end‑links and clasp
Visually and tactilely check for grit, corrosion, loose screws or play at pins and end‑links. Wiggle spring bars and run fingertips along joins to locate abrasive particles or movement.
-
Remove grit with gentle cleaning
If water resistance is uncertain, remove the bracelet from the case first. For metal bracelets, soak briefly in warm soapy water, agitate with a soft brush between links, rinse, and dry thoroughly; use compressed air or a toothpick to dislodge trapped grit.
-
Secure or replace loose parts
Tighten screw‑links with the correctly sized screwdriver and seat push‑pins squarely using a pin pusher. Replace worn or bent spring bars and ailing clasps rather than attempting makeshift fixes.
-
Final check and gentle packing
Cycle the clasp and flex the bracelet to confirm stability, wipe with a microfiber cloth, and stow in a soft pouch or watch roll with compartments to prevent metal‑on‑metal contact.
Small tools:
Non‑magnetic precision screwdriver set Spring‑bar/tool pin pusher, pegwood or toothpick Soft toothbrush, microfiber cloth, small parts tray, compressed air Magnifier or loupe; spare spring barsSafety:
Work over a soft surface to avoid drops. Keep small parts in a container and away from children. Avoid solvents and high torque on tiny screws; use threadlocker only if experienced. If water resistance is unknown, remove the bracelet before wet cleaning or consult a service technician.Select interiors and layouts that stop metal-on-metal contact
Materials and construction to prioritize
- Soft, nonabrasive lining: microfiber, alcantara, or microsuede reduce friction better than felt or synthetic pile. Avoid coarse fabrics that trap grit.
- Closed-cell padding: firm foam cores prevent watches from compressing into one another while absorbing shock. Look for at least 5–10 mm of padding between compartments.
- Structured dividers and individual wells: molded wells or firm dividers stop lateral movement; avoid single-compartment pouches for multiple watches.
- Secure closures: zippers with soft inner flaps and tight seams keep grit out and prevent snaps from shifting inside.
Practical internal layouts and packing steps
- Close each bracelet/clasp so it rests around a cushion or removable pillow; this keeps links aligned and reduces flex.
- Place each watch in its own well or compartment; if the case lacks separate wells, add thin microfiber wraps around bracelets before stacking.
- Insert thin foam or a folded microfiber strip between adjacent bracelets to eliminate metal-to-metal contact.
- Use elastic retention straps or recessed lids to stop sliding; a snug fit beats extra layers that encourage movement.
Small, deliberate choices in lining, padding thickness, and compartment layout remove abrasion risk and keep bracelets pristine during travel.
A short routine for bracelets, links and alternates
When to remove bracelets
Bracelets should be taken off before activities with high abrasion risk: sports, beach time, heavy lifting, and when placing watches in checked luggage. Leave them on for low‑risk events where comfort and fit matter.
Store links and pins safely
- Place spare links, screws, and spring bars in a small resealable bag or pill case. Label it with the watch model.
- Wrap metal parts in a thin piece of microfiber or tissue to stop rattling and surface contact.
- Keep the parts in carry‑on or with the watch to avoid loss and humidity in checked bags.
Pack alternates without damage
- Use individual padded pouches or a travel roll with separate wells so metal never touches metal.
- For leather or NATO straps, fasten buckles and tuck ends; cushion with a soft cloth.
- Store a compact spring‑bar tool in a zipped pocket to swap straps safely on the road.
In-transit Q&A
Should a delicate bracelet be worn on flights?
For long security waits and cramped cabins, wearing increases scratch risk; fragile bracelets are usually safer packed. If wrist wear is preferred, swap to a leather or NATO strap and stow the bracelet in a padded case during movement.
Carry-on or checked baggage?
Carry-on is strongly preferred to control handling and temperature. Keep the padded case inside a soft-sided compartment or under clothing to prevent shifting.
How to position padded cases in checked luggage?
Place the case in the suitcase center, surrounded by folded garments, away from seams and wheels. Hard-sided luggage reduces compression and blunt impacts.
What about hotel-room storage?
Use the hotel safe for high-value pieces. When no safe exists, keep the padded case inside luggage and hidden, not on open surfaces.
Emergency scuff fixes while traveling?
Gently clean with a microfiber cloth to remove grit. Use low-tack adhesive or a small slip of cloth over vulnerable links and avoid polishing compounds until back.
Temporary protection myths
Adhesive can leave residue and lift plating.
Glue bites into plated and brushed finishes.
Film shifts and traps grit, causing micro-abrasion.
Movement plus trapped particles abrades metal.
Cloth alone compresses and allows metal contact.
Soft fabric won’t stop edge impacts or grains.
-
Microfiber cloth
Wipe grit before packing.
-
Thin foam/silicone strips
Place between bracelets to stop metal contact.
-
Resealable bags
Store spare pins and links.
-
Non-adhesive wraps or bands
Use silicone bands instead of tape; see fixes to stop watches rubbing and scratching.
-
Mini toolkit
Spring-bar tool or small screwdriver and a toothpick.
Keep kit in carry-on.
Post-trip bracelet inspection & quick care
-
Visual scan
Examine the bracelet under bright light for hairlines, deeper scratches, dents, bent links, missing endlinks or uneven gaps. Photograph any issues for records and insurance.
-
Movement and play
Flex the bracelet and feel each link for stiffness or excessive side-to-side play; check endlinks and spring bars for lateral movement that indicates loose pins or worn collars.
-
Clean and dry
If removable, rinse the bracelet in lukewarm water with mild soap and agitate gently with a soft toothbrush to dislodge grit. Rinse, pat dry with a microfiber cloth, and ensure moisture is cleared from screws and link gaps.
-
Light lube and fastener check
Apply a tiny drop of watch‑safe lubricant to hinge points or pin holes if accessible, and carefully snug screws/pins to spec—replace damaged pins rather than over‑torquing.
-
Micro-scratch triage
Classify marks: hairlines can be softened with a jeweler’s cloth or fine polishing pad; deeper scratches or finish loss should be documented and left for a watchmaker to refinish.
When to service and how often
- Inspect after trips or any knocks; quick cleaning and light lube prevents progressive wear.
- Use gentle cloth polishing for minor hairlines; avoid abrasive home methods on brushed or coated finishes.
- Consult a professional for loose pins, bent links, corrosion, deep gouges, or persistent movement after tightening.
A brief post-trip inspection, cleaning, and light lubrication will catch most issues before they worsen. For structural damage, visible corrosion, or finish problems beyond surface hairlines, seek a professional to preserve function and value.