
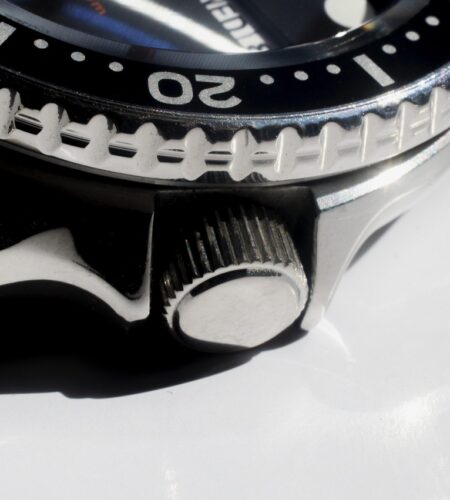
That new insert's faint rattle is more than annoying — it can signal wear or a broken seal.
Installed an aftermarket bezel insert and now a soft click echoes with every wrist flick. The sound is often caused by a tiny gap, loose fit, or trapped debris; left unaddressed it can produce annoying noise, abrade surrounding parts, and compromise water resistance if the bezel shifts under load. Faced with the rattle, the choice is binary: tolerate it temporarily if very minor and stable, or intervene to diagnose and fix before damage accumulates. This guide helps triage the severity and choose safe next steps.
Fast checks to confirm the insert is the rattle source
-
Visual fit and edge check
Inspect the insert under good light for gaps, uneven seating, or visible debris. If the ring sits proud, tilted, or doesn’t meet the bezel evenly, the insert is a likely culprit; also review compatibility of aftermarket bezel inserts if it’s a replacement.
-
Tap-and-touch isolation
Hold the case to the ear and tap the bezel edge lightly with a fingertip. If the sound localizes and changes or stops when pressing the insert, the insert itself is making the noise.
-
Compression repeat test
Press firmly on the insert (simulate seating) and repeat tapping/rotation. Noise that disappears under pressure points to a loose insert rather than caseback or strap.
-
Quick bezel-spring check
While holding the insert down, try rotating the bezel. If noise persists even with the insert held, the bezel spring or click mechanism is suspect; if it stops, the insert is the source.
-
Rule out strap, caseback, crown
Loosen or remove one strap end and retest; tap the caseback and move the crown through positions. If the rattle doesn’t change with strap/caseback/crown manipulation but correlates with bezel handling, the insert is to blame.
Avoid prying the insert without proper tools; if tests point to a loose insert and replacement is needed, seek a press or watchmaker.
Six common causes of a rattling bezel insert
Below are the six most frequent sources of an aftermarket bezel-insert rattle. Each item lists the usual symptom, a quick inspection, the likely remedy, and whether the fix is reversible or requires teardown.
-
1) Insert not fully seated
- Symptom: Rattle only when tapped at specific points; no visible damage.
- Quick check: Press evenly around the insert and listen for the sound moving.
- Remedy & invasiveness: Pop the insert fully into place using a cloth to avoid scratches. Reversible and noninvasive.
-
2) Debris trapped between insert and bezel
- Symptom: Crunching or intermittent noise that shifts with position.
- Quick check: Gently pry a corner with a plastic pick to see if grit falls out; use compressed air.
- Remedy & invasiveness: Clean with air, soft brush, or isopropyl on a cotton swab. Reversible and noninvasive.
-
3) Missing or degraded adhesive
- Symptom: Insert moves slightly and stops when held in place.
- Quick check: Look for gaps, old glue residue, or soft spots behind the insert.
- Remedy & invasiveness: Reapply thin double-sided tape or low‑odor RTV; hold until set. Reversible (tape) to mildly invasive (adhesive cure required).
-
4) Worn or broken retention tabs
- Symptom: Insert drops or tilts when nudged.
- Quick check: Remove insert to inspect plastic clips or tabs for cracks.
- Remedy & invasiveness: Replace or reinforce tabs (glue, small epoxy) — requires removal and moderate work.
-
5) Warped or distorted insert
- Symptom: Visible gap on one side; persistent vibration.
- Quick check: Compare the insert to the bezel profile; test fit outside the case.
- Remedy & invasiveness: Replace insert or carefully heat-and-form if the material allows. Moderate to high invasiveness.
-
6) Incorrect aftermarket size/tolerance
- Symptom: Uniform play around the entire circumference.
- Quick check: Measure inner bezel diameter and outer insert diameter.
- Remedy & invasiveness: Swap for a correctly sized part or add thin shims/tape. Often requires removal and replacement — higher invasiveness.
Always try seating, cleaning, and adhesive replacements before breaking anything apart. These steps fix most rattles and preserve original parts.
Tools and consumables
A compact kit handles most snugging and cleaning tasks; removal or modification calls for sturdier gear. See the tools to fix a rattling bezel insert for a fuller list.
- Essential (sufficient for low‑risk fixes): microfiber cloth, compressed air, plastic pry tools, cotton swabs, 90%+ isopropyl alcohol, double‑sided foam tape or silicone adhesive pads, small non‑marring pick.
- Needed for removal/modification: precision screwdriver set (Phillips/Torx/hex), heat gun or hot air, thin metal shim stock or feeler gauges, small files or rotary tool for trimming.
- Optional: calipers, magnifier, RTV silicone, threadlocker.
Safety notes: use an ESD strap near electronics, wear eye protection, and avoid solvents that degrade gaskets or adhesives.
Stepwise fixes, from reversible to invasive
-
Try reversible micro-adhesive or tape first
Place tiny dots of removable museum putty or thin double-sided foam tape at discreet contact points where the insert meets the bezel; start with one dot and test. This is quickest (10–20 minutes), low risk, and reversible — avoid adhesive on screens, vents, or weather seals.
-
2) Clean and reseat after gentle removal
Use plastic pry tools to lift the insert just enough to clear clips, then clean both mating surfaces with isopropyl alcohol and a lint-free cloth to remove dirt and old adhesive. Inspect clips and seating lips for wear; reseat evenly and test for play (15–30 minutes, moderate skill; wear eye protection and work on a soft surface).
-
Re-adhere with a controlled adhesive application
Apply a thin bead of removable silicone adhesive or a few drops of low-odor RTV/specialty panel adhesive where it won’t ooze onto visible faces; clamp or tape lightly while curing per product directions. Allow full cure before testing (30–120 minutes depending on adhesive), use ventilation, and avoid CA glues on plastic if a reversible fix is desired.
-
4) Mechanical adjustments when adhesive won't hold
If gaps persist, carefully thin protruding bezel lips or add tiny plastic shims to the insert using needle files or a Dremel on low speed — practice on scrap first. This is permanent and higher risk (30–90 minutes, advanced skill); stop if clips deform or fit worsens.
-
5) Replace or repair damaged parts as last resort
Order an OEM or aftermarket insert, have a replacement printed/machined, or repair broken hooks with epoxy and reinforcing plates; match finish and dimensions before installing. This can take days to weeks and may require professional help — choose replacement if structural clips or sealing surfaces are compromised.
After each step, test for noise and fit; cease further invasive work if structural clips break or sealing surfaces are damaged — opt for replacement.
Repair or handoff
Broken hooks or deformed spring?
Yes — full teardown and professional service. No — continue checks.
Spring slips or lacks tension?
Yes — professional spring replacement required. No — continue.
Gasket torn, flattened, or contaminated?
Yes — seal risk; replace and pressure-test professionally. No — proceed with reversible fixes.
Insert stays put with fingertip pressure?
Yes — attempt cleaning and reversible adhesive; retest. No — likely requires invasive repair.
Valuable, under warranty, or used for diving?
Yes — refer to a certified watchmaker. No — DIY acceptable with caution.
Red flags: broken hooks, lost spring tension, damaged gasket, movement intrusion, high value or required water resistance. If any apply, consult a watchmaker.
What to buy and how to test before fitting
-
Fit & tolerance
Confirm pocket ID and insert OD; aim for a light interference or specified tolerance to clamp the part without distortion.
Look forSpecified diameters or 'press-fit' tolerance (≈0.1–0.5 mm).AvoidVague sizes or obvious gaps between insert and bezel. -
Material & thickness
Choose inserts with sufficient stiffness and similar thermal behavior to the bezel to avoid flexing or noise as temperatures change.
Look forSturdy material and uniform wall thickness.AvoidVery thin stamped metal or floppy plastics. -
Adhesive backing & retention
Prefer full-width automotive-grade tape, foam gasket, or mechanical clips; small sticky dots rarely hold long-term.
Look forPre-applied foam gasket or continuous adhesive layer.AvoidTiny adhesive dots or no retention method. -
Seller info & returns
Buy where measurements, photos, and a clear return window exist; keep original packaging until fit confirmed.
Look forClear specs, good photos, easy returns.AvoidFinal-sale listings or minimal product detail.
Quick habits to reduce future rattles:
Clean surfaces thoroughly before any adhesive or tape. Warm adhesive tape slightly with a hairdryer for better initial tack. Press evenly and hold full contact for the adhesive’s specified dwell time. After fitting, perform a local flex/listen test and a short road test; re-check after 24–48 hours. If doubt remains, add thin foam strips in non-visible gaps rather than forcing the part to fit.Quick Fix Cheatsheet
- Use reversible methods first.
- Inspect seals and alignment.
- Escalate to replacement or pro service for structural damage.
Start with reversible fixes: tape or museum putty can confirm and quiet the insert. If confirmed, clean mating surfaces, apply a thin bead of low-viscosity adhesive, align before cure; choose replacement or professional service when gaskets or bezel structure are compromised.
Short and sweet: the fast checks checklist is gold. Did the tap-and-listen method and isolated it in two minutes.
I tried the tape shim method described under reversible fixes and it stopped the rattle, but my bezel now looks slightly misaligned. Any suggestions to keep alignment while using tape?
Thanks for the report, Sam. Try using thin double-sided foam tape only at the high points (not around the whole circumference) so you can fine-tune alignment before pressing fully.
Also clean both mating surfaces with isopropyl first, then apply tape in small segments and test alignment frequently. If the tape creates a visible gap, switch to the low-profile putty mentioned in the cheatsheet.
Great article — the stepwise fixes section saved me from sending my bezel back. The reversible putty trick worked perfectly for a temporary fix.
I bought a supposedly ‘exact fit’ aftermarket insert and it rattled immediately. Used the fast checks section to confirm it was the insert, then the buy/test checklist to find the vendor’s tolerance specs missing. Beware sellers who don’t publish fit tolerances.
Same here — I started returning vendors who couldn’t supply tolerance numbers. Switched to a slightly pricier seller that posts measurements and my problems stopped.
Quick tip: check for debris under the insert before assuming it’s loose. I found a tiny shard of plastic causing noise.
Long post: I went through the ‘six common causes’ checklist and found two issues at once — an undersized insert and a tiny burr on the case lip.
I filed the burr down (very carefully), then used a thin layer of the recommended adhesive and clamps overnight. No rattle since. The article’s repair vs handoff section helped me decide when to try fixes vs when to seek a pro (I stopped when I felt I was risking the seal).
Thanks for sharing the step-by-step, Ethan. Good call on stopping if seal integrity seemed at risk — that’s one of our red flags.
If you keep seeing undersized inserts come back in new purchases, refer to the ‘what to buy and how to test’ checklist before fitting to avoid repeat work.
I disagree with the part that says filing should be a last resort. In my experience with several aftermarket inserts, carefully filing a high spot on the case was the only way to get a snug fit without warping the insert.
YMMV, but maybe expand on when filing is appropriate (material, measured gap tolerance, etc.).
Follow-up: after using the adhesive method from the article (clean-and-adhere), wait a full 24 hours before testing. I tested too soon and it popped loose again.
Has anyone had issues with gasket compression after using adhesive? The article warns about seal failure, and I’m paranoid about water resistance.
Good question, Laura. Use adhesives rated for flexible joints and avoid rigid glues that prevent gasket compression. The article’s recommended silicone-based, flexible adhesives keep the seal intact.
If you see uneven compression after bonding, remove the adhesive (see Tools and consumables), clean, and try either a thinner adhesive bead or a mechanical spacer approach.