Excitement and caution meet at the workbench—customization feels creative and risky at once.
A freshly bought watch can feel like a blank canvas and a fragile heirloom at the same time: the urge to personalise clashes with worries about breaking the movement, voiding the warranty, or accidentally spending more on tools and parts than the watch is worth.
Choosing scope, budget, and acceptable risk before opening a case makes modding manageable. Begin with low-risk cosmetic changes—straps, bracelet sizing, bezel inserts—or practise on an inexpensive donor watch; reserve movement work, polishing, and provenance-altering mods for professionals or later, after gaining confidence.
- Starter budget: $30–$200 (straps to basic tools).
- Low-risk mods: straps, spring bars, bracelet sizing, bezel inserts.
- Basic toolset: ~$25–$60; precision/movement tools cost significantly more.
- Watch modding
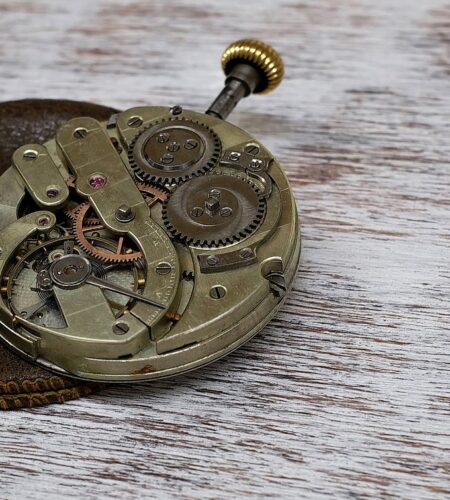
Replacing or altering parts of a wristwatch to change appearance, function, or performance; can be done on mechanical or quartz watches and ranges from swapping bezels to movement swaps.
- Cosmetic mods
Changes that alter look without affecting core timekeeping: dials, hands, bezels, crystals, straps and case finishes. Low technical risk and good for beginners.
- Technical mods
Alterations to movement, date mechanisms, or structural repairs that affect function and reliability; often requires tools, parts, and movement-specific knowledge. Higher risk and typically involves movement swaps, regulation, or jeweling.
- Personalization
Modding to achieve a distinct style, sentimental detail, or brand alignment—best when the goal is uniqueness rather than resale preservation.
- Learning and value
Projects teach watchmaking fundamentals and can increase appeal or value if executed well, but poor technical work can decrease value.
Starter mods, ranked by accessibility and risk
Starter mods, ranked by accessibility and risk
Beginner-friendly projects are mostly cosmetic; technical work rises quickly in risk. The list below orders common starter mods from lowest to highest barrier.
- Strap or bracelet swap — very low risk, very accessible. Simple tools, immediate results, no impact on movement.
- Bezel insert replacement — low to moderate risk. Many inserts press in, so alignment and correct diameter matter. A ceramic insert can look great but still not seat correctly; see the ceramic bezel fit on the SKX explanation for a concrete example of fit trouble.
- Crystal replacement — moderate risk. Proper sizing, dust control, and correct press tools required. Acrylic is forgiving; sapphire demands precision.
- Hands and dial swap — moderate to high risk. Delicate work near the movement; misalignment or tool slips can damage the dial or pinions.
- Movement service or swap — high risk. Requires disassembly, lubrication, and timing equipment; mistakes can be costly.
- Case mods or refinishing — high risk, often irreversible. Be mindful of polishing away serials or altering historical value.
Practical tips: practice on a donor watch, test-fit parts before final assembly, organize tiny parts in labeled trays, and invest in basic presses and hand levers before attempting technical swaps.
Starter tool kit and buying priorities
Begin with a small set of versatile, reliable tools — these cover most low-risk mods and teach safe technique. Start with the essential tools checklist before splurging on specialty gadgets.
Core first purchases:
- Spring-bar tool (dual-ended) and a set of spare spring bars
- Precision screwdriver set (hollow-ground tips, sizes 00–3)
- Tweezers (antimagnetic, fine tips)
- Caseback opener (adjustable for common casebacks)
- Loupe (5–10×) and a movement holder or small vice
- Soft mat, dust blower, and small parts tray
Avoid buying expensive single-use machines early: crystal presses, ultrasonic cleaners, and timing machines are rarely necessary for first projects and often sit unused. Cheap knock-off screwdrivers or tweezers are a false economy — they slip, strip screws, and damage parts.
Plan upgrades after several mods: invest in a quality screwdriver set, a staking set, and a demagnetizer once comfort and interest increase. Prioritize tool reliability over price for anything that directly contacts screws or movements.
Avoid flimsy drivers with loose bits.
Prefer drivers with replaceable heads and good fit — they protect screw slots and reduce repair costs.
Vet parts sellers before buying
Start with measurable facts, not marketing blurbs. Request exact measurements (diameter, hole spacing, dial-foot positions, thickness, crystal outer/inner diameters) and ask for photos that include a ruler or caliper reading.
Before committing, inspect seller signals: clear, high-resolution photos; a stated return policy and delivery tracking; multiple positive reviews; and willingness to answer technical questions. For dials, consult a buyer’s guide like where to buy custom watch dials that fit popular movements to compare stated specs to common movement standards.
Quick checklist:
- Ask for caliper reads or technical drawing
- Confirm compatibility with movement (hand hole/cannon pinion heights)
- Verify material claims (sapphire vs mineral) with photos and trusted listings
- Confirm return window and buyer protection
Red flags: no measurements, blurry or stock photos, refusal to accept returns, inconsistent dimension listings, or prices that seem unrealistically low. For crystals, compare fast-market options before buying — for example, see quick sources for sapphire parts on Amazon via fast sapphire crystal options. When unsure about installation risks or fit, read real-world tests like putting a sapphire on a Timex without a watchmaker to learn potential pitfalls.
Measure first, seal last
Before reassembly, confirm every part sits where it should. Use digital calipers and a movement holder to check these critical dimensions:
- Hand holes / dial feet: measure the dial hole diameter and confirm hand hole clearances for minute and hour hands. For movement-specific guidance, consult the compatibility details for common movements.
- Cannon pinion height: measure from the movement plate to the top of the cannon pinion so hands clear the crystal and each other.
- Crystal and bezel diameters: measure the bezel seat inner diameter and the crystal outer diameter, plus crystal thickness and gasket channel width — see the explainer on how swaps affect sealing at bezel and crystal water-resistance.
- Overall movement height and rotor clearance: check caseback clearance and crown/stem length.
Simple test-fit steps before sealing:
- Install movement and dial in the case, fit hands lightly and rotate through positions to confirm no rubbing.
- Seat the crystal with its gasket and press by hand; confirm an even, gap-free seating.
- Close caseback finger-tight and inspect gasket alignment before final torque.
These checks catch most mismatches that lead to broken hands or water intrusion.
Do not rely on visual checks alone for water resistance. Professional pressure testing is the only reliable confirmation. If parts don’t test-fit perfectly, delay sealing to avoid costly water damage.
Consequences and mitigation
Most mods carry clear trade-offs: manufacturers may refuse warranty service and some buyers pay less for modified watches. For details on warranty consequences, consult the full warranty implications guide.
Mitigation focuses on reversibility and documentation. Start with reversible cosmetic changes (straps, bezels, crystals) before any permanent case or movement work. When a more invasive mod is necessary, follow practical habits that protect value:
- Keep every removed original part in labeled, padded packaging.
- Photograph the watch before, during, and after each step; keep timestamps and receipts.
- Use a donor watch for practice so the main piece stays original.
- Note any professional work on service records and disclose modifications when selling.
These steps preserve options: restore to factory condition, prove provenance, and often recover more resale value.
Store original parts in a clearly labeled box. Keep process photos and invoices. Offer originals with the watch when selling to maintain value.
Three Progressive Starter Projects (checklists)
-
1 — Quick plan (what to prepare)
Gather basic tools: spring-bar tool, case-back opener (if needed), dust blower, non-magnetic tweezers, soft cloth; set up a well-lit, clean workspace. Verify donor watch condition and measure lug width, crystal profile, and hand clearance before ordering parts.
-
2 — Strap swap (lowest risk)
Required tools: spring-bar tool, strap/extra spring bars. Pre-checks: correct lug width and spring-bar condition. Test-fit: remove old strap, fit new strap and check clasp alignment and clearance. Reassembly: ensure spring bars fully seat; flex folds and wear-test for 24 hours. Typical cost: $5–$60 depending on material.
-
3 — Bezel and crystal swap (moderate risk)
Required tools: bezel tool or friction press, crystal press, crystal lift (if applicable), tape. Pre-checks: confirm bezel type (snap/insert) and crystal dimensions. Test-fit: dry-fit bezel and crystal before sealing; confirm alignment and no hand interference. Reassembly: press evenly and verify gasket seating for water resistance. Typical cost: $20–$200 depending on crystal and bezel quality.
-
4 — Dial and hands swap (highest beginner risk)
Required tools: movement holder, hand removers, hand press, dust cover, loupe. Pre-checks: movement compatibility, feet placement, and hand-hole sizes. Test-fit: mount dial on movement, fit hands in stages checking clearance at each hand; check timekeeping and calendar function. Reassembly: re-case carefully and perform leak and timing checks; consult realistic price ranges for parts.
Start with strap swaps on a non-valuable donor and progress only after mastering tool control.
Always protect the movement when working on dials or hands. Use a movement holder and face-down dust cover; keep small parts in labeled containers. Common precautions:
Work over a soft pad to avoid dents. Wear nitrile gloves to avoid oils on dial/hands. If unsure, practice on an inexpensive donor first.Quick troubleshooting checklist
Common mod problems are often simple—apply this quick framework: problem → quick diagnostic → likely fix.
-
Hands stop or rub
Quick diagnostic: slowly advance the movement and watch for catching or uneven seating.
Likely fix: reseat hands, increase clearance, or swap to correct hole-size hands. See the hand clearance guide for step-by-step options. -
Bezel insert rattles
Quick diagnostic: gently press around the insert and listen for movement.
Likely fix: size the insert, add thin tape or a removable adhesive, or replace with a correct-fit insert—follow the bezel insert rattle fix. -
Markers not aligned after fitting
Quick diagnostic: compare the 12 o’clock bezel marker to the chapter ring index.
Likely fix: reindex the chapter ring or realign the bezel using the chapter ring alignment steps.
Consult those detailed how-tos before attempting risky case disassembly—many problems can be fixed without opening the movement.
Final Steps and First Move
- Keep changes reversible to protect value and preserve learning options.
- Measure and test-fit parts before permanent assembly to avoid common mistakes.
- Use a donor watch to practice—cheaper, lower stress, and forgiving of errors.
This guide closes with a single clear approach: work small, keep changes reversible, and prepare before lifting a hand. To reduce risk and build confidence, select a low‑risk starter project, buy the prioritized starter tool kit, and read the linked troubleshooting and how‑to guides before beginning. Document measurements and preserve original parts so mistakes stay fixable.
Concrete first moves:
Pick a low‑risk project (strap swap, bezel or donor‑dial swap). Purchase the starter‑tool list (spring‑bar tool, basic screwdrivers, hand levers, loupe). Read the linked troubleshooting/how‑to guides and rehearse test‑fits on the donor watch.