
Test Your Watch’s Water Resistance—Safely at Home
This guide gives a practical, SAFETY-FIRST outline to help you check a watch’s water resistance using low-risk, home-friendly methods, showing when to test, what to avoid, and how to recognize signs that require professional service and simple safe follow-up steps.
What You'll Need

Can You Pressure Test Watches at Home? Learn How to Check Water Resistance – Video #48
Decode the Rating: Know What the Specs Actually Mean
Did you know '30m' rarely means you can swim with a watch? Read this first.Start by locating the water-resistance marking on the caseback or dial (look for ATM, m, or the words “water resistant”).
Read the marking and treat it as a practical limit, not a guarantee.
Note whether the crown is screw-down and whether the watch recently had a battery change or service—these operations can void or disturb seals.
Compare the rating to real activities using these simple guidelines:
Imagine testing a 3 ATM watch in a sink—avoid that to prevent permanent movement damage.

Visual and Manual Inspection: Find the Obvious Problems
Why a hairline crack or loose crown can ruin your whole watch — spot it now.Use a loupe or magnifier to inspect the crystal for chips, hairline cracks, or replaced crystals seated poorly.
Inspect the caseback and edges for missing screws, gaps, or uneven caseback seating.
Check the crown and pushers for play, stiffness, or corrosion—try winding and pressing them gently to feel for resistance.
Examine the strap ends and springbar area for compressed or torn gaskets where the strap meets the case.
Stop and consult a professional before any water contact if you see corrosion, stuck crowns, or a cracked crystal.
Start Small: Controlled Shallow Water Tests
Wet tests without panic: begin with splashes, not deep dives.Choose an inexpensive, modern watch that passed the visual inspection and feels mechanically sound.
Place the watch face-up in a shallow bowl of room-temperature tap water for 30–60 seconds, keeping it completely stationary.
Use a timer and avoid operating or pressing the crown or pushers while the watch is submerged.
Remove the watch, pat dry with a soft lint-free towel, and let it sit face-up for 10–15 minutes while you watch for any internal condensation or droplets on the crystal.
Note that this static soak can reveal gross leaks (for example, a cracked crystal or bad gasket will often show beads of water on the dial quickly) without exposing the case to pressure testing.
Avoid immersing vintage, high-value, or previously opened watches — those belong to a watchmaker for a proper pressure test.
Look for Internal Condensation and Functional Changes
See the fog? That's your red flag — quick checks to confirm leakage.Inspect the crystal and dial immediately after any water contact under strong light (daylight or a bright lamp) and a 10x loupe. Look closely for fogging, tiny moisture beads, or dark spots on the dial.
Check the watch’s functions right away. Verify:
Observe realistic signs: for example, if the second hand hesitates or the chronograph won’t reset after a shallow soak, treat it as a red flag.
Do not attempt to dry with heat. Keep the watch off, remove the strap if possible, place it in a dry, room‑temperature area with silica gel packs, and contact a professional. Persistent fog or functionality issues indicate water ingress requiring service.

Safe At-Home Alternatives and What to Avoid
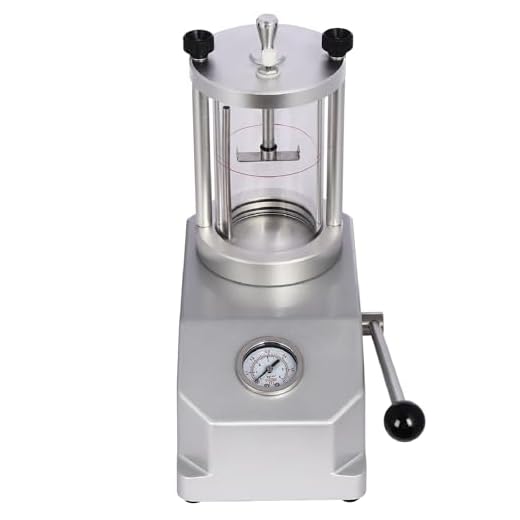
You don't need expensive gear — but know the limits of DIY testing.Avoid improvised pressure chambers or opening the case yourself. Recognize that consumer pressure testers exist but can be inaccurate and can damage seals if misused. Use only low-risk checks on inexpensive, modern pieces.
Try these simple, non-invasive options:
Prefer non-invasive checks (visual, short static soaks) and inexpensive trial methods. Skip DIY and schedule a professional pressure test and gasket replacement when in doubt.
When to Stop and Bring It to a Professional
Some tests are DIY; some risk permanent damage — here's when to quit.Stop testing immediately if the watch is valuable, vintage, has been opened before, shows corrosion, fails any home test, or displays condensation or functional faults. Bring the watch to an authorized service center or a competent watchmaker.
Request the following services and documents:
Expect a diagnostic fee. Prioritize trained technicians for dive watches, helium-release systems, or mechanical chronographs (for example, a vintage Omega Seamaster or a modern dive watch with HEV). Rely on proper lab testing — it is the only reliable way to certify water resistance.
Stay Safe — Know When to DIY and When to Seek Help
Home checks catch obvious issues but have limits; use conservative tests, protect valuable watches, and consult professionals for certification or repairs. Try these steps, share your results, and learn more.
Great guide — clear and practical. I liked the step about decoding the rating; I always thought 30m meant you could swim with it (facepalm).
Tried the shallow cup test on an old Seiko and it survived, but I didn’t press the crown underwater.
Question: does pushing the chronograph button once while submerged automatically void the rating, even for 100m watches?
Good catch on the 30m misconception — it’s super common. Pressing buttons underwater is risky: many watches are only rated for water resistance with crowns and pushers fully secured. Even 100m-rated watches can leak if you press buttons while submerged unless the manufacturer explicitly states it’s safe.
Yep — manufacturers usually warn against using pushers underwater. I learned that the hard way with a cheap chrono. Lost my sub-dial functionality 🙁
If you need button use under water, look for screw-down pushers or dive-specific models. Otherwise treat pushers as a no-go.
Pretty thorough write-up but a couple of points felt too cautious.
If the watch is 200m rated and the crown screws in, is the shallow test really necessary? Feels redundant for modern divers.
Curious where you draw the line between trust and paranoia.
I treat vintage and modern differently. My vintage sub gets left out of water entirely regardless of rating. Modern dive watches — sure, but only after a professional pressure test when in doubt.
Fair question. For modern, factory-sealed 200m divers with documented screw-down crowns, many owners skip basic home tests. The guide leans cautious because watches age — gaskets harden and previous service quality varies. If it’s new from authorized dealer, less need to test; if vintage or service history unknown, test or get a pressure test.
This section on visual/manual inspection rescued me. I found a tiny hairline gap around the caseback seam that I had completely missed.
The guide’s tip about checking the gasket condition by looking for cracks helped a lot — saved me a trip to the shop.
Thanks! 👍
Also check the crystal edges and the crown stem. My crown was slightly loose and that was the culprit for moisture later on.
Glad it helped! If you spot a gap, avoid any at-home water tests and take it to a watchmaker — a compromised caseback or gasket is best fixed professionally.
Love the ‘When to Stop and Bring It to a Professional’ section.
I once tried to DIY a gasket replacement and ended up bending the caseback — cost me way more to fix. Learned my lesson: some things are worth paying for.
Totally — gasket replacement can seem simple but caseback torque specs and proper seal seating matter. Good call on a pro for that job.
Same here. I tried to DIY a simple battery swap and messed up the O-ring. Now I only do batteries on quartz that are user-serviceable.
PS: If you do go to a pro, ask for a pressure test printout — it’s nice to have documentation that it’s been tested and passed.
A little skeptical about the at-home condensation check — waiting overnight for fog inside the crystal isn’t always reliable.
Sometimes condensation shows up only after a few hours of temperature change, not immediately.
Maybe mention a temp-change method (put watch in cool room then move to warmer) if people want to accelerate the test?
I do a quick test: keep the watch in a fridge for 20-30 mins (not freezing), then bring it into a warmer room and watch for fog. But don’t go overboard, like admin said.
That fridge trick is neat — thanks for sharing. Just don’t leave it near ice packs or humidifiers or you might invite other problems.
Great point. Thermal stress can reveal micro leaks more reliably. The guide’s intention was to keep things safe, but adding a note on controlled temp-change checks (cool then warm) could be useful — as long as owners avoid extremes that could damage the watch.
Thanks for the no-nonsense ‘what to avoid’ tips. The line about not using dishwashers, hot tubs, or high-pressure showers was gold. 😂
Also, tiny typo on the third paragraph of section 3 — ‘submergee’ instead of ‘submerge’.
Thanks — we’ll fix that typo. And yep: dishwashers and hot tubs are deceptive; water temp and pressure plus chemicals are a terrible combo for seals.
I once saw someone test in a pressure washer (why?!) — instant regret. The guide was right to call out high-pressure streams specifically.
Quick newbie question: the guide says “controlled shallow water tests.” How long would you recommend submerging a watch in a bowl of water for a basic check? 30s? 2 mins?
Don’t want to overdo it, but also want to be sure.
1 minute here too. If it passes, I still avoid any button/ crown use underwater unless it’s specified safe.
I usually do 1 minute and check immediately and after an hour. That seems to catch anything obvious without stressing the seals too much.
For a basic shallow test, 30–60 seconds fully submerged at room temperature is enough to reveal obvious leaks. Observe for bubbles during submersion and then watch for condensation over the next hour. If you suspect anything, stop and get a pro test.
Small PSA: when you do the shallow water test, try it with a cheap disposable camera near the watch so you can review the footage after — sounds silly but helped me catch subtle bubbling once.
Also: don’t use hot water. Learned that from someone else’s experiment. 😬
Creative idea with the camera! And yes — avoid hot water and temperature extremes; they expand seals and can create leaks that wouldn’t otherwise appear in normal conditions.
Totally agree on the hot water — never ever. Also try room-temp distilled water if you want to avoid mineral spots on the case.
Haha the camera trick is genius. I just stare at the watch and miss the tiny stuff. Will try this next time.
Random tip: wrap straps in plastic if you’re doing a shallow test and worried about leather. I ruined a strap once because I didn’t think ahead. 😅
Also, for metal bracelets, dry them thoroughly afterward or they’ll trap moisture under the clasp.
Good practical tips. Leather and fabric straps don’t like water; swapping to a rubber or nato for tests (or actual water use) is smart.
Yeah, I keep a cheap nato strap just for swimming/testing. Saves the nice leather from any risk.
Helpful guide, but I wish you’d included recommended torque specs for common casebacks or a list of tools pros use — would help identify when someone is cutting corners.
Also, small nit: the term ‘waterproof’ should be highlighted as obsolete — you did mention it but maybe bold it more 😉
Good suggestions. We avoided specific torque specs because they vary widely between brands and models, and wrong torque is dangerous. But adding a note about proper tool use and to look for service stamps/documentation is a great idea. And agreed — ‘waterproof’ is outdated terminology; we’ll emphasize that.
I appreciate the distinction too. Had a shop overtighten my caseback once and caused a hairline crack. Tools + training = important.
Yep, different brands have different threads and specs. Better to steer people toward reputable watchmakers rather than DIY torque tables unless they’re experienced.