Introduction: Clear the Fog, Save the Watch
This concise guide shows how to assess water damage, safely dry a foggy watch, replace seals, and test water resistance. Follow step-by-step methods for hobbyists and cautious DIYers to restore clarity and prevent recurring moisture problems using minimal household tools.
Requirements: What You’ll Need

Remove Water Inside a Watch: Easy DIY Fixes
Step 1 — Inspect and Decide: Is DIY Safe?
Not all watches are equal — when to risk it and when to call a pro.Begin with a careful inspection. Remove the watch from your wrist and blot external water with a lint-free cloth; avoid shaking the watch or pressing crowns and pushers. Photograph the watch—front, back, and sides—for reference.
Identify the watch: check model, age, and any water-resistance stamping on the case back (e.g., “100m” or “Water Resistant”). Note visible fog, beads under the crystal, or wetness around the crown, pushers, and case back.
Remove obvious power risks: remove the battery on quartz watches to prevent shorting and corrosion. Do not try to remove the movement on a mechanical watch unless you have experience—moisture and dust can irreparably damage gears and hairsprings.
Decide DIY vs professional repair using these quick rules:
Work in a well-lit, low-humidity area. Lay parts on a clean, organized surface and have silica gel packets ready. Plan whether you’ll only dry the case and seals or also replace gaskets. Record any resistance test results and serial numbers before proceeding carefully.

Step 2 — Open and Remove Immediate Moisture
Quick moves that can save a movement — but are they worth the risk?Open the case safely if you decide to proceed. Use a correct case opener or a thin case knife; pry gently at the notch and avoid gouging the case. Use a proper case wrench for screw-off backs.
Inspect the interior immediately for corrosion, brown residue, or pooled water. Photograph any damage for records.
Remove the battery right away on quartz watches and place it in a dry container. For most simple quartz movements, leave the movement in place while drying; avoid touching the dial or hands.
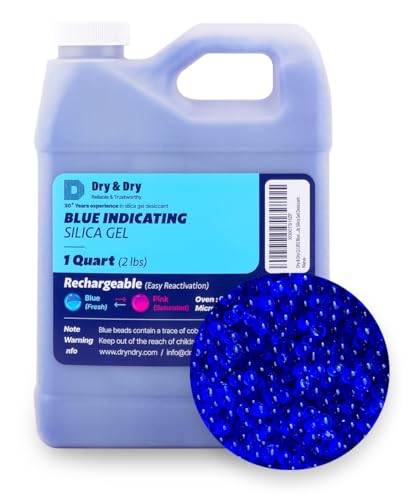
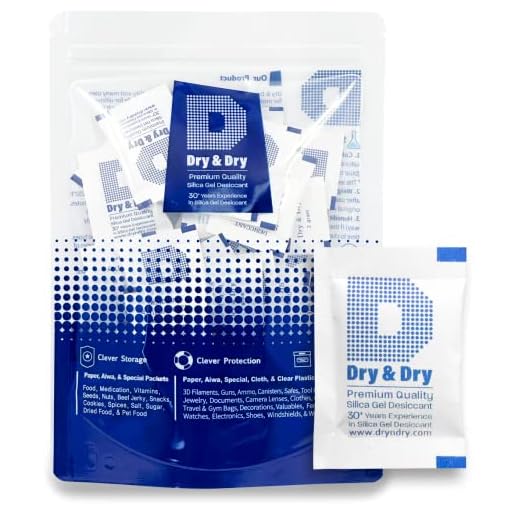
Pat damp areas with a lint-free cloth to lift visible moisture. Position the watch upright on a soft cloth and surround the case with desiccant.
Use gentle heat only if needed: apply a hair dryer on low from 20–30 cm in short bursts to aid evaporation; never exceed body-warm temperatures and avoid heat that can harm seals and lubricants.

Step 3 — Deep Drying Techniques
Silica gel, vacuum, or warmth — which actually works best?Escalate drying if moisture persists after initial desiccant treatment. Choose methods based on watch robustness: inexpensive sport pieces tolerate bolder steps; vintage or high-value watches deserve a watchmaker.
Place the opened case and non-sensitive components in an airtight container with fresh silica gel. Warm the container gently using a low-heat source such as a heating pad or sunlight filtered through glass. Keep temperatures under about 50°C to avoid degrading oils and gaskets.
Use a vacuum desiccator if available. Run a short vacuum cycle of a few hours to pull moisture from crevices.
Stop and consult a watchmaker if you see green or brown corrosion, sticky residue, or pitting—these often require ultrasonic cleaning or movement overhaul.
Document each drying attempt. Reassemble only when the interior shows no visible condensation for 48 hours. Replace silica gel between uses to maintain effectiveness.
Step 4 — Replace and Reseat Seals
A tiny gasket makes the biggest difference — don’t skimp here.Confirm dryness, then address all seals thoroughly. Inspect the crown gasket, case‑back O‑ring, crystal gasket, and pushers. Replace any gasket that is hardened, cracked, flattened, or compressed beyond recovery. Use correct‑size replacement gaskets from the manufacturer or a reputable supplier (for example: Seiko or Rolex replacement part numbers).
Lightly coat new gaskets with silicone watch grease to improve sealing and ease reassembly, but avoid over‑greasing—too much attracts dust and swells seals.
If you have access to a pressure tester, perform a wet or dry pressure test per device instructions to verify water resistance. If you lack a tester or the watch is high‑value, have a certified technician perform a professional pressure test and service.

Step 5 — Reassemble, Test, and Prevent
How to make sure fog never returns — surprisingly simple routines.Reassemble carefully and restore power: reinstall the movement or battery, screw down the case back, and secure the crown. Use proper tools and gentle, even pressure to avoid pinching the new gaskets.
Set the time and wear the watch for a short trial period. Move through daily activities for a few hours to let any trapped moisture reveal itself.
Replace gaskets according to manufacturer intervals and after significant impacts or battery changes. Avoid wearing watches in hot showers, saunas, or during water sports unless rated appropriately.
Store watches in low-humidity environments with occasional silica gel packets in the box. For high-humidity climates, use a small dehumidifying drawer. Maintain regular servicing every 3–5 years for mechanical watches; oil breakdown and gasket aging are common moisture-entry causes. If you ever detect persistent condensation, corrosion, or compromised performance, stop wearing the watch and consult a professional immediately. Early intervention can prevent costly long-term damage.
Conclusion: Quick Recap
Careful inspection, controlled drying, and proper gasket work remove fog and often restore water resistance; when unsure or corrosion appears, consult a pro. Try these steps, then share your results!
Okay, silly question incoming: if fog returns after reassembly, is that immediate evidence the seal is bad or could it be condensation from temperature changes? My watch fogged after a long cold commute once and then cleared back up at home — is that different than trapped moisture?
Sorry for the long comment, just trying to understand the difference so I don’t overdo repairs 😅
Also consider a pressure test if the watch is water-resistant and you want peace of mind — pros can do this cheaply and it confirms seal integrity.
Thanks for asking this — I learned the difference the hard way and would’ve liked to know earlier!
One trick: place watch in a small sealed container with silica for a day after reassembly if you’re worried. If fog still appears later in stable temps, time to inspect seals.
Not a silly question at all. If fog appears briefly when moving between cold and warm environments, that’s likely condensation from temperature change — the air inside the case condenses. If fog is persistent or appears even in a stable room, that’s trapped moisture and indicates a seal issue or remaining water inside. If it returns immediately after reassembly and in stable conditions, re-open and check for remaining moisture or improperly seated gaskets.
I had the same experience — commute fog clears at home. No need to panic unless it stays.
I followed Step 2 and opened the snap-back case of my quartz watch. Found a little puddle. Used a microfiber and paper towel to soak it up, then left it with rice (yeah yeah I know silica is better 😬). After 48 hours, the fog was way less but not gone. The guide’s section on replacing seals helped — they were crumbly and I replaced them using the gasket sizes mentioned.
A couple of notes:
– Rice works ok in a pinch but not ideal.
– Take pictures before you open anything so you remember how parts sit.
– Those rubber seals are cheap but crucial.
Thanks for the thorough steps!
Rice + watch = emergency mode, lol. Good on you for fixing the gasket. Where did you buy replacements?
Thanks for sharing your process, Hannah. Photos are a great recommendation — they save lots of head-scratching during reassembly.
Local watchmaker supplied the gasket set, Oliver. Online sellers also have them; just match dimensions.
Totally second the photo tip. Also, keep screws in a tiny dish so they don’t roll away 😂
And if anyone wants links for reputable gasket suppliers, I can add a short list in the comments.
This guide is super useful for hobbyists. Couple of extra things I do:
1) Work over a clean towel so tiny parts land softly.
2) Use a loupe to inspect for corrosion — sometimes it’s hidden.
3) If you see white powdery stuff (battery leakage), stop and get pro help.
Also, shoutout to the slow-drying method — patience pays off.
Agree on the towel. Saved me from losing a spring once. Also, gloves help keep oils off parts.
Thanks for these practical tips, Lucy. The battery leakage note is especially important — that can harm the movement quickly.
Solid guide — I actually tried the silica pack trick from Step 3 last weekend and it worked like a charm on my old Seiko. Took about 36 hours, no heat, and the fog was gone. One tip: put a tiny piece of paper under the caseback (if removable) so the watch sits slightly elevated above the silica — helps airflow.
Only downside: I panicked and used my hair dryer on low for 5 mins before reading the rest of the guide 😅. Thankfully no damage.
Good to hear that worked, Ethan — and thanks for the airflow tip, that’s a clever tweak. Going slow with no heat is usually safest.
Left them in for 36-40 hours, Maya. Checked at 24 but still a little haze. After 36 it was clear.
Glad it turned out ok! I burned a gasket once with heat, so your cautionary tale is appreciated. How long did you leave the silica packs in total?
Minor nitpick: the guide should stress using the right tools when opening screwback cases. I tried with a kitchen knife once (don’t ask) and nearly scratched the case. Buy or borrow a proper opener. Your local hobby shop might have one.
Hobby shops or watchmakers often sell or lend cases openers. Also, magnetic trays for screws are lifesavers.
Absolutely — using incorrect tools is a fast track to damage. I’ll add a recommended tools list and safety tips.
Magnetic tray yes!! Saved me from hunting screws under the couch for hours.
Little skeptical about the “no heat” advice — my grandfather swore by the oven trick at very low temp 🤨. Can someone explain why heat is risky? I’m not trying to start an Internet debate, just want the mechanics behind it.
I’ve seen crystal bezels crack with too much direct heat. Not worth the risk unless it’s a cheap beater.
Good question. Heat can warp plastic or rubber gaskets, expand parts unevenly, and damage lubricants in the movement. Even low oven temps are hard to control; hot spots can occur. The guide recommends passive drying (silica, ambient air) or controlled low-heat methods only if you know what you’re doing and the components involved.
If you ever try heat-based methods, use a purpose-built watch heater/stabilizer — pros use calibrated equipment, not ovens.
Grandpa hacks are great in a lot of cases, but watches are delicate. Even a small warp in a gasket can mean more water next time.
I gotta say — the step-by-step was chill and clear. Loved the checklist at the end. Also, small thing: add a note about crown positions (pulled out vs pushed in) when drying — I left mine pulled (thinking it’d dry faster) and then forgot to set the time 🤦♂️. Not a big deal but might help others.
Haha, same — I got distracted and missed a few days of daylight saving changes because my watch was paused. The struggle is real.
Good point, Carlos. Crown position can affect how moisture moves in/out of the case. I’ll update the guide to mention checking crown position before starting and before reassembly.
Would putting the crown in the neutral (pushed) position slow drying? Or is it safer to leave it slightly open?
Quick note: Step 4 mentions lubricating seals lightly. Don’t overdo it — just a tiny smear of silicone grease. I learned the hard way and used way too much and made the gasket slip out of place when closing the case 😩. Rookie mistake!
Yep, that’s a classic mistake. A little goes a long way. If the gasket slips, re-seat it gently and check alignment before complete closure.
Oof been there. I now use a cotton swab to apply a thin coat. Helps control the amount.
Question: Step 1 says inspect and decide if DIY is safe. What are the red flags that mean I should send it to a pro? I have a vintage watch with a cracked crystal but it still runs. Don’t wanna make it worse.
Agree with admin — plus if it uses rare parts or has a complicated chronograph movement, pro service is worth it. Vintage value > saving $50 for me.
Great question, Zoe. Red flags include: visible corrosion on movement parts, water that leaves residue or smells like salt (sea water), non-removable sealed casebacks without the right tools, or vintage pieces with collectible value. If the crystal is cracked and it’s vintage, I’d advise a pro — the seal might be compromised beyond DIY fixes.