
Why a Quick Rinse Makes a Big Difference
Salt, sand, and sunscreen left on a watch after a beach day cause real damage. Salt accelerates corrosion, sand scratches bracelets and bezels, and sunscreen clogs crowns and gaskets. Even water-resistant watches can suffer when grime sits in crevices and around seals.
A short, practical rinse stops problems before they start. This guide gives a fast rinse-and-dry routine you can do immediately after leaving the beach. It also explains simple checks and when to seek professional service for seals, movement issues, or visible damage. Quick action preserves function, finish, and value.
Follow these quick steps for peace of mind and to avoid costly repairs down the road in the weeks after exposure.


Know Your Watch: Water Resistance and Materials
Interpreting water-resistance ratings (what they really mean)
Factory ratings — 30m, 50m, 100m, 200m — tell you about pressure in lab conditions, not real-world seawater exposure. Quick rules of thumb:
Remember: saltwater speeds corrosion and dries gaskets. A 100m rating on a ten-year-old watch with unserviced seals is not the same as a new watch. For ocean days, aim for 100m+, and treat anything older or untested with caution.
Case materials, crystals, and finishes
Materials change how your watch tolerates salt and sand:
Crystals:
PVD or painted finishes can wear away where salt sits in crevices.
Common vulnerabilities & pre-rinse checks
Quick checks before any rinse — do these aloud:
Watches to avoid rinsing: non-water-resistant dress watches, vintage pieces with unknown service history, or watches with loose crowns/pushers. In those cases, gently wipe away salt with a damp cloth and visit a watchmaker for safe cleaning.
Gather the Right Tools: Simple Supplies for a Safe Rinse
A compact kit makes rinsing quick and confident — especially when you’re leaving the shore with sand in every crevice. Pack light, choose soft tools, and prioritize fresh water.
Travel-friendly rinse kit
Carry these basics in a small pouch or zip bag:
Supplies by strap type
Different straps need different care; bring one extra item for the strap you’ll be wearing:
A quick real-world tip: if you wear a leather strap to the beach, swap it for a rubber strap and store the leather piece in a silica bag until you’re home.
Handy optional tools
Small extras can save a return trip to the watchmaker:
What to avoid
Protect seals and finishes by skipping these:
With this kit assembled, you’ll be ready for the quick, safe steps to take right on the beach.
Immediate Steps at the Beach: What to Do Before You Leave
When you’re still at the shoreline or loading the car, every minute counts. Move deliberately but calmly — a quick, correct action now can prevent hours at the bench later.
Quick shoreline checklist
Practical tip from the shore
A buddy of mine rinsed his bracelet with a water bottle and avoided a trip to the jeweler — simple actions like a gentle flow and tightened crown really work.
Urgent troubleshooting signs
If you see any of the above, isolate the watch in a clean, dry pouch and seek professional help — do not try to force the crown or continue rinsing. Next, we’ll cover the step‑by‑step home rinse routine to safely remove salt and sand without risking seals or finishes.
Step-by-Step Home Rinse Routine: Remove Salt Without Risk
Step 1 — Soft rinse with lukewarm fresh water
Start with a gentle stream of lukewarm tap water to dissolve residual salt. Keep the crown fully seated or screwed down. Hold the watch face-down at a slight angle so water runs away from the crown and seals — imagine rinsing a camera lens, not blasting dirt out of delicate gaps.
Step 2 — Use a soft brush between links and around the caseback
With the crown secured, use a soft-bristled toothbrush or a purpose-made watch brush to sweep away salt from link gaps and the caseback. Use light pressure and short strokes; aggressive scrubbing can remove plating or polish.
Step 3 — Mild soap if needed (dilute and rinse)
If oily sunscreen or heavy salt residue remains, mix a drop of mild dish soap (Dawn) or baby shampoo in a bowl of lukewarm water. Dip the brush briefly, scrub gently, then rinse thoroughly until no soapy film remains — soap residue attracts dirt.
Step 4 — Detach bracelets to clean separately (when practical)
If you’re comfortable using a spring‑bar tool, remove metal bracelets to access end links and lugs. Clean the bracelet in the soap solution and rinse separately. If unsure, leave bracelet on and clean around the lugs instead.
Step 5 — Cotton swabs for crevices and around the crown
Use cotton swabs dampened (not dripping) to lift grit from tight spots, between bezel edges, and around the crown tube. Replace swabs often; they trap grit rather than smear it.
Step 6 — Final rinse and gentle water expulsion
Give a final lukewarm rinse, then gently shake the watch face‑down to expel trapped water. Pat with a microfiber cloth; avoid compressed air or forceful shakes that might push moisture inward.
Safety reminders
Next up: gentle drying and de-sanding techniques to finish the job without harming finishes or seals.
Drying and De-sanding: Gentle Methods to Prevent Damage
Blot — don’t rub
After your final rinse, start by blotting excess water with a clean microfiber cloth (MagicFiber or similar). Think of it like drying a camera lens: pat and lift rather than dragging. Rubbing can grind residual grit and scratch polished surfaces or push moisture deeper into gaps. Flip the watch face-down on the cloth so gravity helps pull water away from the crown and caseback.
Air-dry and use desiccants for trapped moisture
Move the watch to a shaded, well-ventilated spot on a soft, clean surface (cotton towel or microfiber). Avoid direct sun, car dashboards, or hairdryers — heat warps seals and fades straps. For straps or watches with tiny trapped pockets of moisture, speed drying safely with desiccants can help.

Place the watch (or removed strap) in a zip-top bag with a few silica packs for several hours — not against the crystal — and check periodically.
De-sanding: gentle dislodging
A small amount of sand can hide in hinges and lug gaps. Use these low-risk techniques:
Strap-specific handling
Leather and fabric straps need patience:
Metal bracelets and stiffness
If a bracelet remains gritty or stiff after cleaning, try working each link gently to redistribute lubricant. Persistent stiffness or rust at pin joints is a cue to seek professional ultrasonic cleaning and re-lubrication — a local watchmaker will disassemble, clean, and apply the correct lubricants to restore smooth action.
Post-Rinse Checks and When to Seek Professional Help
Quick post-rinse checklist
Run through this short checklist within 24–48 hours after drying to catch trouble early:
When to pressure-test
If you swam in saltwater, surfed, or your watch is over 5–7 years old, schedule a water-resistance/pressure test. A failing seal can let salt in slowly, causing corrosion that’s invisible at first.

A pressure test is the fast way to confirm the case and crown seals are still doing their job; many shops offer dry and wet-test options depending on the make and local equipment.
Clear signs to bring it to a watchmaker
Bring the watch in immediately if you notice any of these:
Service cadence & professional services
For frequent marine users: consider pressure testing every 6–12 months and a full service every 2–4 years. Watchmakers can perform ultrasonic cleaning, seal replacement, movement decontamination, and certified pressure testing — services that preserve longevity and prevent costly corrosion repairs.
Now that you’ve checked for trouble and flagged anything concerning, move on to the final wrap-up.
Fast Rinses, Lasting Watch Health
Prompt, careful rinsing and thorough drying are the simplest ways to prevent salt and sand from shortening your watch’s life. Remove salt and grit as soon as possible, follow a gentle home rinse routine, and use the right tools to avoid abrasion or trapped moisture.
Know when a problem exceeds DIY care: persistent fogging, sand in moving parts, or compromised seals need professional attention. Pack a compact rinse kit in your beach bag for peace of mind — a small spray bottle, soft brush, and microfiber cloth keep your watch protected and running well every time.
Hah, I almost always skip the dramatic gear and just do a careful rinse. But the article’s drying section is legit — air drying on a soft pad + gentle towel = no drama. The bit about not blasting compressed air onto seals? Thank you. I had a guy in a forum once advocate for that like it was rocket science 😂
Also — who else read the “Fast Rinses, Lasting Watch Health” subtitle and felt personally attacked? 😆
Glad you liked that point. Compressed air can force salt deeper or damage seals if used carelessly. Your rinse approach is exactly what we recommend for everyday beach exposure.
Agree — leave the compressed air to camera cleaning, not watch seals 😅
Also FYI: if anyone does want compressed air, make sure it’s low-pressure and aimed parallel to surfaces, not into gaps. But simple towel + silica is the safer route.
Totally — slow and steady, then professional check once a year if you ocean-surf a lot.
LOL that subtitle got me too. But seriously, little habits add up — fast rinse today, long life later.
Really appreciated the “Know Your Watch” and materials section. I didn’t realize my bracelet was a mix of plated metal and cheap pins — salt ate at the pin ends real fast.
Question: the article lists an “Essential 3-Piece Watch Cleaning Kit, USA Made” and a “Professional Watchmaker Multi-Brush Cleaning Kit Set” — is the 3-piece enough for light rinses, or should I splurge on the multi-brush set? Typo: “plated” got autocorrected twice 👀
If you’re on a budget, get the 3-piece first. You can always add a multi-brush later; the extra brushes are a nice-to-have but not essential for occasional beach-goers.
For light rinses and basic maintenance, the Essential 3-Piece kit is fine — it covers cleaning, and it’s compact for travel. The Professional Multi-Brush set is worth it if you do deeper cleans (bracelets, tight lug areas) or you work on multiple watches.
Great tips! Quick question: after rinsing, is it okay to pop my watch into a bag with a 15-Pack 20g Transparent Silica Gel Desiccant Pack to speed up drying, or should I avoid enclosing it? I’m paranoid about trapping moisture inside the clasp or case.
Also, tiny typo in the ‘Drying and De-sanding’ header — not a biggie but noticed it.
Good question, Emily. You can place silica packs in the same sealed bag as the watch if the watch is completely closed (crown screwed in, no obvious gaps). The packs will absorb ambient moisture, not moisture trapped inside a sealed case. If the watch is suspect (water ingress), don’t seal it — seek professional help.
I put silica packs around (not touching delicate finishes) and leave the bag partly open for the first hour, then seal it later. Helps with straps too.
Solid rundown. I’m not a super-careful person, so the “Immediate Steps at the Beach” section was the most useful for me — rinse quick, towel dry, do a more thorough rinse at home.
I have a Casio Men’s MDV106-1AV 200M Black Dive Watch (mentioned in the article) and it handled everything fine, but I still did the home rinse. The Lumirio Watch Pressure Tester sounds tempting but seems pricey — anybody have experience with it?
The Lumirio tester is a good investment if you often swim in salt water or do independent pressure checks — saves you trips to a shop. But for occasional beach trips, following the rinse routine and periodic professional checks is usually enough.
If you’ve got a Casio MDV106 like Marcus, honestly it’s pretty bulletproof. I only buy pressure testers if I’m fixing/servicing watches for others.
I second the meetup idea — some watch clubs have testers you can borrow or use for a small fee.
I used a Lumirio at my local watch meetup once — it’s accurate and fast, but yeah, expensive for casual users. Consider a simple professional pressure test every year instead.
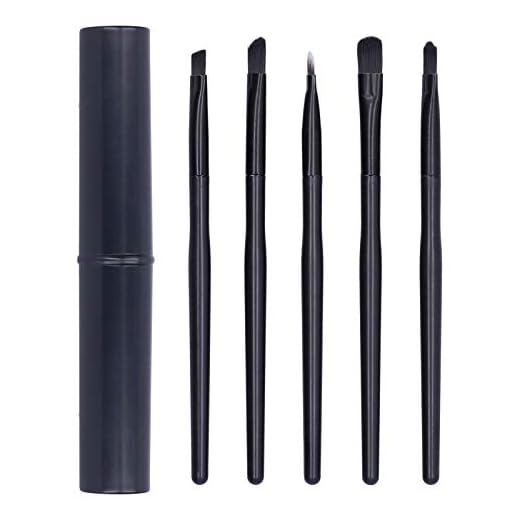
I liked the product roundup. I’ve used the Professional Watchmaker Multi-Brush Cleaning Kit Set for bracelets and it makes a huge difference removing sand from crevices. Paired it with the Essential 3-Piece kit for the crystal and bezel touch-ups.
Also ordered a 15-pack of silica gel for travel kits after reading this. Funny how a tiny pack can feel like a tiny guardian angel for your watch 😄
Same here — a small hard case is worth it. Also, wash the brushes with mild soap occasionally to avoid salt buildup.
Nice combo, Noah. Brushes for hardware, small kit for delicate parts — that’s the balance we intended. Glad the silica packs are working out!
How do you store the brushes? I keep mine in a small zip pouch but worry about bristles getting bent.
I keep mine in a hard tube case so bristles stay straight. Works great when traveling.
Great article — saved me from a beach-day disaster! I followed the “Immediate Steps at the Beach” section after getting sand stuck under my strap and the Step-by-Step Home Rinse Routine really helped.
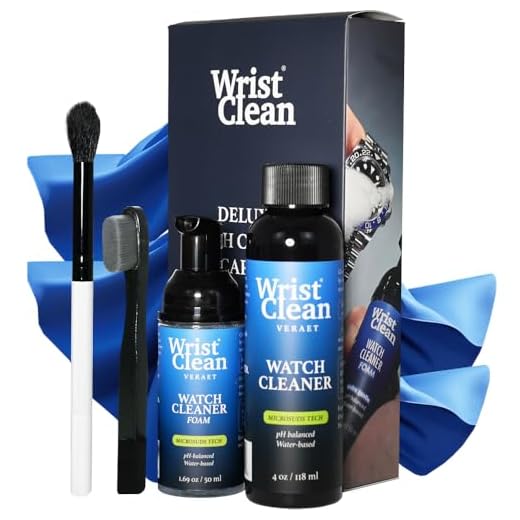
I used the Deluxe Watch Cleaning Kit with Microsuds Tech like you recommended and a few of those 20g silica gel packs afterward to dry it out. Pro tip: leave the watch on a soft towel with silica packs around (not inside the case) for a few hours.
Would’ve loved a quick checklist at the end though — something to print and stuff in my beach bag. 😅
Agree on the checklist — I made my own after reading this. Also, small note: don’t put silica directly under leather straps unless you want a stiff strap later.
Nice tip about silica placement, Sarah. I learned the hard way with a leather NATO strap — oops 😅
Thanks for the feedback, Sarah — love the checklist idea. We might add a printable pocket checklist in the next update. Glad the Microsuds kit worked for you; keeping silica packs nearby is a smart move.