This step-by-step guide provides easy-to-follow instructions for changing the time zone on a dual-dial traveler’s watch. It is specifically designed for frequent travelers who need a convenient way to adjust the time to different time zones.
Timekeeping for the Jetsetter

Locate the time zone adjustment button
Look for a small button on the side of the watch that is specifically used for adjusting the time zone. Press the button to activate the time zone adjustment feature. The button may be labeled with an abbreviation such as ‘TZ’ or ‘T-Zone’. Once activated, the watch will display the current time zone setting.
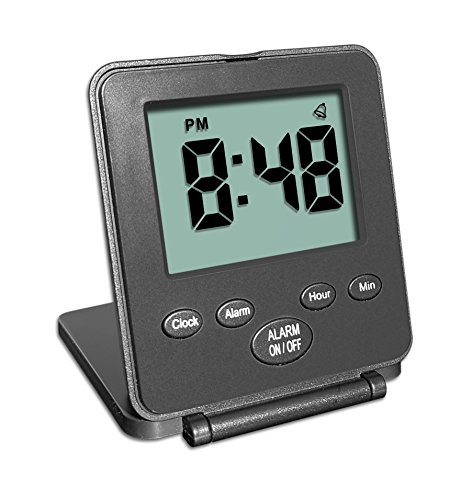
For example, on a digital watch, you might find a button labeled ‘TZ’ near the bottom right corner of the watch face. Press this button to cycle through different time zone options. Each time you press the button, the watch will display the current time zone setting, such as ‘GMT’, ‘EST’, or ‘PST’. Release the button when the desired time zone is displayed.
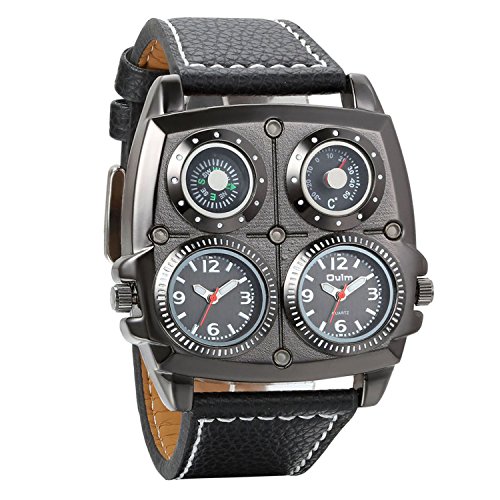
On an analog watch, the time zone adjustment button is commonly a small, protruding button located on the side of the watch case. Gently press this button to activate the time zone adjustment mode. As you press the button, the watch hands will move forward or backward to indicate different time zone settings. Continue pressing the button until the desired time zone is reached, and then release the button to set the watch to that time zone.
Remember to consult your watch’s manual for specific instructions as the location and labeling of the time zone adjustment button may vary depending on the model and brand.
Press and hold the time zone adjustment button
- Press and hold the time zone adjustment button for a few seconds to activate the time zone adjustment mode.
- Once you press and hold the button, you will notice the watch display enters a setup mode, indicating that you are now ready to adjust the time zone.
To activate the time zone adjustment mode:
- Locate the time zone adjustment button on your watch.
- Press and hold the button for a few seconds.
- Watch the display closely for any changes.
- Once the display enters the setup mode, release the button.
Now that you have successfully activated the time zone adjustment mode, you can proceed with adjusting the time zone according to your preference.


Navigate to the desired time zone
To navigate to the desired time zone, follow these steps:
- Enter setup mode on your watch.
- Use the watch’s buttons or crown to navigate through the available time zones. Press the up or down button to scroll through the list.
- Example: Press the up button to move to the next time zone in the list.
- If your watch has pre-configured time zones, select the desired one from the list by pressing the select or enter button.
- Example: Press the enter button to choose “New York” if that is your desired time zone.
- If your watch requires manual adjustment of the hour and minute hands, use the crown to move them to the corresponding positions.
- Example: Rotate the crown clockwise to move the hour hand ahead and align it with the desired time zone.
- Note: Some watches may require you to press and hold a button to switch between adjusting the hour and minute hands.
- Once you have adjusted the time zone or selected it from the list, exit setup mode to save the changes and return to normal operation.
- Example: Press the mode button to exit setup mode and return to the watch’s main screen.
- Verify that the watch is displaying the correct time in the desired time zone.
By following these simple instructions, you can easily navigate to the desired time zone on your watch, ensuring accurate timekeeping no matter where you are.


Select the correct time zone
To ensure that you have selected the correct time zone on your watch, follow these simple steps:
- Find the desired time zone: Press the time zone adjustment button on your watch until you reach the correct time zone. This may involve scrolling through a list of options or using arrows to navigate to the appropriate zone. Take your time and double-check that you have chosen the correct one.
- Confirm your selection: Once you have found the desired time zone, press the time zone adjustment button again. This will confirm your selection and let the watch know that you are ready to update the time.
- Wait for the update: After confirming your selection, wait for a few seconds to allow the watch to update the time. The watch should automatically adjust and display the correct time based on the new time zone you have selected.
By following these steps, you can ensure that your watch accurately reflects the correct time zone and helps you stay on track, no matter where you are in the world.


Verify the time zone change
To verify the time zone change, you need to check the watch display to ensure that the time has been updated correctly. Look at the watch face and make sure that it shows the current time in the correct time zone. For example, if you have just traveled from New York to London, the watch should display the local time in London instead of New York’s time. Take a moment to compare the watch display with the current time in your location to confirm the accuracy of the update.
If you find that the watch display is not showing the correct time zone, you may need to make further adjustments. To do this, follow the previous steps you took to change the time zone initially. For instance, if you are using a digital watch, you might have navigated through the settings menu to locate the time zone option and set it accordingly. Repeat these steps and ensure that you select the correct time zone for your current location. Once you have made the necessary adjustments, check the watch display once again to make sure that the time now reflects the accurate time zone. By double-checking and making any required adjustments, you can be confident that your watch is displaying the correct time in the appropriate time zone.


Final Thoughts
In conclusion, mastering the art of changing the time zone on a dual-dial traveler’s watch allows for effortless adjustments to different time zones during your travels. With these easy steps, you can ensure that your timepiece always matches the local time, keeping you on schedule and organized no matter where you are in the world.
Time Zone Adjustment Tips
The Ins and Outs of Setting and Utilizing a Dual Time (GMT) Watch – Watch and Learn #10
Step-by-step guide for utilizing the features of dual-dial traveler’s watches
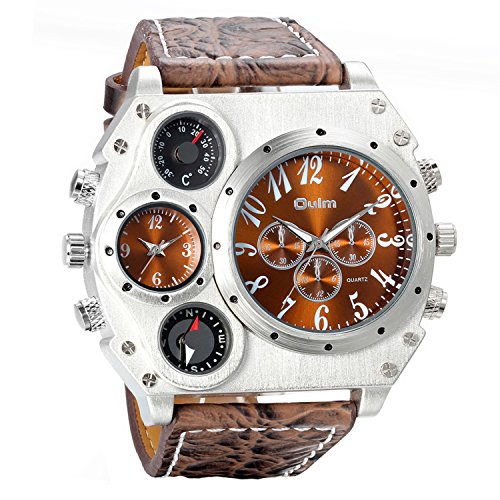
- Adjust the time: Start by pulling out the crown (the small knob on the side) and rotate it clockwise or counterclockwise to set the time on both dials. Keep in mind that one dial is for the local time and the other for a different time zone, so set them accordingly
- Set the date: If your dual-dial traveler’s watch has a date function, you can adjust it by pulling the crown further and rotating it to change the date display. Make sure to set it correctly for each dial
- Switch between time zones: To switch between time zones, you can use the additional buttons or feature provided by the watch. This may involve pressing a specific button or operating a special function in order to adjust the secondary dial to a different time zone
- Use the secondary dials for reference: The secondary dial on a dual-dial traveler’s watch is particularly useful for keeping track of time in a different time zone. You can set it to the time of your destination or any other location you want to monitor
- Keep the watch wound or charged: If your dual-dial traveler’s watch is automatic or battery-powered, make sure to keep it wound or charged to ensure accurate timekeeping. Follow the manufacturer’s instructions to keep your watch functioning properly
Frequently Asked Questions about Dual-Dial Traveler’s Watches
Are there any limitations or disadvantages to consider when purchasing a dual-dial traveler’s watch?
Yes, there are limitations and disadvantages to consider when purchasing a dual-dial traveler’s watch.
- Cost: Dual-dial traveler’s watches are often more expensive compared to regular watches due to the additional mechanism and functionality they offer.
- Complex Design: The dual-dial feature can make the watch design more intricate and complex. This can potentially make it difficult to read the time or use other functions, especially if the watch has small dials or crowded displays.
- Size and Weight: Dual-dial watches can be bulkier and heavier compared to simpler watches, which may not be ideal for those seeking a lightweight or minimalist timepiece.
- Maintenance and Repair: Dual-dial watches tend to have more intricate movements and mechanisms, which can make maintenance and repairs more challenging and costly. It may be necessary to find a specialized watchmaker for any servicing needs.
- Learning Curve: Getting used to reading and interpreting multiple dials may take some time. It can be confusing initially, especially if the watch has additional complications, such as a world time function or multiple time zone displays.
- Limited Functionality: While a dual-dial traveler’s watch offers the convenience of displaying multiple time zones, it may lack some advanced features found in more specialized travel watches. For example, it may not have built-in alarms, chronographs, or comprehensive world time functions.