
Remove a Watch Bezel Safely — Fast and Flawless
Learn a careful, six-step method to remove most watch bezels without marring the case or crystal. Surprisingly, a slip can ruin a $5,000 watch in seconds. I’ll guide you patiently, clearly, and quickly so you feel confident and safe today.
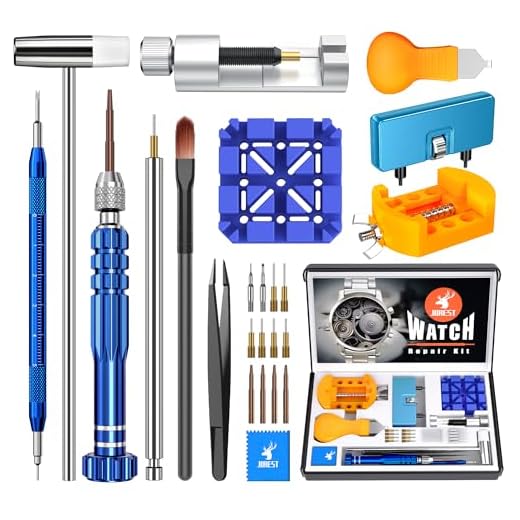
What You’ll Need

Step 1 — Inspect the Bezel and Locking Method
Don’t dive in blind: is it snap-on, screw-down, or friction-fit? Knowing this saves watch heads from disaster.Inspect the watch closely under good light or a loupe. Look for tiny notches, slots, screws, or a visible gap between the bezel and case. Check for a locking lip or spring tab that holds the bezel in place.
Look for:
Compare the model number or manufacturer markings online if unsure. Photograph the watch from multiple angles and note bezel orientation so you can return parts exactly as found.
Step 2 — Prepare and Protect the Watch
A little tape and care now means no polishing nightmares later — protect everything.Clear and clean your workspace. Lay down a soft, non-slip mat (microfiber or silicone) so small parts won’t roll away. Remove the strap or bracelet to give full access to the bezel—unscrew spring bars or use a pin tool as needed.
Apply narrow strips of masking tape (3–5 mm) over the crystal edge and along the case where tools might slip; this prevents scratches and preserves the finish. For watches with a loose crown or exposed movement, either remove the caseback or engage the crown guard to protect internals.
Wear nitrile gloves to avoid skin oils, and use a loupe for close inspection and steady work. These protections make bezel removal more predictable and dramatically reduce the chance of cosmetic damage.

Step 3 — Use the Right Tool and Technique
Not all prying is equal — choose the gentlest effective method and avoid brute force.Select the removal method based on bezel type and available gap.
Place the tool at a secure point (for example, at a visible gap near 2 o’clock) and apply even, controlled pressure. Work incrementally by prying at several points around the circumference to reduce stress. Avoid using metal spudgers directly on polished surfaces without protection—pad them with tape or cloth if unavoidable. Apply low, controlled heat (hair dryer or heat gun set back) only when necessary to slightly expand metals; monitor gaskets and finishes to prevent damage.
Step 4 — Remove the Bezel Slowly and Safely
One careful notch at a time — like opening a treasure chest without the crowbar.Work around the bezel methodically: if prying, lift a small amount at one point, then move to the opposite side to balance stress and avoid bending the ring.
Loosen screws progressively in a star pattern for screw-retained bezels rather than fully removing one screw at a time.
Stop and reassess if the bezel resists; do not force it. Reapply protection, clean visible corrosion, or apply a tiny drop of penetrating oil to metal-on-metal joints well away from gaskets and seals.
Use an example: balance two small lifts opposite each other to gently walk the bezel free — this often prevents sudden springing.

Step 5 — Clean, Inspect, and Service the Exposed Areas
Surprising payoff: you’ll often find grime, dried gaskets, or hidden corrosion — now’s the time to fix it.Inspect the case top, gasket, and underside of the bezel immediately. Use a blower and soft brush to remove dust and debris; avoid breathing on the movement. Wipe residues with a lint-free cloth dampened with 90%+ isopropyl alcohol for steel or plastic surfaces.
Check the gasket for cracks, flattening, or hardened sections and replace if compromised to preserve water resistance. If you spot corrosion, gently lift buildup with a plastic pick and soft brush; avoid metal picks or abrasive pads that score surfaces.
Document any parts that need replacement and note seating positions or torque settings for reassembly. For example, photograph the gasket groove and bezel alignment so you can restore the original orientation during reinstallation.
Step 6 — Reinstall, Test, and Final Checks
Putting it back together is as important as taking it apart — avoid common reassembly mistakes.Re-seat the gasket if removed or replace it, ensuring it lies evenly in the groove. Press it gently so it sits flush without twists or folds.
Align the bezel correctly — match any indexing marks to the dial or case (for example, set the diver’s zero triangle to 12 o’clock). For click bezels, ensure the spring or detent sits in its notch before closing.
Reapply light, even pressure to snap or press the bezel back in, or tighten screws to the manufacturer’s recommended torque using a torque driver.
Clean fingerprints and store the watch on a soft surface for a final visual check.
You’re Done — Well Done
Follow these six steps and you’ll remove and replace a watch bezel with minimal risk. Try it, share your results, and if unsure stop and consult a watchmaker to protect valuable pieces—your careful work preserves both function and value safely.
This guide is exactly what I needed. I was terrified to try removing the bezel on my grandma’s seiko, but the clear steps and the focus on protecting the crystal made it doable.
Couple of things I did differently:
1) Used painter’s tape + a credit card as a wedge (worked fine)
2) Cleaned the exposed area with a Q-tip and isopropyl before doing any service
Thanks — bookmarked! 😊
Nice — grandma’s watches are always the trickiest. You inspired me to try this on a funky old piece in my drawer.
Thanks for sharing your process, Laura — using a credit card as a wedge is a clever, low-risk trick. Good call on the isopropyl and gentle cleaning.
This is a solid guide. Two small suggestions: add recommended torque or pressure ranges for snaps (lol I know that’s vague) and maybe a quick tool kit list for beginners — what exactly to buy to avoid improvising with kitchen utensils.
Great suggestions. We’ll add a beginner’s tool kit with recommended, affordable tools and a note on applying even, gentle pressure (no exact torque values since bezels vary).
Thanks — a kit would make the whole thing less intimidating for newbies.
Noted — adding a kit link and DIY-safe alternatives section.
Yes to a kit list — it would have saved me from using a butter knife back in the day 😂
Loved the photos in Step 1 showing locking mechanisms. Helped me identify my bezel as snap-on vs. screw-down. I had one question though — after removing the bezel, my insert had a tiny hairline crack. Should I replace the insert before reinstalling or is it okay to put it back?
Agree with admin. I replaced a cracked insert once — so much cleaner look. Also, cracked inserts can make the bezel seating uneven.
If you post the watch model, someone might point you to compatible inserts or suppliers.
Thanks — appreciate the quick advice. I’ll order a replacement insert.
If the crack is hairline and cosmetic only, you could reassemble for now, but over time it may allow moisture/dirt in. Replacing the insert is the safer long-term fix.
Heads up: if you’re working on water-resistant watches, do NOT test water resistance after bezel work unless you have a proper pressure tester. I ruined a watch by assuming reassembly kept seals intact. Learned the hard way 😞
We’ll update the guide to emphasize that homeowners should not rely on DIY water tests.
Absolutely — Step 6 recommends testing, and adding a clear callout about professional pressure testing for water-resistant watches is a must. Thanks for sharing your experience.
Yup — lesson burned into me. Don’t skip the test.
Agree. If you can’t test it, avoid submerging until a watchmaker checks the seals.
Also, when in doubt, get a watchmaker to reseal — inexpensive compared to a flooded movement.
I’m not a watch person but needed to do this for a cheap gift. The guide’s protective steps (tape and cloth) were lifesavers. One minor nit: the sequence for re-lubing the gasket could use more detail.
I use a toothpick to apply a tiny bead of grease. Less is more.
Good point — Step 5 mentions inspection and service but we can add a short sub-step about applying a thin layer of silicone grease to rubber gaskets and how much is enough.
Uh, I managed to pop off a bezel but then couldn’t get it back on straight for the life of me. Maybe the guide could add a small section on alignment marks or clockwise vs counterclockwise seating? I spent 20 minutes fiddling 😅
Great feedback. Step 6 mentions testing and final checks, but we can expand that to include alignment tips and how to check rotation stops. Thanks!
Great step-by-step — worked like a charm on my old diver. Quick tip: if your bezel feels stuck, try warming the case slightly with a hairdryer on low before prying. Saved me from scratching the lugs!
Good call. I usually drape a microfiber first so the heat’s less direct. Also helps prevent fingerprints 😅
Does anyone know the max temp to be safe with silicone gaskets? I didn’t see a temp guideline in the steps.
Nice tip, Ethan — gentle heat can help loosen adhesive but keep it low and brief to avoid damaging seals. Glad it worked for you!
Tried this on a cheap chrono and the chronograph pusher got sticky after reassembly. Any ideas? Followed Steps 1–6 exactly though. 🤷♀️
Ohhh okay I’ll try that — thanks!
Sticky pushers can be caused by dust or a little leftover grease in the pusher tube. Try removing the caseback and carefully cleaning the pusher tubes and surrounding area with a q-tip and isopropyl. If unsure, a service tech can do a quick check.
Also check the spring under the pusher — if it’s slightly bent or out of place it can bind. Mine was like that once after a bezel job.
Question: For bezel inserts with lume, is it okay to use isopropyl on the edge? I don’t want to dull the lume.
Isopropyl on the metal edge is usually fine, but avoid soaking the luminous paint. Use a lightly dampened swab and avoid scrubbing across the lume. If in doubt, use distilled water or a specialty cleaner.
Just wanted to say the safety reminders in Steps 2 and 4 prevented me from cracking the crystal — I used the plastic pry tool instead of metal. Saved $$$. Thank you!
FUNNY story: used the guide, removed the bezel, cleaned the gunk, and then realized I’d been trying to fix the wrong watch — roommate had the real Seiko the whole time 😂
Anyway, the method is solid. The only caution I’d add is to be extra careful with thin vintage bezels — they can deform easily.
Thanks all — adding tool alternatives (wood/nylon) to Step 3 and a vintage caution note.
Yup — wooden toothpicks saved a 1950s case I thought was goners.
Ha! Classic mix-up. Thanks for the vintage warning — we’ll add a note about thin bezels and recommending ultrafine tools and minimal force.
Storytime lol. For vintage pieces I use wooden or nylon picks first to avoid bending metal.
Wooden picks are underrated — good shout.
Short and useful. Step 3 (right tool) should be underlined in every bezel guide — a butter knife isn’t a tool, it’s a weapon 😆