Why Fit Matters: Get Comfortable, Accurate Tracking
Choosing the right chest strap size is about more than comfort. A well-fitted strap improves heart-rate accuracy, reduces movement artifacts, and helps you trust your data during workouts. It also prevents chafing and skin irritation that can cut training short.
Proper fit supports performance wear too. Compression and placement affect breathing and posture, so the right size helps you move naturally and safely. Good fit reduces injury risk from poor alignment or distraction.
This guide gives practical, hands-on advice. You’ll learn how to measure, read size charts, adjust straps, and troubleshoot common fit problems. Follow simple steps and tips to find a secure, comfortable fit for better training results every time. Start now.
Know Your Options: Types of Chest Straps and How They Differ
Understanding the variety of chest straps helps you pick the right fit from the start. Below are the common types, what sizing looks like, materials and closures they use, where fit matters most, and practical trade-offs you’ll face.
Elastic heart-rate monitor straps
These are the classic bands used for accurate heart-rate data (think Polar H10, Garmin HRM‑Pro, Wahoo TICKR).
Sizing approach: usually based on under-bust circumference; many are one-size-with-adjustment.
Materials & closures: elastic or silicone with snap buttons or small plastic clips.
Fit focus: electrode/sensor must sit snugly against skin under the sternum; too loose = signal drop, too tight = breathing restriction.
Trade-off: maximize snugness during intervals; loosen slightly for comfort between sessions.
Compression straps and athletic harnesses
Used for stability, posture support, or impact protection in sport (compression tops like 2XU or strapped harnesses for weightlifting).
Sizing approach: garment sizes (S–XL) or numeric chest measurements.
Adjustable, breathable shoulder straps that help improve posture, reduce hunching, and enhance chest alignment when worn regularly. Lightweight and discreet enough to wear under clothing for daily posture training.
Fit focus: under-bust band stability and sensor placement (if integrated) — poor cup fit can displace sensors.
Trade-off: great for convenience and multi-hour wear, but harder to fine-tune sensor position separately.
When to seek specialized options or professional fitting: post-surgical patients, pregnant athletes, very large-chested users, or those with scoliosis should consult clinicians or fitting specialists — the wrong strap can worsen discomfort or compromise data. Next, we’ll cover practical measuring techniques so you can match these strap types to your exact measurements.
2
How to Measure Your Chest Correctly: Tools and Techniques
Tools you’ll need
A soft cloth tape measure (flexible sewing tape), a full-length mirror or partner, a smartphone camera (for photos to check level), and something to write your numbers down. A partner makes it easier to get perfectly level measurements, but you can do this solo with a mirror.
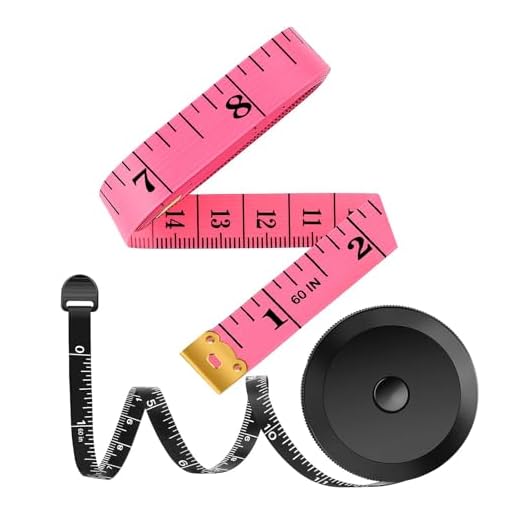
Best Value
iBayam 2-Pack Double-Sided 60-Inch Tape Measures
Two styles: retractable and soft fashion tape
A 2-piece measuring tape set including a soft 60-inch pink tape and a retractable black tape, both marked in inches and centimeters. Portable and accurate for sewing, body measurements, crafts, and home use.
Broad chest: measure twice and prioritize under-bust; go up one size if between numbers to avoid compression.
Barrel chest (thick ribcage): expect higher under-bust numbers; choose straps with extra adjustment range.
Small ribcage with larger bust: record both under-bust and full-chest; choose a strap where sensor position can be fine-tuned independently of band tightness.
Asymmetry or postural issues: measure both sides and note the tighter side for better strap placement.
What to record and when to measure
Record multiple readings (at least two under-bust, one full-chest, and one inhaled value) and note preferred strap placement (under sternum, higher on torso). Measure while wearing the clothing or padding you intend to use with the strap (sports bra, wetsuit, compression top) — those layers change fit and will give the most reliable final size.
3
Choosing the Right Size: Reading Size Charts and Making Smart Choices
How to read different brands’ size charts
Size charts aren’t standardized—brands sometimes list under-bust (band), full-chest (bust), or a combined “fit range.” Match the measurement you took to the chart’s labeled metric. If a chart shows a range (e.g., 70–85 cm), aim to sit near the middle of that range for best comfort and stability. Example: Polar H10 lists band circumference; Wahoo TICKR gives an adjustable range—compare your under-bust number directly to those values.
What “stretch range” vs “adjustable range” means
Stretch range: how far the fabric will elastically stretch (important for neoprene/elastic blends).
Adjustable range: the strap’s buckle/loop adjustment limits.
If your number is inside the stretch range but outside the adjustable range, the strap may fit but won’t be tunable—prioritize adjustable range when in doubt.
Materials: elastic vs. neoprene and the fit impact
Elastic (woven/nylon) straps: lighter, more breathable, more micro-adjustable—good for long runs. Neoprene/cushioned straps: softer against skin, resist slipping under sweat, but bulkier and less breathable—better for cold-weather or camera harness use.
Real-world note: athletes who sweat a lot often prefer woven elastic (e.g., Wahoo TICKR), while triathletes who need a snug, stable fit in wetsuits like denser straps (Polar H10-style pads).
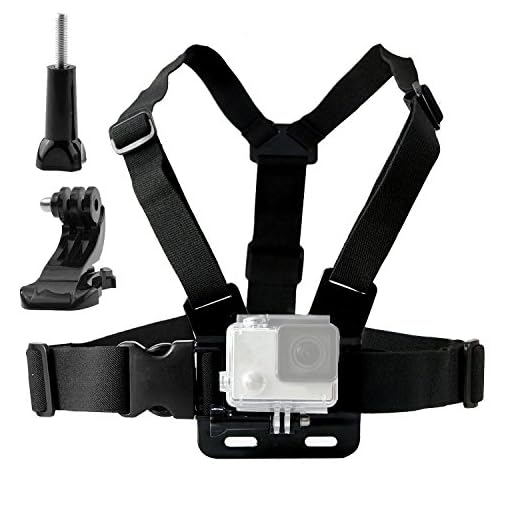
Must-Have
TEKCAM Adjustable Chest Harness Mount for Action Cameras
Fits wide sizes; compatible with many action cameras
An adjustable chest strap and J-hook mount that lets you capture hands-free POV footage while biking, skiing, boating, or riding. Includes aluminum thumbscrew and fits over jackets; wipe metal parts dry after water use to avoid rust.
Between sizes: choose the smaller size if accuracy is the priority (snug contact). Size up for multi-hour comfort or when layering (wetsuit, thick sports bra).
Wide ribcage: pick models with longer adjustable ranges or those explicitly labeled “XL/large” (Garmin HRM-Pro offers wider fit).
Large bust: prioritize under-bust measurement and straps with independent sensor positioning so the band doesn’t ride up.
Pregnancy/body changes: size up and use extenders; choose straps with soft materials to avoid pressure on sensitive areas.
Consider extenders or aftermarket shortening kits if you’re just outside the range—extender kits are common for older devices and inexpensive.
Returns, reviews, and try-before-you-buy
Before buying, check reviews for comments about fit on specific body types and real photos. Confirm the seller’s hygiene/return policy (unopened or washable parts often accepted). When possible, try at a local bike/sport shop or borrow from a friend—fit is personal and often easier to judge in-person.
4
Fit and Comfort: How Proper Fit Affects Performance and Skin Health
Why fit changes accuracy, breathing and movement
A chest strap that’s too loose moves; one that’s too tight pinches. Movement breaks electrode contact and creates noisy heart-rate data; pinching restricts breathing and can cause pressure sores. Think of the strap as a precision tool: it must stay flush against the skin over the sternum to read clean ECG signals while letting the ribcage expand freely during heavy breathing.
Quick fit-test: short sessions to trial fit
Put the strap on, moisten the electrodes per the manufacturer, then test for 5–10 minutes using real motion:
Walk briskly for 2 minutes to check slippage.
Jog or sprint for 3 minutes to reveal bounce.
Raise arms and simulate cycling position to see if the band rides up under a sports bra or wetsuit.
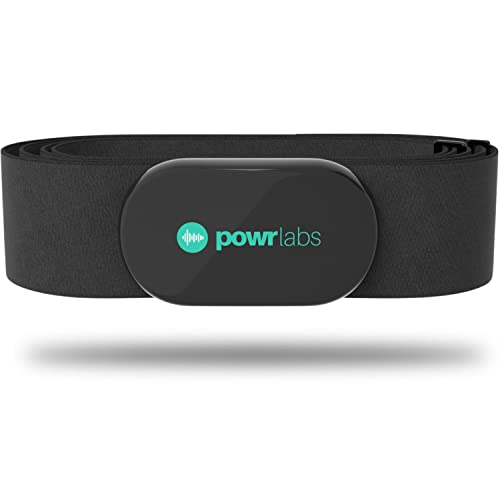
Editor's Choice
Polar H10 Accurate ANT+ Bluetooth Heart Rate Sensor
Industry-leading accuracy with multiple connection options
A highly accurate chest heart rate sensor known for precision and reliable data, supporting Bluetooth, ANT+, and 5 kHz connections plus internal memory. Comfortable strap with improved electrodes and waterproof construction for versatile training use.
Good fit: a snug, even pressure across the band; sensor stays centered; breathing feels unimpeded; no pinching or hot spots.
Problem signs: slipping/rotation, pinching at the buckle, numbness/tingling, red streaks or blistering, or the sensor losing connection when you move.
Materials, padding, and placement
Choose fabrics and padding to match your activity:
Lightweight elastic/nylon: breathable for long runs; common on Wahoo TICKR-style straps.
Neoprene/cushioned pads: reduce pinpoint pressure and resist slipping in wet conditions. Padding should sit beneath the sensor and along areas that contact bony ribs. Center the sensor under the sternum — off-center placement increases motion artifact.
Anti-friction and skin-care strategies
Reduce irritation with practical tactics:
Use moisture-wicking straps and wash them regularly to remove salt buildup.
Apply an anti-chafe balm (BodyGlide) sparingly to rubbing hot spots — avoid heavy creams that form a barrier at electrode contact points.
If lotions interfere with readings, try a thin fabric liner or sports bra between skin and strap, or use a small amount of conductive gel at the electrodes for cold/dry skin.
Safe tightness limits and when to change size or model
Use the two-finger rule: you should be able to slide two fingers comfortably under the band. A strap that causes pain, persistent numbness, deep redness, or bruising is too tight — stop and switch size or style. For high-intensity, short efforts you may tighten slightly; for multi-hour sessions prioritize comfort and breatheability. If irritation persists after adjustments and care, it’s time to try a different model or size.
5
Adjustment, Maintenance, and Troubleshooting Common Fit Issues
To shorten: slide the adjustment buckle toward the sensor, feed the excess back through the loop, and secure the tail under the strap’s keeper. If there’s no keeper, use a silicone hair tie or small Velcro strap to lock the loose end.
To lengthen: reverse the buckle, feed more webbing through the adjuster, or attach an approved extender.
Reposition the sensor by moving it a few centimeters up or down the sternum — small shifts often eliminate rotation without changing tightness. Test for 5–10 minutes after each move.
Long adjustable strap with quick-release and D-rings
An extended-length sternum strap that secures your pack, adjusts quickly with a slider, and fits over layers from summer to heavy jackets. Made from durable nylon with a quick-release buckle and D-rings for attaching gear.
Strap riding up: tighten evenly on both sides, center the sensor, and use a snug sports bra or compression top to hold the band in place.
Slipping with sweat: moisten electrodes, swap to a neoprene-padded strap (better grip), or apply a tiny dab of sports adhesive (e.g., 3M Fixomull) behind the sensor.
Chafing: apply an anti-chafe balm (BodyGlide), use a thin fabric liner, or pad the contact points with a narrow strip of moleskin.
Signal dropout: wipe electrodes and sensor contacts, ensure the strap is moist, replace the battery, and move the paired device away from heavy metal zippers or chest-mounted packs.
Sizing after weight change: re-measure your chest. If you’re within 2–3 inches of your previous measurement, extenders or tighter threading usually suffice; beyond that, buy the new size.
Maintenance that preserves fit
Washing: rinse after sweaty sessions; hand-wash with mild soap weekly. Avoid machine drying; air-dry flat away from direct heat to preserve elastic.
Inspect monthly: look for frayed webbing, delaminated sensor pads, or stretched elastic. Replace elastic components or the whole strap if elasticity is gone.
Storage: hang or roll loosely — don’t fold tightly around the sensor.
When to DIY vs. replace
Quick DIY: secure tails with silicone ties, use a temporary extender, or apply a small medical adhesive patch to stop slippage.
Replace/repair: if electrodes crack, the sensor housing leaks, elastic won’t rebound, or you get recurring skin reactions, replace the strap. Professional alterations are rarely worth the cost unless the strap is high-end and repairable.
These practical adjustments and care habits keep your strap working and comfortable; next, we’ll wrap up the article with final fit-first takeaways.
Summing up: pick the chest strap style that matches your activity and sensor needs, measure around the chest with a flexible tape in the positions described, and use manufacturer size charts to land a size that balances accurate heart-rate contact with comfortable movement. Aim for snugness that doesn’t restrict breathing; test in motion to confirm sensors stay put and skin stays happy.
Rinse straps after sweat, air-dry, and replace elastic or electronics at first signs of wear—typically every 12–24 months. If unsure, size up for comfort and wear chest-strap-friendly clothing. Buy from reputable brands with clear sizing and returns so you can trial fit confidently. Prioritize comfort: a well-fitted strap improves data and training.
Small PSA: if your strap keeps slipping, try moving it slightly higher/lower rather than tightening more. The ‘Choosing the Right Size’ section explained this but it took me weeks to try it. Also the UANJBYO quick-release helped for cycling transitions.
Oliver Stone
on October 15, 2025
I always tighten first — now I try repositioning and it’s magically better. Thanks!
Great tip, Nina. Strap position can affect slipping more than tightness. Quick-release straps are handy for transitions.
Isabella Reed
on October 15, 2025
Small nitpick: the size chart images could’ve been bigger. I nearly missed the ‘measure snug but not tight’ note. Otherwise loved the troubleshooting tips — I fixed a weird HR drop by cleaning the electrodes like the article suggested.
James Ford
on October 15, 2025
Agreed on charts. I printed the chart and used the iBayam tape measure — made it so much easier. Also, batteries and contact gel check too.
Thanks for the feedback, Isabella. We’ll look into making charts more prominent. Glad cleaning the electrodes helped — it’s an underrated fix.
Isabel Moreno
on October 15, 2025
Minor gripe: the article recommended a few products but didn’t compare price vs longevity. For instance, is Powr Labs cheaper long-term than Polar H10? I’d pay a bit more if it lasts, but curious what others experienced.
Isabel Moreno
on October 15, 2025
Thanks — that helps! I do daily training so leaning toward the Polar then.
Good point, Isabel. Polar H10 tends to cost more upfront but is known for durability and accuracy. Powr Labs is budget-friendly and works well, but longevity may vary by use and care.
Ben Turner
on October 16, 2025
I own both — Powr Labs saved me cash and lasted 2 years with light use. Polar H10 feels sturdier and had better battery life. Depends on frequency of use.
Ethan Miller
on October 15, 2025
Great article — finally something that explains why chest strap fit actually matters. I always thought tighter = better, but the section on skin health changed my mind. Bought a Polar H10 last month and had chafing until I loosened it a bit.
Also shoutout to the iBayam tape measure tip — cheap and accurate for quick checks. Saved me from returning a strap twice. 👍
Maya Lopez
on October 15, 2025
Same here — H10 is so accurate but I had to play with strap placement. The article’s measuring technique (under the pecs, not over) was key for me.
Thanks Ethan — glad the Polar H10 example was helpful. Loosening a strap a bit often fixes both accuracy and comfort. The iBayam tape measures are handy for home measuring.
Connor R
on October 16, 2025
I had chafing too until I tried a little anti-chafe balm and slightly looser strap. Worth mentioning for sensitive skin.
Maya Lopez
on October 15, 2025
I bought the Heavy Duty Shoulder Posture Corrector for posture while running (yes, weird) and it actually changed how my straps sat on my chest. The article’s section about posture affecting fit is so real. Anyone else try this?
Interesting experiment, Maya — posture can definitely alter strap position. If using a posture corrector, re-measure chest with it on so the strap fits in that posture configuration.
Ben Turner
on October 15, 2025
I tried a posture corrector for cycling and had to reposition my strap lower. Just be careful of extra straps overlapping and causing pressure points.
Clara Evans
on October 16, 2025
Haha never thought of posture affecting fit. Who knew being tall/rounded shoulders would be a factor!
Maya Lopez
on October 16, 2025
Yeah, I ended up pairing the posture corrector only during workouts where upper-back alignment matters. Otherwise it interfered with breath depth.
Sophie Kim
on October 17, 2025
Loved the ‘Fit and Comfort’ section. As someone with sensitive skin, the article’s mention of chafe zones and fabric choices saved me a ton of irritation. Also, Polar H10 felt less scratchy than cheaper straps for me.
Noah Patel
on October 18, 2025
Agree, Polar H10 is comfy. If you get red marks, try silicone-based padding or reposition the strap slightly lower.
Thanks Sophie — choosing softer fabric and checking electrode contact points are key for sensitive skin. Polar H10 is often praised for comfort and build quality.
Sophie Kim
on October 19, 2025
Will try padding — thanks! Also got fewer false dropouts after switching cleaning routine.
Ben Turner
on October 21, 2025
Question for the group: for someone with a barrel chest, do you go a size up or go with an adjustable strap like Powr Labs? The size chart was helpful but I’m still unsure where to land. Anyone with similar body type?
Grace Huang
on October 22, 2025
I have a wider chest and went one size up — better for deep breathing during runs. The iBayam tape measure helped me confirm size before buying.
For barrel chests, start with a size up if chart suggests borderline. Adjustable straps give flexibility — Powr Labs and UANJBYO are good options. Measure snug, then allow breathing room.
Ava Brooks
on October 22, 2025
I also went up a size and it made long intervals way more comfortable. Still stays in place if positioned right.
Ben Turner
on October 22, 2025
Appreciate the advice — will measure and probably go up a size.
Oliver Stone
on October 22, 2025
Could we get a follow-up on strap care? The article’s maintenance section was good but I’d love a product-specific recommendation — like should I handwash the Powr Labs strap or machine wash? Tried both and worried about longevity.
Best practice: handwash sensor strap with mild soap and air dry. Avoid machine washing or heat drying as that shortens elastic life. Batteries/sensors should not be submerged.
Nina Park
on October 23, 2025
I once accidentally machine-washed a strap — it survived but lost elasticity fast. Learned my lesson 😅
Ethan Miller
on October 23, 2025
Yep, handwash only. I wrap mine around a towel and let it air out. Batteries last longer if you remove sensor from strap between uses.
Dylan Brooks
on October 30, 2025
Noticed something funny: the Heavy Duty Shoulder Posture Corrector kinda interfered with where the strap sits when I used it at the gym. The article warned about posture effects but I still got surprised. Anyway, the maintenance tips saved me when the strap absorbed sweat like a sponge 😂
Nina Park
on October 30, 2025
Same here. I wash my strap weekly after lots of sweat.
Dylan Brooks
on October 31, 2025
I switched to a spare strap rotation — one in use, one washing. Works well.
Good reminder — posture aids can shift strap placement. Re-measure with any corrective gear on. And yes, intense sweat needs more frequent washing to avoid odor and conductivity loss.
Ava Brooks
on November 2, 2025
I appreciate the product round-up. Quick question — anyone used Powr Labs Bluetooth ANT+ Chest Heart Monitor with an old Garmin watch? I’m worried about pairing issues. If it helps: I’m not tech-savvy 😂
Sophie Kim
on November 2, 2025
I’m tech-challenged too — removing old sensors fixed it for me. If all else fails, contact Powr Labs support or try Polar H10 instead (super reliable).
Liam Carter
on November 2, 2025
I’ve paired a Powr Labs to an older Garmin 235 before. Make sure no other HR strap is still remembered by the watch — clear saved sensors and re-scan.
Powr Labs usually pairs fine with Garmin if it supports ANT+; double-check your watch settings and try restarting both devices. If connection fails, toggling Bluetooth off/on or re-entering pairing mode often helps.
Lucas Wright
on November 4, 2025
Random tip: the UANJBYO Extended Quick-Release Backpack Chest Strap worked wonders on long hikes where my HR sensor kept sliding. Article touched on quick-release but not these backpack clips — they’re a game-changer for comfort between climbs.
Dylan Brooks
on November 5, 2025
Noted — I hate pausing to fiddle with my strap mid-hike. Quick-release sounds ideal.
Great to hear, Lucas. Quick-release straps can reduce sliding and help re-adjust quickly during multi-activity days. Good product mention.
Maya Lopez
on November 6, 2025
I’ll try that on my next hike! The article’s point about switching fit based on activity rings true.
Lucas Wright
on November 6, 2025
Pro tip: make sure clip placement doesn’t press on the sensor — put it a little lower on the sternum area.
Clara Evans
on November 19, 2025
Loved the troubleshooting checklist. The only issue I had that wasn’t in the article: my strap worked fine on treadmill but dropped during outdoor runs in cold weather. Anyone else? Maybe battery or conductivity issue?
Cold can affect battery performance and skin conductivity. Try warming the sensor in your hand briefly before use and ensure electrode hydration (water or gel). Also keep the strap snug but not overly tight.
Isabel Moreno
on November 20, 2025
I started wearing a thin base layer under the strap in cold runs — not ideal for accuracy though, so test carefully.
Ethan Miller
on November 21, 2025
Yes — low temps have messed with Bluetooth range for me. Polar H10 handled cold better than cheaper straps.
Noah Patel
on November 21, 2025
Had no idea there were so many chest strap types. The ‘Know Your Options’ section sold me on trying ANT+ over Bluetooth-only for group workouts. Curious if anyone tried the TEKCAM harness for running with a camera and a chest strap together? Seems tight spacewise.
Oliver Stone
on November 21, 2025
I tried it once and the camera rub annoyed me after 30 minutes. Maybe a thin layer between camera mount and skin helps.
Grace Huang
on November 22, 2025
I used TEKCAM on a short trail run with a strap (Powr Labs) and it was fine — just moved the strap down a touch. Keep an eye out for rubbing though.
TEKCAM harness is designed for action cams — it can be snug with a chest strap, but placing the camera slightly off-center usually works. Test for restriction of chest expansion before long runs.
Grace Huang
on December 3, 2025
Funny note: I used the TEKCAM harness to record a sprint session and accidentally captured my coach telling me to ‘stop dramatic yelling’ — fit tip: make sure mounts don’t pick up distracting noises 😅
On a serious note, measuring under the pecs like the article says is clutch. I kept measuring over the chest and kept getting weird HR spikes.


Small PSA: if your strap keeps slipping, try moving it slightly higher/lower rather than tightening more. The ‘Choosing the Right Size’ section explained this but it took me weeks to try it. Also the UANJBYO quick-release helped for cycling transitions.
I always tighten first — now I try repositioning and it’s magically better. Thanks!
Great tip, Nina. Strap position can affect slipping more than tightness. Quick-release straps are handy for transitions.
Small nitpick: the size chart images could’ve been bigger. I nearly missed the ‘measure snug but not tight’ note. Otherwise loved the troubleshooting tips — I fixed a weird HR drop by cleaning the electrodes like the article suggested.
Agreed on charts. I printed the chart and used the iBayam tape measure — made it so much easier. Also, batteries and contact gel check too.
Thanks for the feedback, Isabella. We’ll look into making charts more prominent. Glad cleaning the electrodes helped — it’s an underrated fix.
Minor gripe: the article recommended a few products but didn’t compare price vs longevity. For instance, is Powr Labs cheaper long-term than Polar H10? I’d pay a bit more if it lasts, but curious what others experienced.
Thanks — that helps! I do daily training so leaning toward the Polar then.
Good point, Isabel. Polar H10 tends to cost more upfront but is known for durability and accuracy. Powr Labs is budget-friendly and works well, but longevity may vary by use and care.
I own both — Powr Labs saved me cash and lasted 2 years with light use. Polar H10 feels sturdier and had better battery life. Depends on frequency of use.
Great article — finally something that explains why chest strap fit actually matters. I always thought tighter = better, but the section on skin health changed my mind. Bought a Polar H10 last month and had chafing until I loosened it a bit.
Also shoutout to the iBayam tape measure tip — cheap and accurate for quick checks. Saved me from returning a strap twice. 👍
Same here — H10 is so accurate but I had to play with strap placement. The article’s measuring technique (under the pecs, not over) was key for me.
Thanks Ethan — glad the Polar H10 example was helpful. Loosening a strap a bit often fixes both accuracy and comfort. The iBayam tape measures are handy for home measuring.
I had chafing too until I tried a little anti-chafe balm and slightly looser strap. Worth mentioning for sensitive skin.
I bought the Heavy Duty Shoulder Posture Corrector for posture while running (yes, weird) and it actually changed how my straps sat on my chest. The article’s section about posture affecting fit is so real. Anyone else try this?
Interesting experiment, Maya — posture can definitely alter strap position. If using a posture corrector, re-measure chest with it on so the strap fits in that posture configuration.
I tried a posture corrector for cycling and had to reposition my strap lower. Just be careful of extra straps overlapping and causing pressure points.
Haha never thought of posture affecting fit. Who knew being tall/rounded shoulders would be a factor!
Yeah, I ended up pairing the posture corrector only during workouts where upper-back alignment matters. Otherwise it interfered with breath depth.
Loved the ‘Fit and Comfort’ section. As someone with sensitive skin, the article’s mention of chafe zones and fabric choices saved me a ton of irritation. Also, Polar H10 felt less scratchy than cheaper straps for me.
Agree, Polar H10 is comfy. If you get red marks, try silicone-based padding or reposition the strap slightly lower.
Thanks Sophie — choosing softer fabric and checking electrode contact points are key for sensitive skin. Polar H10 is often praised for comfort and build quality.
Will try padding — thanks! Also got fewer false dropouts after switching cleaning routine.
Question for the group: for someone with a barrel chest, do you go a size up or go with an adjustable strap like Powr Labs? The size chart was helpful but I’m still unsure where to land. Anyone with similar body type?
I have a wider chest and went one size up — better for deep breathing during runs. The iBayam tape measure helped me confirm size before buying.
For barrel chests, start with a size up if chart suggests borderline. Adjustable straps give flexibility — Powr Labs and UANJBYO are good options. Measure snug, then allow breathing room.
I also went up a size and it made long intervals way more comfortable. Still stays in place if positioned right.
Appreciate the advice — will measure and probably go up a size.
Could we get a follow-up on strap care? The article’s maintenance section was good but I’d love a product-specific recommendation — like should I handwash the Powr Labs strap or machine wash? Tried both and worried about longevity.
Best practice: handwash sensor strap with mild soap and air dry. Avoid machine washing or heat drying as that shortens elastic life. Batteries/sensors should not be submerged.
I once accidentally machine-washed a strap — it survived but lost elasticity fast. Learned my lesson 😅
Yep, handwash only. I wrap mine around a towel and let it air out. Batteries last longer if you remove sensor from strap between uses.
Noticed something funny: the Heavy Duty Shoulder Posture Corrector kinda interfered with where the strap sits when I used it at the gym. The article warned about posture effects but I still got surprised. Anyway, the maintenance tips saved me when the strap absorbed sweat like a sponge 😂
Same here. I wash my strap weekly after lots of sweat.
I switched to a spare strap rotation — one in use, one washing. Works well.
Good reminder — posture aids can shift strap placement. Re-measure with any corrective gear on. And yes, intense sweat needs more frequent washing to avoid odor and conductivity loss.
I appreciate the product round-up. Quick question — anyone used Powr Labs Bluetooth ANT+ Chest Heart Monitor with an old Garmin watch? I’m worried about pairing issues. If it helps: I’m not tech-savvy 😂
I’m tech-challenged too — removing old sensors fixed it for me. If all else fails, contact Powr Labs support or try Polar H10 instead (super reliable).
I’ve paired a Powr Labs to an older Garmin 235 before. Make sure no other HR strap is still remembered by the watch — clear saved sensors and re-scan.
Powr Labs usually pairs fine with Garmin if it supports ANT+; double-check your watch settings and try restarting both devices. If connection fails, toggling Bluetooth off/on or re-entering pairing mode often helps.
Random tip: the UANJBYO Extended Quick-Release Backpack Chest Strap worked wonders on long hikes where my HR sensor kept sliding. Article touched on quick-release but not these backpack clips — they’re a game-changer for comfort between climbs.
Noted — I hate pausing to fiddle with my strap mid-hike. Quick-release sounds ideal.
Great to hear, Lucas. Quick-release straps can reduce sliding and help re-adjust quickly during multi-activity days. Good product mention.
I’ll try that on my next hike! The article’s point about switching fit based on activity rings true.
Pro tip: make sure clip placement doesn’t press on the sensor — put it a little lower on the sternum area.
Loved the troubleshooting checklist. The only issue I had that wasn’t in the article: my strap worked fine on treadmill but dropped during outdoor runs in cold weather. Anyone else? Maybe battery or conductivity issue?
Cold can affect battery performance and skin conductivity. Try warming the sensor in your hand briefly before use and ensure electrode hydration (water or gel). Also keep the strap snug but not overly tight.
I started wearing a thin base layer under the strap in cold runs — not ideal for accuracy though, so test carefully.
Yes — low temps have messed with Bluetooth range for me. Polar H10 handled cold better than cheaper straps.
Had no idea there were so many chest strap types. The ‘Know Your Options’ section sold me on trying ANT+ over Bluetooth-only for group workouts. Curious if anyone tried the TEKCAM harness for running with a camera and a chest strap together? Seems tight spacewise.
I tried it once and the camera rub annoyed me after 30 minutes. Maybe a thin layer between camera mount and skin helps.
I used TEKCAM on a short trail run with a strap (Powr Labs) and it was fine — just moved the strap down a touch. Keep an eye out for rubbing though.
TEKCAM harness is designed for action cams — it can be snug with a chest strap, but placing the camera slightly off-center usually works. Test for restriction of chest expansion before long runs.
Funny note: I used the TEKCAM harness to record a sprint session and accidentally captured my coach telling me to ‘stop dramatic yelling’ — fit tip: make sure mounts don’t pick up distracting noises 😅
On a serious note, measuring under the pecs like the article says is clutch. I kept measuring over the chest and kept getting weird HR spikes.
Haha, coaches speak their mind on camera. Good point about measuring under the pecs — that placement helps stable contact during sprints.
LOL about the coach. Also, try the double-sided tape measure from iBayam — makes under-pec measuring easy.
Yep, movement artifacts reduce when strap sits under the pectoral line. Good catch.