Why a Compact Chest Strap Matters for Triathlon Transitions
A compact chest strap is a lightweight, streamlined harness worn over the wetsuit or race top to hold your race number, heart-rate monitor, or accessories securely.
Transitions are high-value moments: seconds add up across swim-to-bike and bike-to-run changes. A purpose-built strap reduces fumbling, prevents lost gear, and keeps momentum.
This article breaks down the DESIGN principles that prioritize minimalism, security, and speed. It highlights KEY FEATURES—fast buckles, adjusters, and attachment options—that shave seconds.
You’ll learn efficient TRANSITION TECHNIQUES, how to dial fit and comfort, and simple care steps to extend durability and value.
Read on for tips and product considerations that help you shave time and reduce stress on race day.


Boost Your Chest Rig: Add a Quick-Detach to One or Both Sides
Design Principles: Minimalist, Secure, and Fast
Core goals: shave bulk, lock gear, and move fast
A transition chest strap must do three things exceptionally well: stay out of the way, stay put, and let you act in a split second. Minimal bulk means a slim profile that slides under a wetsuit or lies flat over a race top without creasing or shifting. Security comes from thoughtful webbing routes and anchor points that resist vertical and rotational motion during high-cadence cycling. Speed comes from predictable, repeatable release/adjust actions—ideally something you can operate by feel when your hands are cold or salt-slick.
A common race-day image: an athlete wrestling with a bulky, flapping strap on T1. That lost momentum is exactly what this design philosophy prevents.
Materials and construction choices that matter
Choose components that prioritize low weight and corrosion resistance while keeping enough strength where it counts.
Real-world tip: a strap with bonded seams across the sternum often stays quieter than one with loose flaps that slap against the chest when sprinting on the bike.
Trade-offs designers balance (and how to choose)
Designers constantly trade one advantage for another—understanding those trade-offs helps you pick the right tool for your race distance.
Actionable rule: if you expect cold, wet starts, favor simple, large-release buckles and fewer adjustment steps—those conditions amplify small design complexities.
Next up: the specific features—buckles, adjusters, and attachment options—that actually shave seconds out of your transitions.
Key Features That Save Seconds: Buckles, Adjusters, and Attachment Options
Fast-release buckles: single-handed, tactile, and reliable
The quickest way to lose time is fumbling with a tiny clip. Look for:
Real-world tip: many triathletes report 2–5 seconds saved per transition using magnetic or oversized tabbed closures vs. micro-buckles.
Alignment aids: magnetics and hook-and-loop guides
Magnetic alignment or short strips of hook-and-loop help you get the strap centered by feel. Magnets won’t jam when wet and seat instantly; hook-and-loop gives audible and tactile feedback but can collect sand and lose stick on salt-slick neoprene.
Indexed length settings: repeatable, no-thinking adjustments
Indexed settings (numbered stitches, notched webbing, or incremental sliders) let you pre-set your comfortable race length and snap back to it. For example, mark your “T1” and “T2” positions with a permanent stitch or write a small number on the webbing — you’ll avoid trial-and-error fiddling between disciplines.
Streamlined attachment points: race belts, bibs, and quick clips
Low-profile slots and elastic loops for race belts or bibs keep the number flat and reduce snag risk. Look for:
Optional tri-specific features: chips, sensors, and modular gear
How these features perform in race conditions
Next, we’ll turn those hardware advantages into movement—practical, step-by-step transition techniques that use these features to shave even more seconds.
Transition Techniques: How to Use a Compact Chest Strap Efficiently
Pre-race setup: prep and pre-sets
Before race morning, set two indexed lengths on the strap: a snug swim position and a slightly looser bike/run position. Use a permanent stitch or colored thread at those marks so you can restore length by feel. Thread the race belt through any low-profile loops so your bib attaches to the strap and not to fragile neoprene. Lay the assembled system beside your shoes in T1 for a single-motion grab.
Practice drills to shave seconds
Run short, repeatable drills to make transitions unconscious:
Anecdote: many triathletes shaving 2–4 seconds per transition see gains that stack across races—practice is what makes that real.
Race-day sequence: clean, repeatable order
T1 (swim-to-bike)
T2 (bike-to-run)
Integration with common gear
Quick fixes and contingencies
Use these drills and sequences in training so race-day transitions become confident, fast motions rather than fraught improvisations.
Fit and Comfort: Finding the Right Size and Adjustments
A chest strap that sits right is invisible during racing—no mid-race fidgeting, no raw spots, just reliable anchoring. Fit matters because your body shape and posture change from a flat, face-down swim to an aero-bent bike and upright run. Small errors in length or edge finish turn into big irritations over hours.
Measuring for length and posture
Measure with a soft tape across the sternum at the level where the strap will sit (roughly mid-chest), keeping the tape snug but not tight. Record that circumference and note how it changes when you:
Allow enough adjustability so the strap can be set tighter for a low-swim position and loosened for the bike/run without bottoming out on the adjuster. Aim for a strap that offers several inches of meaningful adjustment rather than micro-clicks that don’t hold under load.
Shape, edges, and materials that prevent chafing
Choose straps with soft, rolled or bonded edges and panels that follow chest contours—flat, wide contact areas spread pressure and reduce rubbing. Breathable, quick-drying fabrics (mesh-backed Lycra, perforated neoprene, or wicking polyester) prevent sweat buildup and the micro-abrasion that causes hot spots on long rides or multi-hour events.

Sizing checklist: what to measure and try
Guidance for athletes with unique needs
Test it in real conditions
Don’t wait until race day: wear the strap on a wetsuit swim, a 90–120 minute ride in aero, and a brick run. Check for movement, pressure points, and how quickly it dries in transition practice. A small break-in period is normal; persistent hotspots mean change.
Next, we’ll look at keeping that well-fitting strap performing race after race—what to clean, repair, and when to replace.
Care, Durability, and Value: Maintaining Performance Over Time
Washing and drying to prevent degradation
Rinse saltwater and chlorine out immediately after training—those minerals accelerate wear. Hand-wash with mild soap or put the strap in a mesh laundry bag on a gentle cycle; never use bleach or fabric softeners. Air-dry flat or hung in shade; avoid direct sunlight and hot dryers that can stiffen or shrink elastic and fade coatings. A quick anecdote: one triathlete saved a season’s strap life by switching from tumble-drying to towel-wrapping and air-drying after every race.

Inspection routines: catch problems early
Inspect before heavy sessions and before race day. Look for:
If you find surface wear but buckles and adjusters work, minor fixes (trimming loose threads, re-stitching a seam, swapping in a replacement buckle) buy time. If webbing is torn through, elastic has a permanent set, or buckles crack, replace the strap.
Repairs versus replacement
Quality matters: low-cost straps ($15–$30) often last one season of heavy use; mid-range ($40–$80) typically survive 2–4 seasons with care; premium, corrosion-resistant designs and silicone-backed straps can go 5+ seasons for regular racers.
Storage and avoiding deformation
Store flat or hung with buckles unlatched to keep shapes true. Avoid tight rolls that crease elastic and keep straps away from chemical fumes, oily gear, and prolonged UV exposure.
Cost-benefit framework for athletes
Weigh initial price against reliability, transition time savings, and seasons of use:
Practical rule: if maintenance adds minimal time and the strap still performs in wet conditions, keep it; if you’re paying frequent repairs or losing confidence, replacement is the better investment. With routine care and clear replacement criteria, your compact strap stays race-ready — next, we’ll wrap up the article with final takeaways.
Small Gear, Big Gains
A thoughtfully designed compact chest strap streamlines triathlon transitions by simplifying donning and doffing, minimizing fiddly straps, and offering secure, low-profile support that improves comfort and focus. Fast-release buckles, reliable adjusters, and versatile attachment points shave seconds while keeping race-day movement efficient and distraction-free.
Prioritize fit, time-saving features, and regular maintenance when selecting a strap: try sizes before race day, practice transitions, and inspect hardware and stitching after each use. Small investment in a quality strap delivers measurable time savings, reduced stress, and a smoother race experience—choose wisely and train with it. Race smarter, not harder today.
Some quick practical transition tips that built on the article:
– Pre-clip any action camera mounts (Suptig) to a small loop on your race suit during transition practice.
– Set strap lengths before the race and mark them so you can replicate quickly.
– Use a slim race belt (VeloChampion) for gels and tuck it under your suit if allowed.
One more thing: test how the chest monitor reads HR right after a swim — salty residue can affect reads, so rinsing is key.
Excellent step-by-step tips, Hannah. The swim-to-run HR lag is real — some athletes prefer wrist-based optical sensors for that specific reason, but chest straps are the gold standard for accuracy.
Kyle — medical tape is perfect. Also, bring a spare strap if you’re traveling to races; they somehow go missing at the worst times.
Spare strap — noted and wise. We’ve all had one mysteriously disappear from a transition bag.
The marking trick is a game changer. I use a small piece of medical tape to mark my strap length — quick and cheap.
I liked the section on ‘Design Principles: Minimalist, Secure, and Fast’ — but realism check: secure and minimalist sometimes clash. The Suptig camera mount looks cool, but expect compromises in comfort for long endurance sessions.
Also, anyone else think the adjustable sternum straps with whistles are better for backpacking than triathlon?
You’re right — sometimes you trade off. We tried to highlight which features are race-focused (quick-release buckles, low-profile adjusters) versus general outdoor utility (whistle, heavy-duty straps).
Question for folks: how do you decide between an elastic race belt (like VeloChampion) and a chest strap for carrying small items? The article mentions both but I’m not sure which is faster in transition.
Also, sizing help — 5’2″ and 130 lbs, any recs for chest monitor fit?
Priya — for gels/keys, an elastic waistpack (VeloChampion) is usually faster because you don’t have to fumble under clothing. For HR accuracy, chest straps (Polar H10 or Powr Labs) are best. For your size, standard chest straps usually fit; look for adjustable ranges and reviews from petite athletes.
If you’re buying from Amazon, check the product Q&A — many sellers include measurement ranges in replies from other buyers.
I’m also petite and the Polar H10 worked well for me. Just tighten enough that it doesn’t move but isn’t uncomfortable — test in training, not race day!
Some practical critique: the article nails the minimalist design idea, but I wish there was more on sizing — many brands’ ‘one size fits most’ is not really one size. The UANJBYO Extended Heavy-Duty strap is great if you need more length, but it’s clunky for races.
Also, adjusters matter. A cheap slider can slip mid-effort, which is the last thing you want during a 70.3.
Agree about adjusters — I replaced cheap ones with low-profile metal adjusters and haven’t had slippage since.
Good point, Michael. We added a sizing section but I’ll follow up with a brief guide showing how to choose between standard and extended straps.
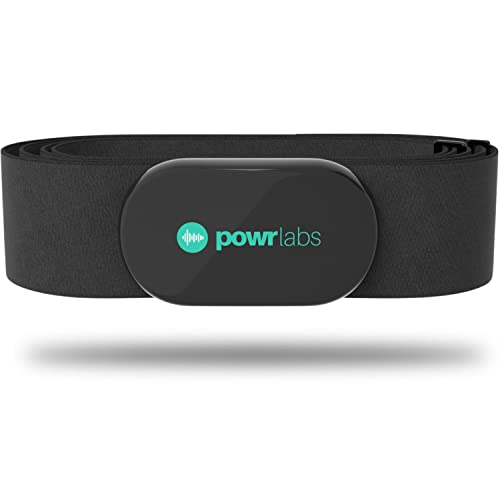
Great article — finally someone wrote about chest straps that actually think about transitions. I switched from a bulky harness to a compact chest strap last season and shaved off a solid 8–10 seconds in T1. The Polar H10 gives me reliable HR data, but the Powr Labs Dual ANT+ Bluetooth chest monitor was way easier to sync with my bike computer during transitions.
Love the bit about quick-release buckles and minimalist design — those small touches are everything when you’re fumbling with socks and goggles.
Nice! Did you use a separate waistbelt like the VeloChampion for gels? Curious if combining both adds too much complexity in transitions.
I had the same experience — repositioning the strap slightly lower on the sternum helped. Also, a tiny dab of chamois cream on contact points kept it from rubbing during long runs.
Thanks Emma — glad it helped! If you’re syncing to multiple devices, the dual ANT+ + Bluetooth models really save time. Any tips you used to secure the strap so it wouldn’t ride up?
Short and sweet: small gear can make a big difference. Bought a Polar H10 and an adjustable sternum strap for my backpack and both were great value. Minor care (hand wash, air dry) has kept them going for seasons.
Thanks Carlos — appreciate the endorsement. Simple maintenance really extends life and performance.
Long comment incoming — cuz this actually got me thinking about a bunch of practical stuff:
1) Transition technique: practice with the exact strap you plan to race with. Sounds obvious but I watched teammates try new straps on race day and it was chaos.
2) Attachment options: I use a small carabiner to clip a cam mount (Suptig) to my vest for swim practice — works but it’s not race-legal for tri. 😂
3) Care: washed my Polar H10 by hand after a muddy race and it still works fine a year later. Follow the care tips in the article!
On a lighter note, I don’t trust whistles on sternum straps unless you’re planning to call a peloton to attention. Who’s actually going to blow it mid-race? 🙂
Sarah, were you comfortable running long distances with the chest camera mount? I worry about chafing but want better POV footage.
Thanks for the detailed breakdown, Sarah — great practical points. The whistle is more for safety hikes or kids’ packs, but I agree it’s not a race feature.
Haha the whistle comment made me laugh. I used a mini-safety whistle on a group trail run once and felt like a scout leader. 😂
Totally on the practice point. I learned that the hard way in my first Olympic tri — strap got twisted during the run and I lost 12s fixing it. Never again.
Quick tip: for race day, mark your preferred strap length with a small stitch or piece of colored tape. Reproducible every race, no measuring needed.
Oliver — for long runs, consider a breathable option like the Suptig they mentioned; also test with the exact camera and clothing combo to spot chafe points early.
This made me laugh and think at the same time. 😅
I tested three straps last season: Powr Labs, Polar H10, and a cheap Amazon adjustable sternum strap with whistle (for comedy value). The cheap one performed fine for casual runs but felt like a necklace from the 90s under race clothing. Polar H10 = pro vibes. Powr Labs = techy but solid.
Care tip: don’t dry your strap in direct sunlight like I did once. Learned that the hard way — fabric looked like it had a sunburn.
Olivia, did you actually use the whistle in a race? 😂
Seagulls: the unofficial menace of transitions. Good reminder to keep food secure!
Mila — no, but my friend almost did when a seagull stole his gel. True story. 😆
Haha the sunburned strap image is real. Thanks for sharing the comparison — that’s the kind of user testing readers love.
Agree on the cheap strap — fine for warmups but not race-day. Also, cheap buckles snap sooner than you’d think.
Interesting piece. I’m still on the fence about chest mounts vs wrist HR straps. The article made a decent case for chest straps during sprints and triathlons. Also, shoutout to the UANJBYO for those who need heavy-duty adjustments — seems overkill for me but useful for backpacks too.
Good read but felt a bit promotional for specific Amazon items. The fundamentals are fine though — practice transitions and don’t ignore comfort.
Also: some cheap adjusters are garbage. Invest in decent hardware if you race often.
Solid article, especially the ‘Key Features That Save Seconds’ section. Buckles and adjusters really do matter. One minor note: include torque or pull strength ratings for buckles if available — helps people who worry about durability.
Also, for those using heart monitors, check compatibility with your watch/phone — Powr Labs and Polar H10 have different pros and cons there.
Good suggestion, Robert. We didn’t want to get too technical in the main article, but I’ll add an appendix with buckle strength and compatibility notes.
Compatibility saved me a headache once — my old watch wouldn’t pair with a newer chest strap and I had to improvise with my phone.
Love the ‘Small Gear, Big Gains’ tagline. I used the VeloChampion Elastic Race Waistpack for gels and a Powr Labs chest monitor for HR during a sprint series last month. The waistpack was so minimal that I forgot it was there — exactly what you want.
Also: cleaning tip — rinse the chest strap right after salty swims and let it air dry flat. Don’t toss it in a drawer still wet!
Does the Powr Labs feel any bulkier than Polar H10? I’m deciding between the two and prioritize comfort over features.
VeloChampion is underrated. I use one for track workouts too.
Sophie — Powr Labs felt a tad thicker but not uncomfortable. If you want ultra-thin, go Polar H10; but Powr Labs was easier to connect to both watch and phone at once.
Exactly — keeping things dry prevents smells and sensor corrosion. Thanks for sharing the waistpack experience; glad it stayed invisible in the race!