
Change a Watch Battery Fast — No Sweat
Save time and money with this fast, safe guide to replacing most watch batteries at home. Shockingly, a tiny coin cell can store energy for years—learn how to change it safely without damaging the movement or ruining water resistance today.
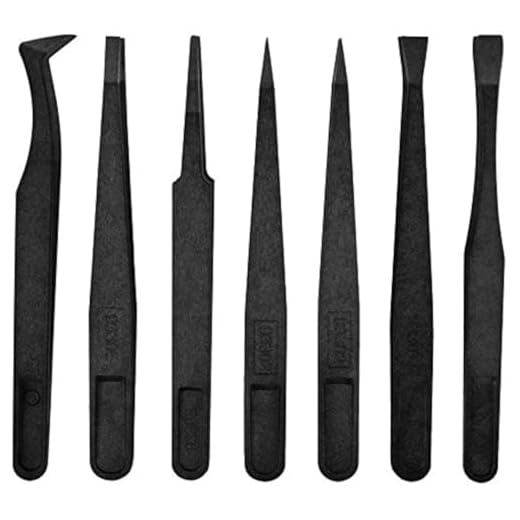
What You’ll Need

How to Replace a Change Watch Battery — Quick
Step 1 — Confirm the Battery Is Dead
Is it really the battery? Don’t rush to replace it — misdiagnosis wastes time and can hide bigger problems.Confirm the watch has a dead battery by observing the second hand: check that it is stopped or skipping/jumping irregularly (e.g., skipping every 2–5 seconds).
Check with a battery tester or a known-good battery if you have one.
Rule out a stuck crown or mechanical problem by trying to wind the watch (for automatics/mechanics) or by setting the time and watching for normal movement.
Note that intermittent operation can mean moisture or a dirty movement, not just a dead cell.
Write down the following from the case back or movement now so you buy the right replacement:

Step 2 — Open the Case Safely
One wrong pry and you’ve got a scratched case — learn the three safe opening methods and when to use each.Identify the case-back type: snap-on, screw-down, or held by screws.
For snap-on backs, use a thin case knife at the notch or a soft rubber ball — insert the blade gently and pry evenly or press and twist the ball to pop it open. For screw-back cases, use a proper case wrench with matching pins; never force the back with pliers. For backs held by tiny screws, use the correct-size jeweler’s screwdriver and keep screws in a parts tray.
Work on a soft cloth to avoid scratches, wear nitrile or lint-free gloves to prevent oil transfer, and use a loupe or magnifying glass to inspect for gaskets and corrosion.
Prepare to replace the gasket or apply silicone grease for resealing if it looks brittle or damaged.

Step 3 — Remove the Old Battery Without Harm
Tiny, slippery, and easy to lose — removing the battery is a precision job, not a tug-of-war.Observe how the battery is held: clip, spring, or retaining screw. Example: a tiny spring clip across the cell or a pivoting metal retainer.
Use plastic tweezers or a non‑magnetic tool to lift the battery; metal tweezers can short terminals and damage the circuit.
Loosen small clips or screws gently and keep parts organized in a parts tray.
Avoid touching other components. Do not force the cell; search for hidden clips or a thin retaining plate if it feels stuck.
Inspect the compartment for corrosion. Clean light residue with 90%+ isopropyl alcohol and a soft brush, and seek professional service if leakage is extensive.
Step 4 — Identify and Install the Correct New Battery
A look-alike can ruin things — why the exact battery code matters more than size.Match the replacement cell exactly by code and voltage (e.g., SR626SW, CR2032). Confirm chemistry — silver‑oxide vs. alkaline vs. lithium — because voltage curves and longevity differ.
Use plastic tweezers to place the new battery in the same orientation as the old one; observe the + / − markings. Ensure the cell seats fully under the retaining clip and that contact springs engage properly. Remove any battery isolator tab now.
Avoid touching the battery faces with bare hands — oils accelerate corrosion. If the watch has multiple batteries (some quartz chronographs), replace all as instructed to prevent imbalance and future failures.

Step 5 — Reseal and Close the Case Correctly
Water resistance matters — sealing isn’t optional if you want your watch to survive a splash or shower.Replace any gasket and lightly lubricate it with silicone grease if the manufacturer specifies. Seat the gasket evenly in its groove so it doesn’t twist or pinch.
Press snap-on backs evenly using a case press or your palms wrapped in a soft cloth—apply steady, uniform pressure until the back clicks into place. Tighten screw-backs with the proper case wrench, using even pressure and small turns to avoid cross‑threading. Reinstall case screws with the correct screwdriver; finger-tight is usually sufficient.
Check that the crown and pushers operate smoothly and that the case back sits flush with no gaps. If the watch is water‑resistant and you’ll swim with it, consider a professional pressure test (e.g., service shop test). Record the battery change date for future maintenance.

Step 6 — Test, Set, Dispose, and Troubleshoot
Done? Almost — final checks and safe battery disposal keep your watch running and your conscience clear.Set the time and any complications (date, day, chronograph) following the manual. Example: pull the crown to position 2 to set the date; press the chronograph reset pusher until the hands return to zero.
Observe the watch for at least 24 hours to confirm consistent timekeeping and that all features function normally.
Re-open the case if the watch doesn’t start. Verify battery orientation, spring-clip pressure, and that contacts are clean. Demagnetize with a small demagnetizer if the second hand stutters or stops near electronics or speakers.
You’re Done — Quick, Safe, and Smart
Replacing a watch battery is straightforward when you follow safe opening, correct battery selection, careful handling, and resealing; try it yourself, share your results, and if unsure consult a professional to protect water resistance and movement integrity — act now.
This guide saved me money — $15 at the shop vs $3 battery and 20 minutes. One pro tip: take photos of the movement before removing anything. Made reassembly way easier for me.
Great tip, Leo — documenting each step with photos is a lifesaver for reassembly. We should highlight that more prominently.
Yes! Photos + a paper towel layout for parts = zero stress.
Loved the ‘dispose and troubleshoot’ bit. Also, little PSA: don’t throw batteries in the house trash! They can leak. Recycle centers are usually free.
Some grocery stores have battery drop boxes too — super convenient.
Accepted places vary by city, so check your local municipal site.
Absolutely — thanks for emphasizing that. Household safety and environment are big reasons we include disposal info.
I appreciate the troubleshooting section. My watch restarted but kept stopping after a day — turned out the battery holder clip was slightly bent. A tiny nudge fixed it. The guide’s warning about not touching contacts with bare fingers saved me from more corrosion, too!
Use a toothpick or non-metal tool and apply tiny incremental pressure. If it feels brittle, stop and take it to a pro.
How do you bend it back without breaking? I worry I’ll snap it.
Great troubleshooting note, Hannah. Bending clips back gently is a common fix. Using plastic tweezers is another way to avoid oils on contacts.
Short and sweet: follow the guide, don’t rush the reseal, and test for a day before assuming all good. Also, buy good batteries. 👍
Nice summary — testing for a day is smart to catch intermittent issues.
I liked the part about not touching contacts with your fingers, but I’m a bit clumsy — any easy alternative to plastic tweezers? My hands are too big for the tiny bits.
Cool — I didn’t think of nitrile gloves. I’ll grab some.
If plastic tweezers are awkward, try using a wooden toothpick or a smooth nylon tool to nudge the battery. Gloves can help too (nitrile). Just avoid metal tools near the contacts unless needed.
I use a pair of pointed anti-static tweezers — they are comfy and not metal-coated. Worth looking into.
Not a fan of the part where they say ‘no sweat’ lol — I sweated a lot trying to pry open a stubborn diver’s case. 😂 But solid guide otherwise.
Haha — fair! Diver cases can be tough. For those, a proper case wrench or pro help is the safer route.
Yep, I ruined a cheap strap trying to get leverage once. Learned to stop and buy/borrow the right tool.
Step 4 helped me identify the correct battery number. One caveat: some older watches hide the battery code under the movement — took me 20 mins to figure that out. Wish the guide had a note about fragile dial removal.
Seconded. I almost lifted the movement once and panicked. If in doubt, stop and ask before prying under the dial.
Good feedback, Calvin. We intentionally kept dial/movement removal out of the basic guide since it gets advanced, but adding a warning about fragile internals is a great suggestion.
I followed the steps and everything worked, but the watch loses about 30 seconds a day now. Any ideas? Could it be the new battery is low quality?
Try a Renata or Sony genuine cell. I had bad luck with generic brands.
Possibly — cheap batteries can have lower voltage/regulation. But timing issues are more often mechanical or electronic (e.g., movement needs servicing). If it’s just a quartz watch, try a different high-quality battery and see if it improves.
Wow, this guide was super helpful — I changed my dad’s old Seiko in under 10 minutes. A few things I learned the hard way: use a case holder so the back doesn’t spin, and keep a tiny container for screws (they will roll away!).
Also, the bit about checking the battery with the crown pulled was genius. Saved me from swapping a perfectly good battery. Thanks for the clear pics and tips! 😊
Thanks, Maya — love the tip about the little container for screws. We tried to emphasize the crown trick since a lot of folks assume a dead watch is always a dead battery.
Small complaint: the guide didn’t mention lubricating the gasket if it looks dry. I resealed mine but later noticed the gasket was cracked 😕
Agreed — I used a magnetic parts tray and it saved my sanity. Pro tip: lay down a towel so screws don’t bounce.
Minor nitpick: the resealing step mentions the rubber gasket but doesn’t specify when to replace it. My watch looked fine but gasket was flattened and I ruined its water resistance. Maybe add a ‘when to replace gasket’ checklist?
Also, a dab of silicone grease helps reseal and preserves the gasket. Not mandatory but recommended for water resistance.
Great point, Grace. We’ll add guidance on inspecting gaskets and signs to replace them (cracks, flattening, hardening). Thanks!
No replies needed, just chiming in: watch had water resistance rating and I still did the swap at home. After sealing, I had it pressure-tested at a shop. Recommend that if you care about swimming with it.
I have a Fossil with screws on the back — the tiny screwdrivers in the kit were junk. Any recs for a better set? I stripped two screws before switching to a precision set from Amazon.
Sorry about that experience. We recommend a precision driver set with hardened steel bits (look for S2 or similar). Brands like Wiha or iFixit are reliable if you’re planning to do more at-home repairs.
Thanks — ordered an iFixit mini kit. Fingers crossed 🤞
iFixit kits are solid and come with a magnetic mat. Worth the price.
Quick question — for snap-back cases, is a knife actually safe? Kinda scared to scratch the case.
I’ve used an old credit card before — slid it under the lip and bounced it out without damage. Not as fast as a case knife, but safer imo.
Good call being cautious. We recommend using a proper case opener or a thin plastic pry tool if you’re worried about scratches. If you have to use a blade, work slowly and protect the case with cloth.
This guide was perfect for a complete newbie. Loved the step-by-step photos. Also, the disposal tip — recycle watch batteries at electronics drop-off — important and easy to forget.
FYI: some stores that sell batteries will take old ones too. Saved me an extra trip.
Thanks Priya — glad the photos helped. And yes, local recycling centers usually accept button cells.