
How to Set the Date on an Automatic Watch Like a Pro
Quickly learn the SAFE, correct way to set your automatic watch’s date without damaging the movement. This guide walks you through identifying your watch type, preparing your workspace, and changing date/time like an experienced owner safely, confidently, step by step.
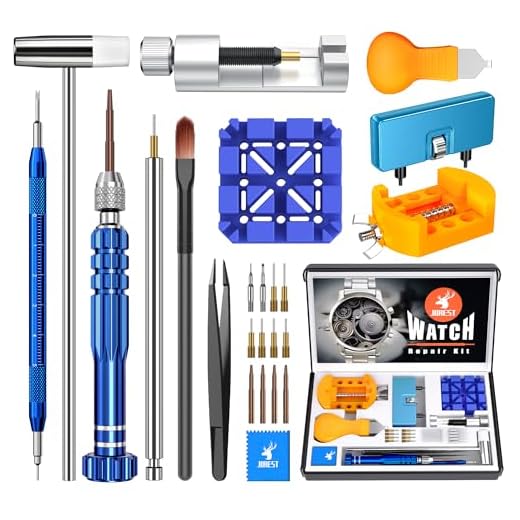
What You Need

Identify Your Watch’s Calendar Mechanism
Not all watches behave the same — don’t guess and risk a costly mistake.Check the manual or the maker’s website first. Look up the movement caliber (often stamped on the case back or in the paperwork) and read its date-change behavior.
Inspect the crown and movement traits. Note these key points:
Determine whether your watch has a quickset date, day-date, or a more complicated calendar; check if the crown screws down, if the movement hacks, and whether backward date changes are allowed.
Prepare the Watch and Workspace
A tidy, padded surface and a calm hand protect your watch more than luck ever will.Lay a soft cloth or watch pad on a stable table. Use a folded microfiber towel or a dedicated watch cushion so the case rests face-up without rocking. Clean your hands and remove jewelry that could snag the watch. Ensure bright, even lighting — a desk lamp or daylight by a window works well.
Remove bracelets or straps if they get in the way of the crown or pushers. For example, take a quick link out or slide the strap back a few links to expose the crown.
If your crown screws down, unscrew it first by turning it gently counterclockwise until it pops to the neutral (position 0). Keep the watch face up and steady while you do this.
Avoid magnetic objects (phones, speakers, magnetic clasps) and strong sunlight that can heat the case. If you prefer gloves, wear lint-free gloves to prevent smudges. These small precautions reduce the chance of slipping, scratching the crystal, or bending the crown stem.

Set the Time First — Determine AM vs PM
Want to avoid the midnight date trap? Set the time first and skip the headache.Pull the crown to the time-setting position (usually position 2). Move the hands forward slowly and watch the date window.
Observe when the date flips: if the date changes as the hands pass 12, you’ve found midnight. Continue rotating the hands to place the correct hour within the AM/PM cycle (for example, if the date flips when you move from 11:30 to 12:05, that passage was midnight — set the hour accordingly).
Set the time before the date because this avoids activating the date-change mechanism during the watch’s “danger zone” and guarantees the date will flip at true midnight, not at noon. Typical dangerous hours span roughly 8:00 PM to 4:00 AM, but check your movement’s manual.
If your movement hacks (stop-seconds), use that feature to halt the seconds hand for precise synchronization with a time signal. After synchronizing seconds, advance the hands to the correct hour within the AM/PM cycle before changing the date.
Change the Date Safely
Changing the date wrong can be expensive — here’s the safe, step-by-step method.Identify the “danger zone” when the date-change gearing is engaged (commonly ~8:00 PM to 4:00 AM; check your manual).
Avoid using the quickset during this window—forcing it can chip teeth or bend levers.
Move the hands to a safe time (for example, 6:00 AM), pull the crown to the date-setting position, and advance the date using quickset—turn forward only unless documented otherwise.
Advance watches without quickset by rotating the hands forward through full 24-hour cycles until the desired date appears; do not attempt to back-rotate the date.
Advance past month-end (e.g., go from 31 to 1 by moving forward) instead of forcing the mechanism.
Cycle the hands forward to confirm the date flips at midnight and that AM/PM is correct.
Stop and consult a watchmaker if anything feels stiff or uncertain.
Secure Everything and Check Functionality
Seal it, wind it, and test it — your watch should feel as confident as you do now.Push the crown back to its neutral position. If your watch has a screw-down crown, screw it clockwise while pressing gently until it seats—do a few firm turns until it feels snug (don’t over-tighten). For example, many dive watches need several clockwise turns to restore water resistance.
Give the movement power if it stopped: with the crown fully in, wind smoothly 20–40 turns until you feel slight resistance, or perform a short rotor shake (10–20 gentle wrist rolls) to engage the automatic rotor.
Reconfirm the calendar and timing. Perform these quick checks within 24 hours:
Stop and take the watch to a qualified service center for complex calendars, persistent resistance, or odd behavior; schedule regular servicing to keep the calendar reliable.
You’re Done — Wear It with Confidence
With these steps you can set the date safely and keep your automatic watch running smoothly; when in doubt consult your manual or a professional watchmaker. Give it a try, share your results, and wear your watch with confidence today!
Pretty good overall, but I wish there were more pictures of crown positions (pulled out half vs full). Words are fine, but a quick diagram would save time.
Also: you might want to mention what to do if the date wheel skips more than one day when changing — is that a user error or a mechanical issue?
Thanks for the suggestion, Marcus — great point. If the date wheel skips multiple days, it can indicate a weak date jumper or worn teeth. First, check you’re not in the danger zone (around 9pm–3am); if it persists, a watchmaker should inspect it.
Photos would help me not press the crown like I’m defusing a bomb. 😅
Loved the step-by-step vibe — felt like someone holding my hand without being patronizing. Also, lol at the “You’re Done — Wear It with Confidence” part. Confidence = 100% until you bump it on a doorframe.
Quick story: I reset my date and then realized I’d forgotten to secure the crown properly. Water splashed on it during washing and my heart stopped for a second. Pro tip: double-check crown is screwed in for screw-down types!
Also, is it OK to change the date at say 4:30 AM if I know it’s AM? I live a weird shift schedule 😅
Great anecdote — thanks for sharing. Yes, if you’re certain it’s AM/PM correctly set, changing the date at 4:30 AM is fine as long as it’s not within the manufacturer-specified danger zone. And absolutely, always screw the crown in on screw-down crowns before any water contact.
If your watch has a 24-hour indicator or GMT hand, it makes AM/PM identification easier — worth checking.
4:30 AM should be fine as Olivia said. Just avoid the typical danger window around late evening to early morning where the mechanism engages to flip the date.
Haha the doorframe strike is the true final boss. Also — can relate to the crown panic!
Fantastic guide — clear and simple.
I especially appreciated the bit about determining AM vs PM before changing the date. I once jumped the date at midnight and ended up setting it wrong for a week 😅
Step 2 (prepare the watch and workspace) is underrated — a clean, well-lit space makes the whole thing less nerve-wracking.
One question: for watches with a quickset date, is there any real risk to turning the crown backward if I’m trying to avoid the danger zone?
Thanks for writing this, I feel confident to try it on my Seiko this weekend.
Same here — lost a spring once and learned my lesson 😂
Glad it helped, Emily! For most quickset mechanisms, turning the crown backward isn’t recommended — it can stress older gears. If you’re unsure, advance the time forward past midnight and then set the date the safe way.
Agreed on the workspace tip. I use a microfiber cloth and a tray to keep screws and pins from disappearing into the abyss.
Quick technical question: for watches with a perpetual calendar vs simple date, do you recommend the exact same procedure? I have an older mechanical with a bit of a complex calendar and don’t want to mess it up.
Also, any tips for watches that haven’t been worn in months and the date+time are way off — is there a preferred order to set time, date, and maybe moonphase if present?
Good questions, Noah. For perpetual calendars and complex complications, follow the manufacturer’s manual — many recommend avoiding manual date adjustments during certain hours. General safe order: set the time first (ensure AM/PM), then change the date, then adjust other complications like moonphase. If a watch has been stopped for months, wind it gently and set time forward rather than backward when possible.
If in doubt, take complex pieces to a watchmaker. Better than trying every trick and risking damage.
Thanks — that cleared up my confusion about setting my friend’s vintage calendar watch. I’ll be careful!
One more tip: avoid changing multiple calendar fields at once (like date + month) — do them sequentially to reduce strain on the movement.
Moonphase adjustments always feel fancy. I usually do that last and google the current moon phase first 😂
Short and sweet — exactly what I needed. Followed steps 1–5 and my watch looks and feels right now.
One tiny nit: maybe bold the safety hours? I almost missed that on first read.
Otherwise great job, loved the practical tone 🙂
Agreed, a bold or highlighted danger window would save people from accidental damage.
Thanks Sophie — good call on emphasizing the safety window. We’ll make that clearer in the next revision.