
Quick Fix: Replace Your Leather Watch Strap in 6 Easy Steps
A concise, step-by-step guide to swapping a leather watch strap at home. No fancy tools — just patience and a steady hand. OVER 80% of watches use simple spring bars, so this method works for most wristwatches. Let’s begin right now.
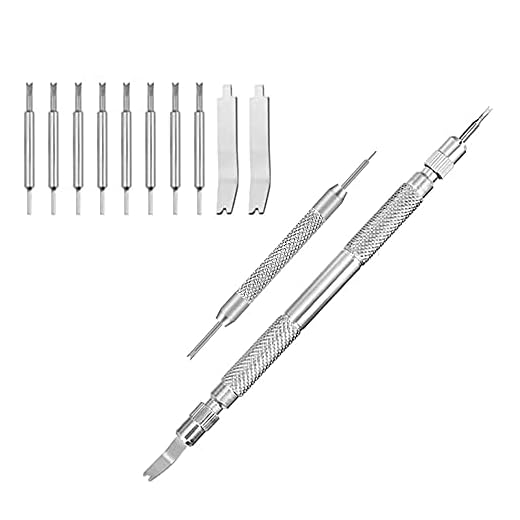
What You’ll Need

Step 1: Identify Your Watch Type and Lug Width
One millimeter can ruin the look — measure precisely before you buy.Identify whether your watch uses fixed bars, spring bars, or quick-release bars. Look for a tiny lever on the strap (quick-release), holes through the lugs (drilled), or solid bars that won’t move (fixed).
Measure the lug width in millimeters without tools: lay a ruler across the gap between the lugs, or measure the existing strap where it meets the case (common sizes: 18, 20, 22 mm).
Note these details and record them:

Step 2: Choose the Right Leather Strap
Think leather is leather? Choose material and build that actually wears well.Pick a strap that matches your lug width, buckle size, and lifestyle. For example, choose smooth calfskin for a dress watch or full-grain for a rugged daily wearer; full-grain lasts longest, calfskin is most versatile.
Select from these key considerations:
Confirm strap length suits your wrist size and that the buckle type complements your watch.

Step 3: Gather Tools and Prep Your Workspace
A tidy surface and the right tools make a ten-minute job painless.Set up on a soft, flat surface to avoid scratches — use a microfiber cloth or a watchmaker’s mat. Lay out tools so everything is visible and reachable.
Ensure bright, steady lighting and sit in a comfortable chair. Read the new strap’s instructions if supplied, and keep your phone camera ready to record steps for reference — this helps if a spring bar slips. Have spare spring bars and a toothpick on hand; they often save time when a tiny part goes walkabout.

Step 4: Remove the Old Strap Safely
Want to avoid scratches and lost pins? This careful move saves repairs.Flip the watch face-down on the cloth. Position the lug holes toward you so you can see where the spring bars sit.
Use the forked end of the spring bar tool to push the spring bar inward from the lug hole, then gently lever the bar out of the lug. Work from one side first, then the other. Compress slowly—do not force it.
Work carefully to avoid the spring bar snapping free; if it does, catch it with tweezers. I once had a bar ping across the room—use a tray or tape to keep parts from vanishing.
Depress the small lever on quick-release straps and slide the strap out.
Replace any stiff or corroded spring bars now to avoid installation problems, and keep all parts organized for reassembly.
Step 5: Install the New Leather Strap
Install correctly — it’s easier than you think and instantly upgrades your watch.Thread or place the spring bar into the new strap’s end piece. Seat one end into the lug hole, compress the opposite end with the spring-bar tool, align it with the lug, then release gently until both ends click into place.
Bend stiff new straps slightly to help them conform—rub between your palms or hold near warm (not hot) water for a few seconds to soften leather if needed. Align the strap so the buckle sits on the top edge of the watch and the stitched or finished side faces outward.
Check the following before finishing:
Step 6: Final Checks and Care Tips
Simple habits now will double the life of your leather strap.Inspect the fit and alignment. Verify both spring bars are fully seated by gently pressing each end; you should hear or feel a small click.
Test wear by flexing the strap with your thumbs and then putting the watch on for 10 minutes to confirm comfort and clearance. Clean fingerprints with a soft microfiber cloth and let the leather settle for a day before heavy use.

Done — Enjoy Your Refreshed Watch
Replacing a leather strap is a quick, rewarding DIY that refreshes your watch; if a task feels risky (vintage case or unusual connectors), consult a watchmaker. Practice builds speed and confidence — try it, enjoy the result, and share photos today.
Friendly warning: if your watch is water-resistant and you replace the strap, that doesn’t mean the watch is still as water-resistant afterward. The guide touched on this, but it’s worth repeating.
I briefly thought changing straps would be a good time to swim — nope.
Check seals and avoid submerging after any DIY maintenance unless you know the caseback and gaskets are intact.
Absolutely — strap changes shouldn’t be an excuse to test water resistance. If you suspect the gasket was disturbed, consider a pressure test by a pro.
Good reminder. I sent my watch for a pressure test after a strap change once — better safe than sorry.
Short and sweet: Step 2 helped me pick a strap that actually matches my watch face. I was surprised how much texture and stitching affect the overall look.
Also, the guide’s pic of the lug width tape trick = genius. Saved me from measuring like an archaeologist.
Glad the styling tips were useful, Ava. Texture and stitching can change the vibe from formal to casual — it’s an easy way to refresh a watch.
Yeah, stitching color can make or break it. I went with contrast stitching on mine and it looks way more modern.
I tried the guide but got stuck on aligning the new strap’s spring bar with the lug hole — my hands are clumsy lol.
Anyone got a trick for holding the bar steady while you compress it? I ended up using a small bit of blu-tack to steady it against the lug once.
I use a bench block or a small empty matchbox to prop the strap at an angle so it’s easier to slide the bar in. Less wobble.
Also try using your thumb to hold one end in place while you compress the other — feels oddly satisfying when it clicks in.
Blu-tack is a clever workaround. Another trick: rest the watch on a folded towel and use the fine fork end of the spring bar tool to compress, then slide the end into the hole. Patience is key.
Totally loved Step 3 — gathering tools saved me a headache. I didn’t realize a spring bar tool is different from a tiny screwdriver.
Question: are quick-release straps really safe? I got one, but it feels kinda flimsy compared to the spring bars.
I use quick-release on my cheap daily beater and standard spring bars on my fancy pieces. Balance convenience vs risk.
Quick-release straps are convenient and generally safe for everyday wear, but they can feel less secure than traditional spring bars on heavier watches. For valuable watches, many prefer standard spring bars for peace of mind.
Okay, confession: I accidentally bent a spring bar while trying Step 4 and then the strap popped off mid-flap while I was biking 😂
Lesson: have spare spring bars and open/close pliers on hand. Also, if your watch has tight lug holes, use a thinner fork end on the tool.
Anyone else had a strap escape during a commute?
Yikes — glad it didn’t get lost, Oliver! Carrying spares is smart. Some people also take a photo of how the original spring bar sits before removing it — makes reassembly easier.
Pro tip: if the lug holes are tight, slightly compressing the spring bar with pliers (gently) can help. But be careful not to scratch the bar.
Yep! Lost mine once at a bike rack. Now I keep a little pouch with spares in my bag. Saved me twice.
A couple of constructive notes: the guide was lovely, but I would’ve liked a quick photo or note about lugs with no holes (hidden spring bars). Took me a while to figure those out.
Also, consider adding a short section on pairing strap width to watch case size — some examples would help newbies.
Good call. Closed lugs can be trickier; sometimes you need a thinner tool or to compress the bar from inside the lug. Pics would make that way clearer.
Thanks, Emma — excellent suggestions. We’ll add a note about closed lugs/hidden spring bars and include pairing examples in the next revision.
This guide saved me money — took me 30 mins and $12 for a leather strap instead of a full service. A few random thoughts:
1) If your watch has decorative screws, don’t force anything.
2) Keep the tiny spring bars in a pill box so they don’t roll away.
3) The final care tips are gold — especially the not-submerging bit.
Also, watch out for cheap straps with awful edges. Some smell like glue for weeks 😝
Also, if a strap smells bad, airing it out and a gentle wipe with a damp cloth sometimes helps. And never use strong solvents.
Totally agree about the smell. I learned to order from reputable sellers or ask for photos of stitch quality before buying.
Glad it helped, Lucas. Cheap straps can be disappointing — worthwhile to invest a bit more for better leather and construction.
Pill box idea = brilliant. Mine used to vanish into the vacuum of my workshop drawers.
Loved the Final Checks and Care Tips section — so many tiny details I would’ve missed.
– I usually oil the buckle spring a bit
– avoid soaking leather straps
– keep the watch out of direct sunlight when storing
This guide should come with a little checklist printable imo.
Be careful with oils though — too much can darken some leathers. Test on an inconspicuous spot first.
Agreed — printable checklist would be awesome. I taped mine into my toolbox after I did the swap.
Also: rotate straps if you wear the watch every day. Leather breathes better and lasts longer that way.
Thanks, Sofia — great checklist ideas. We might add a printable checklist in a future update. Oiling the buckle spring is a neat tip that many skip.
Nice guide — super straightforward. I followed the steps last weekend and swapped a brown strap for a black one in about 20 minutes.
Thing I learned: measure lug width twice. I almost bought 20mm instead of 18mm and that would’ve been embarrassing 😅
Also, pro tip: use a bit of masking tape on the lugs to avoid scratches when removing the old strap.
If it’s new leather, wear it a bit or bend it gently while conditioning with a tiny amount of leather balm. Helps break it in faster.
Great tip about the masking tape, Liam — glad it went smoothly! Measuring twice is always smart. Which type of leather did you pick for the new strap?
Nice! I did the same and still ended up with slightly stiff edges on my new strap. Any tips on softening it up?